How to Install Laminate Flooring to Maximize Durability and Lifespan
Learn how to install laminate flooring focusing on subfloor prep, moisture barriers, and expansion gaps to maximize lifespan and prevent premature failure.
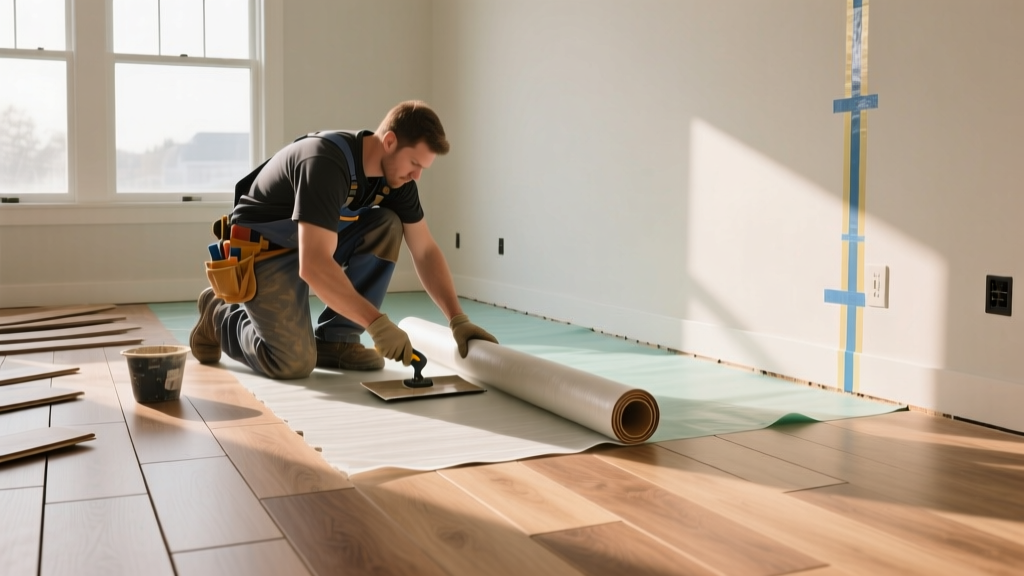
The Physics of Laminate: Why Installation Dictates Lifespan
Laminate flooring typically carries a 15- to 25-year residential warranty, but industry data shows that over 60% of premature failures are traced directly to improper subfloor preparation and inadequate expansion gaps. Laminate is constructed with a High-Density Fiberboard (HDF) core that is inherently hygroscopic. It absorbs and releases moisture in response to ambient relative humidity (RH). When you learn how to install laminate flooring correctly, you are essentially engineering a floating system that accommodates this dimensional movement without compromising the mechanical locking joints.
A flawlessly installed AC4-rated laminate in a climate-controlled environment can easily exceed 25 years of service. Conversely, ignoring subfloor moisture limits or pinning the floor to the baseboards can cause catastrophic peaking, joint failure, and edge swelling within the first 18 months. This guide details the exact installation protocols required to maximize the structural lifespan of your laminate floor.
Phase 1: Subfloor Moisture and Acclimation Protocols
The single greatest threat to laminate longevity is moisture intrusion from the subfloor. The HDF core will swell irreversibly if its moisture content exceeds 12%. Before unboxing a single plank, you must verify the subfloor's moisture levels using a calibrated pin-type or pinless moisture meter.
Acclimation Specifications
Laminate must acclimate to the interior environment where it will be installed. The North American Laminate Flooring Association (NALFA) mandates the following conditions:
- Duration: Minimum 48 to 72 hours prior to installation.
- Temperature: Maintain room temperature between 65°F and 80°F (18°C - 27°C).
- Humidity: Maintain relative humidity (RH) between 35% and 65%.
- Storage: Lay boxes flat on the floor, spaced at least 4 inches from walls to allow air circulation. Never stack boxes higher than three units.
Phase 2: Underlayment and Vapor Retarder Selection
The underlayment serves three critical functions: it bridges minor subfloor imperfections, provides acoustic dampening, and (when specified) acts as a vapor retarder. Selecting the wrong underlayment or doubling up on layers will create a spongy subfloor, leading to excessive vertical deflection that snaps the fragile tongue-and-groove locking mechanisms over time.
| Subfloor Type | Maximum Moisture Limit | Required Vapor Retarder | Underlayment Thickness |
|---|---|---|---|
| Concrete (Below/Above Grade) | < 3% CM or < 75% RH (ASTM F2170) | 6-mil Polyethylene film (overlapped 8") | 2mm - 3mm closed-cell foam |
| Plywood / OSB (Wood Frame) | < 12% MC (Pin-meter reading) | None (Wood must breathe) | 2mm - 3mm standard foam |
| Existing Hardwood / Vinyl | No active moisture issues | None | 1mm - 2mm acoustic pad |
| Radiant Heated Concrete | < 1.5% CM | Thermal-rated vapor barrier | Max 3mm (low thermal resistance) |
For deep technical guidance on managing vapor drive in flooring assemblies, the Building Science Corporation provides comprehensive builders' guides detailing how interior vapor pressures interact with floor coverings across different climate zones.
Phase 3: Precision Laying and Expansion Gap Engineering
The most common DIY error when figuring out how to install laminate flooring is failing to maintain a consistent expansion gap. Laminate expands and contracts primarily across the width of the plank (the short side). If the floor touches the wall, door jamb, or plumbing pipe, the compressive stress will force the planks upward, resulting in "peaking" at the seams.
Maintaining the Perimeter Gap
- Calculate the Gap: Leave a minimum 3/8-inch (10mm) to 1/2-inch (12mm) gap around the entire perimeter. For rooms exceeding 30 feet in length or width, increase the gap to 5/8-inch or install a T-molding transition to break the span.
- Use Physical Spacers: Never rely on visual estimation. Place 10mm wedge spacers against the wall every 24 inches as you lay the first three rows. Remove them only after the floor is fully locked and heavy enough to resist shifting.
- Undercut Door Jambs: Use an oscillating multi-tool with a scrap piece of laminate and underlayment as a depth guide to undercut all door casings. The flooring must slide underneath the casing, maintaining the hidden expansion gap.
Staggering Patterns and Joint Integrity
Proper staggering distributes the structural load across the floating floor, preventing "H-joints" (where end joints align in adjacent rows) that create weak points and visible fault lines.
- Minimum Stagger: End joints must be staggered by a minimum of 12 inches (300mm) for standard planks, or 6 inches for narrow planks (less than 5 inches wide).
- Randomization: Cut the first plank of row two to 2/3 of its length, and the first plank of row three to 1/3 of its length. This creates a natural, randomized stagger pattern that prevents repetitive visual anomalies and structural weak points.
- Locking Engagement: Use a tapping block and a rubber mallet to ensure the short-side and long-side joints are fully engaged. Never strike the locking mechanism directly with a metal hammer, as this will crush the HDF tongue, leading to joint failure within months.
Installation Failure Matrix: Symptoms, Causes, and Lifespan Impact
Understanding how installation errors manifest over time allows you to proactively avoid them during the laying process. The table below maps common laminate failures to their specific installation root causes.
| Visual Symptom | Root Installation Cause | Lifespan Impact |
|---|---|---|
| Peaking (V-shaped ridges at seams) | Insufficient perimeter expansion gap; floor pinned by baseboards or heavy cabinetry. | Reduces lifespan to < 3 years. Locking mechanisms will eventually snap under continuous compressive stress. |
| Edge Swelling (Raised, fuzzy edges) | Missing 6-mil vapor barrier over concrete; wet-mopping during maintenance; spills left uncleaned. | Irreversible core damage. Planks must be replaced. Overall floor lifespan compromised immediately. |
| Gapping (Visible spaces between planks) | Installation in low-humidity winter months without humidification; debris in the locking groove. | Allows moisture and dirt to penetrate the HDF core, accelerating degradation and joint loosening. |
| Squeaking / Sponginess | Subfloor deflection exceeds 3/16" over 10 feet; doubled-up underlayment creating vertical bounce. | Causes micro-fractures in the click-lock joints. Floor will physically separate within 2-5 years. |
Heavy Loads and Cabinetry: The Floating Floor Rule
A critical, often overlooked aspect of how to install laminate flooring for long-term durability is managing dead loads. A floating floor must "float." If you install kitchen cabinets, a heavy kitchen island, or a piano directly on top of the laminate, you pin the floor to the subfloor. When the surrounding laminate attempts to expand during high-humidity summer months, it is restricted by the pinned section, resulting in severe peaking and buckling around the heavy objects.
The Solution: Always install laminate around permanent cabinetry. If the floor is already laid, or if you are dealing with a pre-fabricated island, use a 3/4-inch plywood sub-structure under the heavy cabinetry, and install the laminate up to the plywood base, leaving the required expansion gap covered by quarter-round or shoe molding. For appliances like refrigerators and stoves, use specialized appliance glides to distribute the point-load and allow the floor to slide microscopically beneath the feet.
Final Verification and Transition Moldings
Before installing baseboards, conduct a final perimeter sweep. Ensure no stray nails, drywall screws, or debris are bridging the expansion gap. Install baseboards directly to the wall studs, resting them gently on top of the laminate without compressing it. For spans exceeding 30 feet, or transitions into carpet, tile, or adjacent rooms, install T-moldings. These moldings act as physical breaks in the floating system, resetting the expansion calculation and ensuring that seasonal dimensional changes do not compound across massive square footage, thereby securing the floor's structural integrity for decades.