Cob Material Construction: A Practical Maintenance and Cleaning Playbook
Master the maintenance of cob material construction with expert cleaning protocols, structural patching ratios, and breathable finish applications.
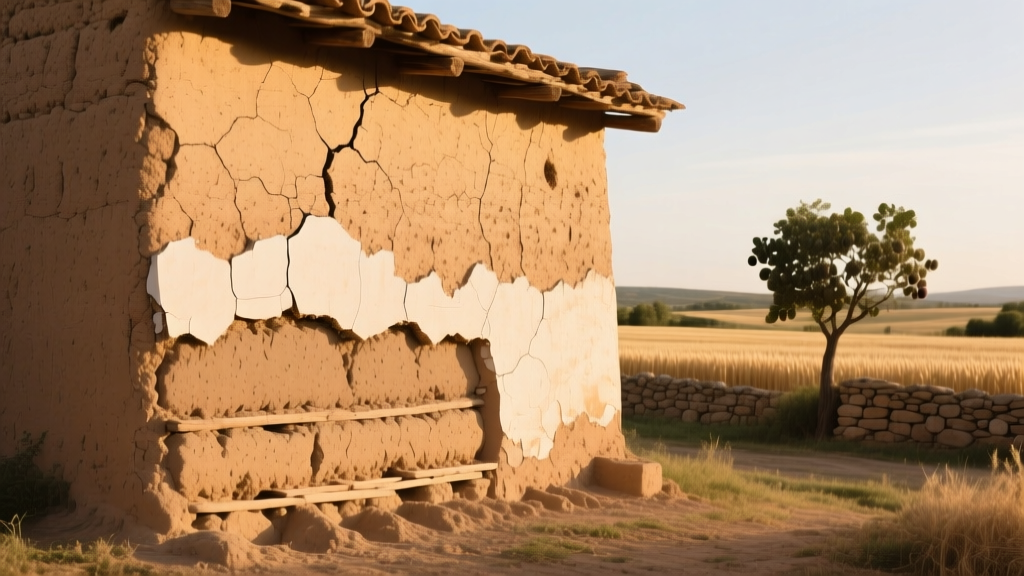
The Physics of Cob: Why Standard Maintenance Fails
Cob material construction represents a fundamentally different approach to building physics compared to modern fired masonry or concrete. Unlike Portland cement-based systems that rely on chemical hydration and rigid impermeability, cob walls function as a breathable, monolithic mass that regulates indoor humidity through vapor transmission. Applying standard masonry maintenance techniques—such as acrylic sealers, elastomeric paints, or cement-based patching compounds—will trap moisture inside the earthen matrix. This trapped moisture inevitably leads to internal erosion, freeze-thaw spalling, and catastrophic structural failure. Proper maintenance of cob requires a paradigm shift from 'sealing and protecting' to 'managing and breathing'.
According to Historic England's technical guidance on earth walls, the longevity of earthen structures relies entirely on the 'boots and hat' principle: keeping the base dry via a high stem wall and protecting the top with generous roof overhangs. When these primary defenses are maintained, the routine cleaning and cosmetic upkeep of the cob itself becomes a straightforward, low-impact process.
The Cob Wall Diagnostic Matrix
Before initiating any cleaning or repair, you must accurately diagnose the wall's current condition. Misinterpreting a symptom often leads to destructive treatments. Use this diagnostic matrix to identify the root cause of common cob wall anomalies.
| Symptom | Root Cause | Corrective Action |
|---|---|---|
| Surface chalking or powdering | UV degradation of natural binders or minor wind erosion. | Apply a fresh coat of breathable limewash or an alis (clay paint) slurry. |
| Deep vertical cracking (>3mm) | Foundation differential settlement or roof load shifting. | Structural assessment required. Undercut and pack with structural cob loaves; do not just surface-fill. |
| White efflorescence deposits | Soluble salts drawn to the surface by trapped internal moisture. | Dry brush removal. Identify and eliminate the moisture ingress source. Never apply a sealer. |
| Soft, spongy patches near the base | Capillary rise from a failing or absent damp-proof course (DPC) on the stem wall. | Excavate exterior splash zones. If severe, install a French drain to lower the water table away from the stem wall. |
| Localized dark staining | Organic growth (algae/mold) due to shaded, poorly ventilated areas. | Clean with a diluted hydrogen peroxide solution (3%). Improve cross-ventilation and trim back vegetation. |
Routine Cleaning Protocols
Cob walls are inherently soft. Aggressive cleaning methods will scour away the clay binder, leaving only loose sand and straw. The goal of cleaning is to remove surface dirt without disturbing the structural matrix.
Approved Tools and Cleaners
- Brushes: Use only natural Tampico fiber brushes or soft horsehair detailing brushes. Avoid stiff nylon or wire bristles entirely.
- Sponges: Natural sea sponges or high-cellulose sponges that hold water without dripping excessively.
- Cleaning Agents: A pH-neutral castile soap (such as Dr. Bronner's) diluted at a ratio of 1:40 with distilled water. For heavy grease or soot near woodstoves, use a mild solution of washing soda (sodium carbonate), but never Trisodium Phosphate (TSP) or bleach, which chemically break down clay platelets.
The Three-Step Cleaning Method
- Dry Dusting: Always begin by lightly sweeping the wall with a dry Tampico brush to remove loose cobwebs and particulate dust. Wetting a dusty wall creates mud stains that are difficult to extract.
- Misting and Agitation: Lightly mist a 3x3 foot section with your soap solution using a fine-nozzle spray bottle. Do not soak the wall. Gently agitate the surface in circular motions with a dampened natural sponge.
- Extraction: Immediately wipe the area with a clean, wrung-out cellulose sponge to lift the suspended dirt. Rinse the sponge frequently in a bucket of clean water.
Crack Repair and Patching Playbook
Cracking is a natural characteristic of earthen buildings as they undergo seasonal hygroscopic expansion and contraction. The repair strategy depends entirely on the width and depth of the fissure.
Hairline Cracks (Under 2mm)
These are purely cosmetic and result from rapid surface drying. Repair them using a clay slip slurry. Mix 1 part fine-screened clay soil with 2 parts water until it reaches the consistency of heavy cream. Paint the slurry over the crack using a wide masonry brush, feathering the edges into the surrounding wall. Allow to dry slowly; misting lightly over 48 hours prevents the patch from curling.
Medium Fissures (2mm to 15mm)
These require a physical cob patch. As detailed in BuildingGreen's primer on earthen wall systems, the patch material must match the original wall's vapor permeability and thermal mass.
- The Mix Ratio: 1 part clay-rich subsoil, 2.5 parts sharp, angular washed sand (never use rounded masonry sand, which lacks locking friction), and 1 part chopped barley straw.
- Straw Prep: Chop straw into 2-inch to 4-inch lengths. Never use hay, as the seeds will germinate inside the wall when exposed to moisture.
- Application: Undercut the edges of the crack with a cold chisel to create a dovetail profile. Score the interior of the crack with a wire scarifier. Mist the cavity heavily with water, then forcefully press the cob mixture into the void, ensuring no air pockets remain. Strike the patch flush with a wooden float once it becomes leather-hard.
⚠️ Critical Warning: The Acrylic Sealer Trap
Applying an acrylic, polyurethane, or siloxane water-repellent sealer to cob material construction is a fatal error. While it may temporarily shed rain, it completely halts the wall's ability to expel internal vapor. Within 12 to 18 months, the trapped moisture will cause the cob to revert to its plastic state behind the sealer, leading to massive structural slumping and the peeling of the sealer film. Always rely on physical geometry (overhangs) and breathable mineral coatings for moisture management.
Breathable Finishes: Limewash and Earthen Plasters
When a cob wall requires a full aesthetic refresh, the finish must allow vapor transmission while providing a sacrificial weathering layer. Limewash is the industry standard for exterior and high-moisture interior cob walls.
Formulating a Durable Limewash
A standard limewash is a suspension of Type S hydrated lime (calcium hydroxide) in water. The standard volumetric ratio is 1 part lime to 2.5 parts water. However, to increase adhesion and reduce the number of coats required on porous cob, incorporate a natural protein binder.
- Add 1 tablespoon of casein powder (milk protein) or 1 cup of prickly pear cactus juice (mucilage) per gallon of limewash.
- Allow the mixture to slake (rest) for a minimum of 24 hours before application. This ensures the lime particles are fully hydrated, preventing burn spots on the wall.
- Apply in three thin coats. Limewash cures through carbonation—absorbing CO2 from the air to revert to calcium carbonate. It must be applied in temperatures between 50°F and 85°F, and misted with water between coats to slow the drying process and ensure deep carbonation.
Seasonal Maintenance Calendar
Proactive maintenance prevents minor issues from escalating into structural emergencies. Adapt this calendar to your local climate zone.
| Season | Primary Focus | Specific Action Items |
|---|---|---|
| Spring | Moisture & Drainage | Clear all debris from roof gutters and downspouts. Inspect the stem wall for soil buildup; maintain a strict 6-inch clearance between the top of the soil/mulch and the base of the cob wall. Check for frost-heave cracking at the stem-wall junction. |
| Summer | Coatings & Vegetation | Apply limewash or alis paints (the warm, dry weather is ideal for carbonation). Trim back all landscaping to maintain a minimum 18-inch air gap between vegetation and the cob surface to prevent splash-back and localized humidity trapping. |
| Fall | Weatherproofing Prep | Inspect roof overhangs, flashing, and window sills. Ensure all drip edges are functioning and projecting at least 1 inch away from the wall face. Re-caulk window frames using a breathable, linseed-oil-based putty, not silicone. |
| Winter | Monitoring | Visually inspect walls during heavy rain or snowmelt. Look for water tracking down the face of the wall, which indicates a failed roof flashing or clogged gutter above. Do not attempt repairs while the wall is saturated or freezing. |
By adhering to these specific material ratios, diagnostic frameworks, and seasonal protocols, you ensure that your cob material construction remains structurally sound, thermally efficient, and aesthetically vibrant for generations. Earthen buildings do not fail from age; they fail from neglect and the misapplication of modern, impermeable materials.