Installing a Heavy Marble Dining Table: Slab Guide
Master the installation of heavy solid-slab marble dining tables. Covers floor load assessments, base anchoring, rigging, and stone sealing protocols.
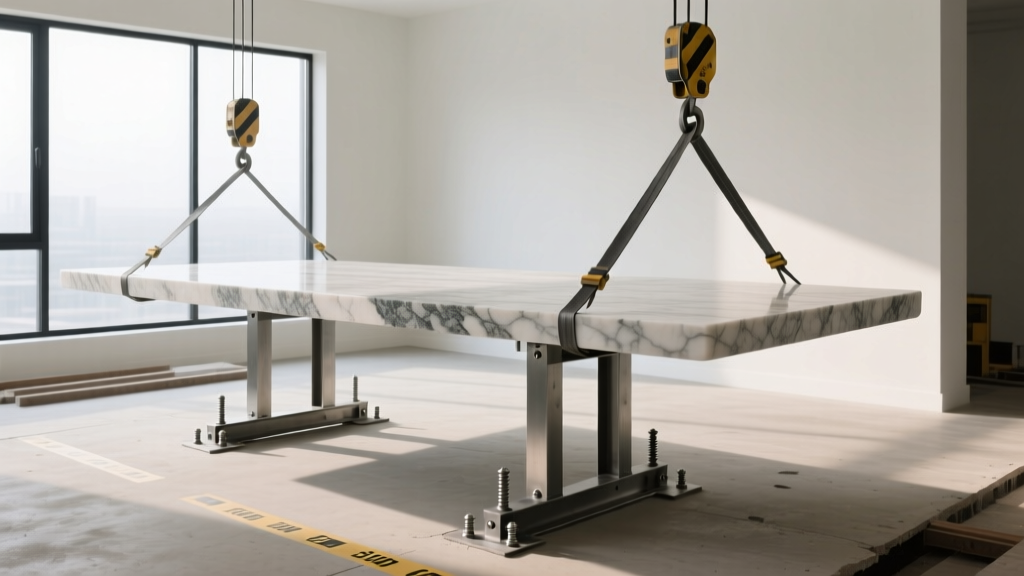
Pre-Installation Structural and Load Assessments
Installing a solid-slab marble dining table is fundamentally an architectural procedure, not standard furniture assembly. Natural stone introduces massive concentrated dead loads to residential flooring systems. Before uncrating the stone, you must verify the structural integrity of the installation site.
A standard 3cm (1 1/4-inch) thick marble slab weighs approximately 19 pounds per square foot. For a typical 42-inch by 84-inch (3.5 x 7 feet) dining table, the surface area is 24.5 square feet, resulting in a stone weight of roughly 465 pounds. When combined with a heavy welded steel or solid wood base (often 100 to 200 pounds), the total concentrated point load easily exceeds 650 pounds.
Standard residential floor joists (e.g., 2x10 lumber at 16 inches on center) are engineered for a 40 PSF uniform live load, but they handle concentrated point loads differently. If the table is being installed on a second-story wood-framed floor, a cantilevered balcony, or over a basement stairwell, consult a structural engineer. According to the Natural Stone Institute (NSI) Technical Bulletins, point loads exceeding 500 pounds on engineered wood I-joists may require localized blocking or sistering of the joists directly beneath the table's footprint to prevent long-term deflection and floor squeaking.
Base Fabrication and Tolerance Leveling
Marble possesses high compressive strength but exceptionally low flexural strength. If the supporting base is uneven, the slab will act as a lever and crack under its own weight. The industry standard for stone support tolerance is strict: the base must be level within 1/16th of an inch over a 10-foot span.
Shimming and Support Protocols
- Laser Leveling: Use a Class 2 cross-line laser level (such as the Bosch GLM 50 C) to map the top flange of the table base. Do not rely on standard bubble levels for a surface this large.
- Shim Materials: If the floor is uneven, shim the base legs using high-density composite shims or lead sheets. Never use wood shims. Wood compresses over time under heavy point loads, creating voids that lead to catastrophic slab failure.
- Continuous Support: For tables exceeding 8 feet in length, the base must feature a central cross-brace or a continuous perimeter frame. Unsupported spans for 3cm marble should never exceed 36 inches.
Never rest raw marble directly on bare steel or aluminum. Micro-vibrations from daily use will grind the metal into the stone, causing permanent scratching and structural weakening. Always apply a continuous 1/4-inch bead of clear structural silicone (such as Dow Corning 795 or Akemi Stone Glue) to the top flange of the base before setting the slab. This acts as an acoustic dampener, an abrasion barrier, and a flexible adhesive that accommodates micro-thermal expansion.
Slab Rigging and Placement Protocol
Manual gripping of a 500-pound slab is a severe safety hazard and risks edge chipping. Professional stone rigging requires specialized vacuum equipment and a coordinated crew.
- Equipment Selection: Utilize a 4-lifter spreader bar equipped with Woods Powr-Grip N4000 vacuum lifters, which are rated for 120 pounds each (totaling a 480-pound safe working load). For heavier slabs, upgrade to the N6000 series.
- Surface Preparation: Ensure the marble surface is completely free of fabrication dust. Vacuum cups will fail if they engage with microscopic stone dust, leading to a dropped slab.
- The 3-Person Lift: Assign one person to operate the overhead hoist or guide the spreader bar, and two people on the flanks to stabilize the slab and guide it onto the base.
- Setting the Stone: Lower the slab at a rate of no more than 1 inch per second. Once the stone contacts the silicone bead on the base, do not slide it. If the alignment is off by more than 1/8th of an inch, lift the slab completely and reposition. Sliding 500 pounds of stone across steel will sheer the silicone bond and scratch the polished finish.
Marble Thickness, Weight, and Span Specifications
Selecting the correct slab thickness dictates both the required base engineering and the rigging equipment. The table below outlines standard specifications for dining table applications.
| Slab Thickness | Weight per Sq. Ft. | Max Unsupported Span | Recommended Base Type |
|---|---|---|---|
| 2cm (3/4 inch) | 12.5 lbs | 24 inches | Full plywood sub-top with perimeter steel frame |
| 3cm (1 1/4 inch) | 19.0 lbs | 36 inches | Welded steel perimeter frame with central cross-brace |
| 4cm (1 1/2 inch) | 25.0 lbs | 48 inches | Heavy-gauge steel pedestal or dual trestle legs |
Post-Installation Sealing and Curing
Marble is primarily composed of calcium carbonate, making it highly reactive to acidic substances. Wine, citrus juice, and vinegar will etch the surface (dissolving the top layer of polish) within seconds if the stone is unprotected. Proper sealing is a non-negotiable final step in the installation process.
According to the Natural Stone Institute Consumer Care Guidelines, impregnating sealers are the only appropriate chemical treatment for dining surfaces. Avoid topical sealers (like polyurethane or acrylic waxes), which trap moisture, create a plastic-like film, and alter the natural tactile feel of the stone.
Step-by-Step Sealing Procedure
- Clean: Wipe the slab with a pH-neutral stone cleaner (e.g., Tenax Daily Clean) and allow it to dry completely for 4 hours.
- Apply Impregnator: Use a high-quality penetrating sealer like Tenax Ager or Miracle Sealants 511 Impregnator. Apply generously using a low-lint microfiber cloth, working in 3-foot sections.
- Dwell Time: Allow the sealer to penetrate for 15 to 20 minutes. Do not let it dry on the surface.
- Buff and Repeat: Buff off any excess residue with a clean, dry cloth. Wait 2 hours, then apply a second coat.
- Cure: Enforce a strict 72-hour curing period before placing any dining ware, placemats, or decorative objects on the table.
Troubleshooting Common Installation Failures
Even with meticulous planning, installation anomalies can occur. Here is how to diagnose and resolve the most frequent issues encountered with heavy marble dining tables.
Table Wobble or Rocking
Cause: Uneven flooring combined with rigid base legs.
Fix: Never attempt to fix a wobble by sliding shims between the stone and the base. This creates a point-load that will crack the marble. Instead, install adjustable leveling feet (M12 or M16 threaded glides) on the bottom of the base legs and adjust them to match the floor's contour while maintaining full, even contact with the stone above.
Micro-Fractures Near the Base Corners
Cause: The base frame lacks adequate perimeter support, causing the stone to deflect when weight is applied to the table edges.
Fix: If the fracture is caught early (hairline), it can be stabilized using a low-viscosity structural epoxy like Akemi Akepox 2000, injected directly into the fissure. However, the root cause must be addressed by welding additional steel gussets to the base corners to eliminate flex.
Cloudy or Hazy Patches on the Surface
Cause: Sealer residue was allowed to dry on the surface during the post-installation curing phase, or a topical wax was improperly applied.
Fix: Do not use abrasive scrubbing pads. Apply a specialized sealer stripper or a poultice designed for natural stone to draw the dried resin out of the pores, followed by a professional re-polish using diamond-impregnated polishing pads (starting at 400 grit and moving up to 3000 grit).