How to Install an Exterior Slab Door on a Concrete Slab Foundation
Learn the exact procedures for installing an exterior slab door on a concrete foundation, focusing on moisture barriers, sill flashing, and secure anchoring.
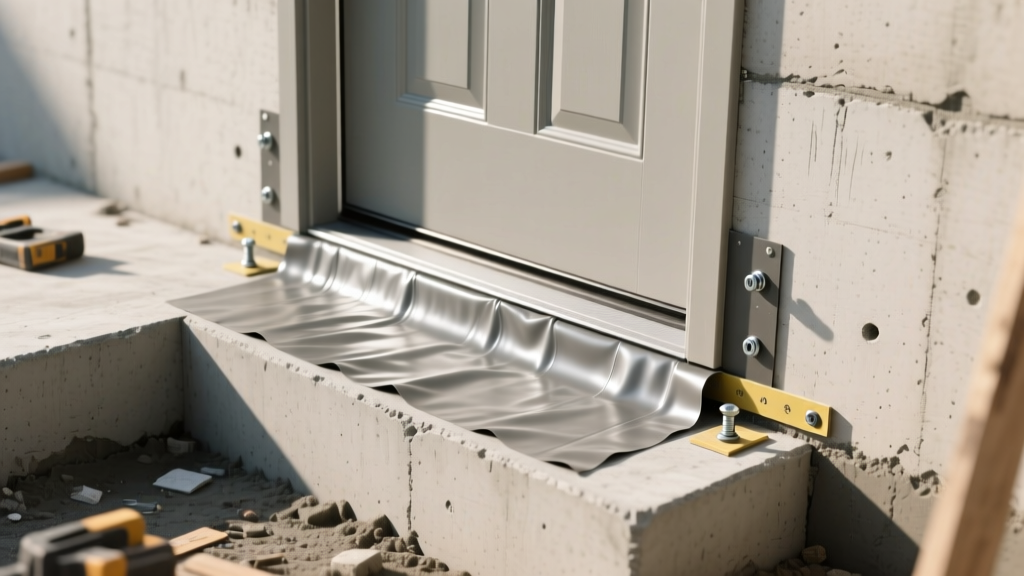
The Foundation-to-Door Interface: Managing Moisture and Movement
Installing an exterior slab door—a door sold without a pre-hung frame or pre-attached hinges—on a concrete slab-on-grade foundation requires precise carpentry and rigorous moisture management. Unlike elevated floor systems, a concrete slab foundation acts as a massive thermal bridge and a potential moisture sponge. Through capillary action, untreated concrete can wick groundwater upward, leading to severe jamb rot, mold proliferation, and structural degradation if the door assembly is not properly isolated.
Furthermore, slab-on-grade foundations are subject to differential settlement, frost heave in colder climates, and expansion in reactive clay soils. According to the U.S. Department of Energy, improper threshold sealing and framing at the foundation edge account for a significant percentage of residential air infiltration and water intrusion claims. This guide details the exact procedures for preparing the concrete sill, installing capillary breaks, mortising the slab door, and anchoring the threshold to withstand structural movement.
Required Tools and Material Specifications
Do not substitute critical moisture-barrier components with standard interior materials. The following specifications are required for a durable exterior slab door installation on concrete:
| Component | Specification / Recommended Product | Purpose |
|---|---|---|
| Sill Gasket | 1/4-inch EPDM rubber (e.g., Protecto Wrap Sill Sealer) | Provides a capillary break between concrete and wood jamb. |
| Pan Flashing | Sloped aluminum or PVC sill pan (e.g., Jamb-Sill Pan System) | Catches and redirects bulk water to the exterior. |
| Fluid-Applied Flashing | Henry Blueskin WB or Zip System Liquid Flash | Seals the corners and end dams of the sill pan. |
| Shims | Composite or PVC shims (never wood) | Resists compression and will not wick moisture or rot. |
| Concrete Anchors | 1/4-inch x 3-1/4-inch Tapcon or Simpson Strong-Tie Titen HD | Secures the threshold to the slab against wind uplift. |
| Jamb Material | Pressure-treated pine or cellular PVC (e.g., AZEK) | Resists decay at the critical foundation intersection. |
Step 1: Preparing the Concrete Slab Threshold
The concrete slab where the door will sit must be flat, level, and clean. Concrete finishers often leave a slight trowel ridge or a rough broom finish at the edge of the slab. Use a 6-foot level to check the threshold area. The tolerance for a slab door installation is a maximum deviation of 1/8-inch over 6 feet.
- Grind High Spots: Use an angle grinder with a diamond cup wheel to knock down any ridges or high spots on the concrete edge.
- Patch Low Spots: If the slab dips more than 1/8-inch, apply a Portland cement-based self-leveling underlayment or a structural epoxy patch to create a perfectly flat bearing surface.
- Clean the Surface: Vacuum all concrete dust and debris. Fluid-applied flashings and construction adhesives will fail if applied over dusty concrete.
Step 2: Installing the Capillary Break and Sill Pan
This is the most critical step in preventing foundation moisture from destroying the door assembly. Wood jambs placed directly on concrete will rot within 3 to 5 years due to capillary wicking.
Applying the Sill Gasket
Staple or adhere a continuous strip of 1/4-inch EPDM sill gasket across the entire width of the rough opening, extending 1 inch up the jack studs on both sides. This compressible rubber acts as an absolute capillary break and seals air leaks between the rough sill plate and the concrete.
Setting the Sloped Sill Pan
Install a rigid, sloped sill pan over the EPDM gasket. The pan must feature a minimum slope of 1/4-inch per foot toward the exterior to ensure positive drainage. Apply a continuous bead of polyurethane sealant (e.g., OSI QUAD) under the exterior lip of the pan. At the interior corners where the pan meets the jack studs, apply a generous layer of fluid-applied flashing to create seamless end dams, preventing water from migrating behind the wall sheathing. For detailed flashing protocols, refer to the Fine Homebuilding door installation archives, which emphasize the necessity of integrated sill pans in modern building envelopes.
Step 3: Mortising Hinges and Hanging the Slab Door
Because a slab door arrives without pre-cut hinge mortises or bore holes, you must custom-fit it to your newly assembled pressure-treated or PVC jamb.
- Measure and Mark: Measure the rough opening and cut the head jamb and side jambs to size, allowing for a 1/2-inch clearance at the top and sides for shimming and insulation. Assemble the jamb using exterior-grade wood glue and 2-1/2-inch stainless steel trim screws.
- Mortise the Hinges: For a standard 36-inch x 80-inch exterior slab door, use three 4-inch x 4-inch ball-bearing hinges. Mark the top hinge 7 inches from the top of the door, the bottom hinge 11 inches from the bottom, and center the third hinge. Use a router with a hinge template to cut the mortises to the exact depth of the hinge leaf thickness.
- Kerf the Bottom: If your threshold requires a door sweep, use a router to cut a 1/8-inch kerf at the bottom edge of the slab door for a compression weatherstrip sweep.
- Set the Door: Place composite shims under the slab door to elevate it exactly 3/4-inch above the finished threshold height. Attach the hinges to the jamb using #9 x 3-inch exterior structural screws. Drive at least one 3-inch screw through the hinge leaf into the jack stud framing for structural support, preventing the door from sagging over time.
Step 4: Securing the Threshold to the Foundation
The threshold must be securely anchored to the concrete slab to resist wind uplift and prevent differential movement between the door and the foundation. According to Simpson Strong-Tie concrete anchoring guidelines, proper hole depth and dust clearance are paramount for anchor performance.
- Mark Anchor Locations: Mark the threshold for anchor placement, spacing them no more than 16 inches apart, and keeping at least 3 inches from the edges of the concrete slab to prevent spalling.
- Drill the Concrete: Using a hammer drill and a carbide-tipped masonry bit matching the anchor diameter (e.g., 3/16-inch for 1/4-inch Tapcons), drill holes 1/2-inch deeper than the anchor embedment depth.
- Clear the Dust: Use compressed air or a vacuum to completely clear concrete dust from the holes. Residual dust reduces the pull-out strength of mechanical anchors by up to 40%.
- Fasten the Threshold: Apply a bead of silicone sealant under the threshold, set it in place, and drive the concrete anchors until the heads are flush with the threshold surface. Do not overtighten, as this can warp aluminum thresholds and compromise the door sweep seal.
Troubleshooting Slab Door Failures on Concrete Foundations
Even with meticulous installation, slab-on-grade foundations can shift, causing operational issues with the slab door. Use this diagnostic matrix to identify and resolve common failures.
| Symptom | Probable Cause | Corrective Action |
|---|---|---|
| Door binds at the top corner when closing | Foundation settlement or slab heave pulling the strike-side jamb downward. | Check the slab elevation with a laser level. If the slab is stable, plane the top edge of the door slab. If the slab is actively moving, consult a foundation repair specialist for slab jacking. |
| Water ingress at the interior sill | Failed pan flashing, missing end dams, or reverse slope on the exterior landing. | Remove the threshold. Inspect the sill pan for punctures. Re-apply fluid flashing at the corners. Ensure the exterior concrete landing slopes away at 1/4-inch per foot. |
| Visible rot or soft wood at the base of the jamb | Missing EPDM capillary break; wood jamb wicking moisture directly from the concrete. | Cut the bottom 2 inches off the rotted jamb using an oscillating multi-tool. Install a PVC jamb extension block over a fresh layer of EPDM gasket and seal with polyurethane. |
| Drafts and air infiltration at the threshold | Threshold warped during anchoring or door sweep failed to engage the kerf. | Loosen the concrete anchors slightly to relieve tension on the threshold. Adjust the sweep depth or replace the sweep insert with a higher-durometer EPDM bulb seal. |
Installing a slab door on a concrete foundation bridges the gap between structural masonry and finish carpentry. By prioritizing the capillary break, utilizing sloped sill pans, and employing proper concrete anchoring techniques, you ensure the door assembly remains plumb, weather-tight, and resistant to the unique moisture challenges inherent to slab-on-grade construction.