How to Use Stone Veneer Molds for Custom DIY Installation
Learn how to cast and install custom DIY stone veneer using polyurethane molds. Includes concrete mix ratios, curing times, and mortar specs.

The Economics of Casting vs. Buying Manufactured Stone
Casting your own stone veneer using high-quality polyurethane molds shifts the cost structure of exterior and interior cladding projects from material-heavy to labor-heavy. For a standard 100-square-foot accent wall, purchasing premium manufactured stone veneer (MSV) typically costs between $8 and $14 per square foot, plus freight shipping for heavy pallets. By contrast, casting your own veneer drops the material cost to roughly $1.50 to $2.50 per square foot, assuming you already own the molds.
| Cost Factor | Pre-Cast MSV (100 sq ft) | DIY Cast Veneer (100 sq ft) |
|---|---|---|
| Stone Material | $800 - $1,400 | $60 (Concrete & Sand) |
| Integral Pigments | Included | $45 |
| Polyurethane Molds | N/A | $150 - $350 (Amortized) |
| Freight / Shipping | $150 - $300 | $0 |
| Total Material Cost | $950 - $2,000 | $255 - $455 |
Selecting the Right Polyurethane Stone Veneer Molds
Not all molds are created equal. When sourcing stone veneer molds, you must prioritize alkali resistance and structural memory. Concrete is highly alkaline (pH 12-13) during the curing process, which rapidly degrades standard silicone or latex molds.
- Material: Specify cast polyurethane rubber. Avoid tin-cure silicones, which will break down after 10-15 pours.
- Durometer (Hardness): Look for a Shore A hardness rating between 70 and 80. A 70A mold offers enough flexibility to demold deep, undercut textures (like fieldstone or limestone) without tearing, while maintaining the rigidity needed to keep the concrete flat during vibration.
- Backing Support: Premium molds include a rigid fiberglass or wood mother-mold shell. This prevents the polyurethane from bowing under the 140+ lbs of hydrostatic pressure exerted by wet concrete.
Phase 1: Casting Your Custom Veneer Stones
Achieving a professional, bug-hole-free finish requires strict adherence to mix designs and vibration protocols. According to guidelines published by the American Concrete Institute, controlling the water-to-cement ratio is the most critical factor in achieving high compressive strength and low porosity in architectural precast concrete.
Step 1: Mold Preparation and Release
Apply a water-based polyurethane mold release agent. Never use petroleum-based releases (like WD-40 or motor oil), as they will chemically attack the polyurethane rubber and cause micro-tearing. Use a soft bristle brush to work the release into deep crevices, then wipe away excess pooling with a lint-free rag.
Step 2: Pigment Application (The Face Coat)
For realistic color variation, do not mix all your pigment into the wet concrete. Instead, use a dry-shake method:
- Dust dry iron-oxide pigments directly into the bottom of the mold cavities using a stiff brush.
- Apply a secondary, contrasting highlight color to the edges and raised ridges.
- Mist the pigment lightly with water to set it into the texture.
Step 3: The Structural Concrete Mix
Standard bagged concrete mix contains large aggregate (gravel) that will ruin the fine details of a veneer mold. You must use a fine-grain architectural mix.
- 3 parts fine masonry sand (sifted through a 1/16-inch mesh)
- 1 part Type I/II Portland cement
- 0.45 water-to-cement ratio (approx. 3.5 quarts of water)
- 4 oz liquid acrylic polymer fortifier (replaces a portion of the water for tensile strength)
Step 4: Pouring and Vibration
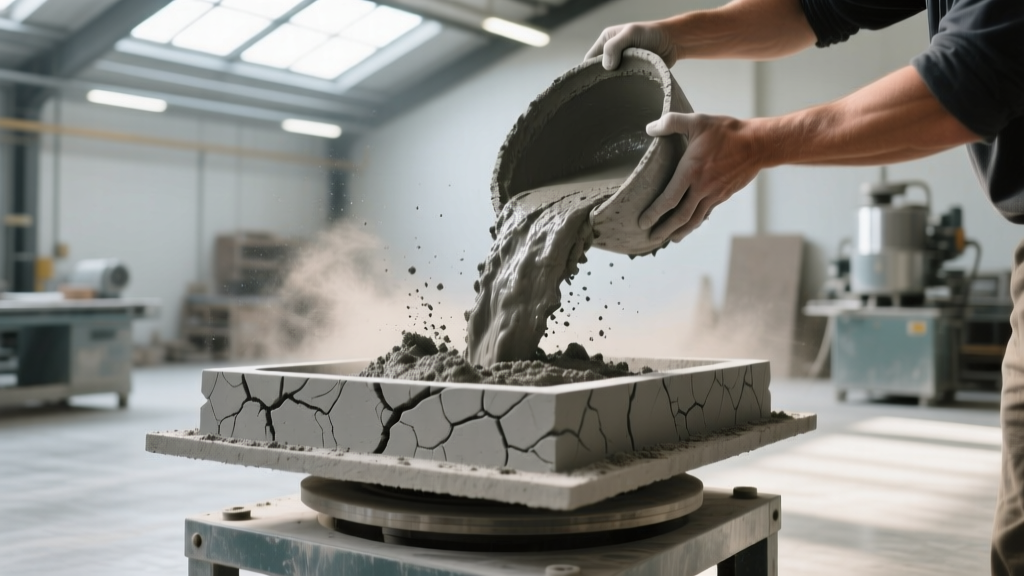
Fill the molds to the top edge. Immediately place the mold on a vibrating table. If you do not have a commercial vibration table, you can build a DIY version using a heavy plywood sheet mounted on four neoprene isolator pads with a 1/4 HP electric motor fitted with an eccentric weight bolted to the center. Vibrate for exactly 15 to 20 seconds. This forces entrapped air bubbles to the surface, eliminating the 'bug holes' that ruin the faux-stone illusion.
Phase 2: Curing and Demolding Timelines
Premature demolding is the leading cause of edge-chipping in DIY cast veneer. Polyurethane molds retain heat, which accelerates the initial set but requires patience for structural integrity.
| Milestone | Timeframe | Action Required |
|---|---|---|
| Initial Set | 12 - 18 Hours | Cover with plastic sheeting to retain moisture. Do not touch. |
| Demolding | 36 - 48 Hours | Gently flex the polyurethane mold. If edges resist, wait another 12 hours. |
| Mist Curing | 7 Days | Stack stones on pallets and mist with water twice daily to prevent shrinkage cracking. |
| Full Cure | 28 Days | Stones reach maximum compressive strength (approx. 4,000 PSI). Ready for installation. |
Phase 3: Surface Preparation and Installation
Installing cast stone veneer requires the same rigorous substrate preparation as natural stone. The International Masonry Institute emphasizes that moisture management and mechanical fastening are non-negotiable for exterior veneer applications to prevent catastrophic delamination.
Exterior Substrate Preparation
- Weather Barrier: Staple two layers of Grade D building paper or a continuous fluid-applied membrane over the exterior sheathing.
- Weep Screed: Install a galvanized weep screed at the base of the wall, maintaining a minimum 4-inch clearance from soil grade or 2 inches from concrete hardscapes.
- Metal Lath: Fasten 18-gauge, 1-inch self-furring galvanized expanded metal lath using corrosion-resistant roofing nails or staples, penetrating the wall studs by at least 1 inch. Overlap horizontal seams by 2 inches and vertical seams by 1 inch.
- Scratch Coat: Trowel a 3/8-inch layer of Type S masonry mortar over the lath. Use a notched trowel to score horizontal grooves into the wet mortar. Allow to cure for 48 hours.
Setting the Veneer
Do not use standard thinset or Type N mortar for setting the stones. You must use a polymer-modified veneer mortar (such as ProSpec Veneer Stone Mortar or Sakrete Stone Veneer Mortar). These mixes contain latex additives that provide the high bond strength and non-sag characteristics required for vertical applications.
Because DIY cast stones are highly porous compared to kiln-fired clay, they are prone to efflorescence (white salt deposits). Before installation, seal the back of each stone with a silane/siloxane penetrating sealer. This prevents moisture from migrating through the stone and pulling alkali salts from the mortar to the surface.
Back-butter each stone with a 1/2-inch layer of veneer mortar, press it firmly into the scratch coat, and hold for 5 seconds to establish a mechanical bond. Maintain a 1/2-inch to 1-inch joint gap between stones, filling the joints with a grout bag using the same polymer-modified mortar. Tool the joints with a concave jointer once the mortar becomes thumbprint-hard.
Troubleshooting Common Casting and Installation Failures
| Symptom | Root Cause | Corrective Action |
|---|---|---|
| Pitting / Bug Holes on Stone Face | Insufficient vibration or mix too dry (low slump). | Increase vibration time by 5 seconds; add 2 oz more water/acrylic mix to achieve a peanut-butter consistency. |
| Mold Tearing on Demolding | Petroleum-based release agent used, or demolding too early. | Switch to water-based urethane release; wait full 48 hours before flexing the mold. |
| Stones Popping Off the Wall | Lath not fastened to studs, or using unmodified thinset. | Ensure nails hit studs (not just OSB/plywood); exclusively use polymer-modified veneer mortar. |
| White Chalky Stains (Efflorescence) | Moisture migrating through porous DIY concrete. | Clean with a diluted muriatic acid wash (1:10 ratio); apply a breathable siloxane topcoat sealer. |
Written by
Priya KapoorPriya Kapoor is a real estate market analyst and construction economics researcher with expertise in housing affordability, development feasibility, and infrastructure investment. She holds a Master of Regional Planning from Cornell University and previously worked as a senior analyst at CBRE's Investment Properties group, where she modeled returns for $4B in mixed-use development pipelines. Priya now runs an independent research practice advising developers, municipalities, and REITs on construction cost forecasting and market timing. She publishes the quarterly "BuildMat Market Pulse" report tracking material price indices across 12 commodity categories. Based in Austin, TX, Priya serves on the board of Habitat for Humanity Austin and is a marathon runner.
More from Priya Kapoor
View all
Construction Cost
Cost to Build a 1600 Sq Ft Home in 2026: Full Breakdown
Accurate 2026 cost to build a 1600 sq ft home—material, labor, and regional pricing breakdowns included. Plan your budget with real-time estimates.
Aug 11, 2026

Wood & Lumber
Name the Types of Wood for Pressure Treatment and Preservation
Learn how to name the types of wood best suited for pressure treatment. Compare species treatability, chemical retention levels, and 2026 preservation costs.
Aug 4, 2026

Stone & Masonry
Stone Veneer Suppliers Lindenhurst: 2026 Cost Analysis
Analyze 2026 stone veneer costs in Lindenhurst, NY. Compare local supplier pricing, delivery fees, and Suffolk County installation labor rates.
Aug 4, 2026