Installing a Custom Marble Bar: Substrate, Brackets, and Sealing
Learn the exact procedures for installing a custom marble bar top, including substrate prep, overhang bracket spacing, and professional sealing.
Substrate Engineering and Deflection Limits
Marble is a calcite-based metamorphic rock with high compressive strength but low tensile flexibility. Unlike quartz or granite, marble will fracture under micro-deflections that other materials might absorb. The Natural Stone Institute mandates a maximum deflection limit of L/720 for natural stone installations, significantly stricter than the L/360 standard used for standard ceramic tile. This means a joist spanning 10 feet cannot deflect more than 1/6th of an inch under maximum load.
For a commercial or high-traffic residential marble bar, the substrate must be engineered to eliminate all flex. Never install marble directly over standard 3/4-inch OSB or particleboard. The required substrate stack consists of:
- Base Layer: 1-1/8-inch tongue-and-groove high-density plywood (such as AdvanTech) glued and screwed to floor joists spaced no more than 16 inches on center.
- Decoupling/Uncoupling Layer (Optional but recommended): A 1/4-inch cement backer board (like Durock) set in a bed of thinset mortar. Note that cement board adds zero structural rigidity; its sole purpose is to provide a stable, moisture-resistant bonding surface and isolate the stone from minor wood expansion.
Never use standard acetoxy-cure silicone (which smells like vinegar) to adhere sinks or seal edges against marble. The acetic acid released during curing will instantly etch the calcite in the marble, leaving permanent, dull, whitish halos. Always specify 100% neutral-cure silicone (e.g., GE Silicone II or Dow Corning 795) for any marble-to-metal or marble-to-sink transitions.
Overhang Support Matrices
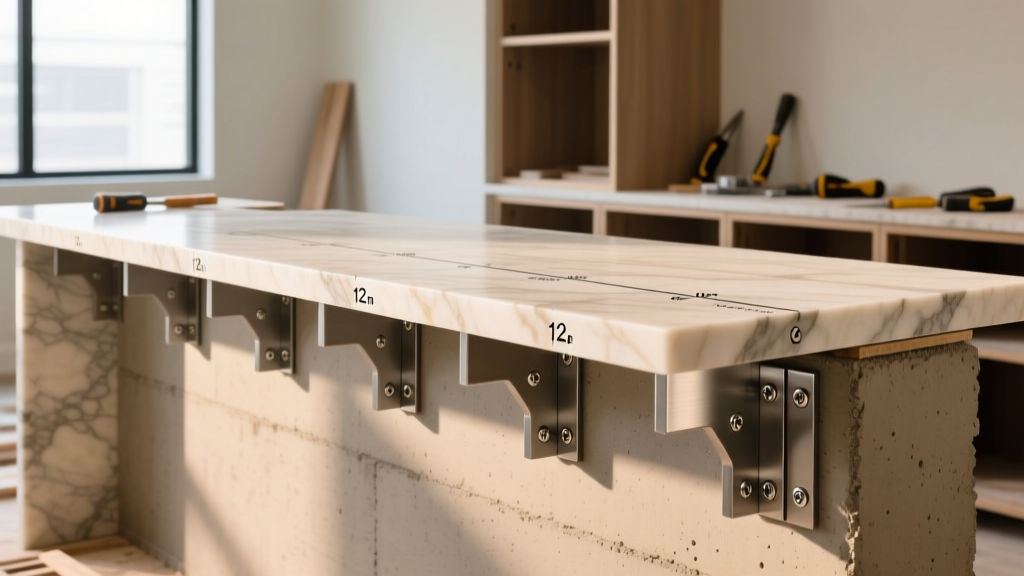
A standard bar top requires a 12-inch to 15-inch overhang for seated patrons. Because 3cm marble weighs approximately 18.5 pounds per square foot, an unsupported overhang creates a massive cantilevered load that will snap the stone at the stress point. According to the Natural Stone Institute's Dimension Stone Design Manual, hidden structural supports are mandatory for overhangs exceeding specific thresholds.
| Marble Thickness | Weight (lbs/sq ft) | Max Unsupported Overhang | Required Bracket Spacing | Bracket Material / Size |
|---|---|---|---|---|
| 2cm (3/4') | 12.5 lbs | 6 inches | Every 16 inches | 3/8' steel flat bar or aluminum corbels |
| 3cm (1-1/4') | 18.5 lbs | 10 inches | Every 24 inches | 1/2' steel flat bar or heavy-duty hidden brackets |
| 3cm Laminated Edge | 24.0+ lbs | 10 inches (edge only) | Every 18 inches | Routed 1/2' steel brackets with epoxy anchor |
Installation Protocol for Hidden Brackets: Do not simply screw brackets to the side of the cabinet boxes. You must route (cut) shallow channels into the top of the plywood substrate and the cabinetry frame so the steel brackets sit completely flush. The brackets should extend at least 2/3 the depth of the overhang. Secure the brackets to the framing using 3-inch structural screws (like GRK RSS), and adhere the marble to the brackets using a flexible, high-strength epoxy.
Sink Cutouts and Edge Profiling
The most common point of catastrophic failure in a marble bar top is the sink cutout, particularly for undermount prep or ice sinks. Square corners create severe stress concentrations. When fabricating the cutout, the fabricator must CNC-route all interior corners with a minimum 1/2-inch radius. Furthermore, the perimeter of the cutout must be reinforced with fiberglass mesh and a high-modulus epoxy, or by routing a groove and embedding a carbon-fiber or fiberglass reinforcement rod.
For edge profiling, avoid deep, aggressive profiles like the 'Dupont' or deep 'Ogee' on the overhang edge of a 2cm slab. Removing that much material from the bottom edge reduces the structural cross-section right where the cantilever stress is highest. If a complex profile is desired, specify a 3cm slab or a built-up (laminated) edge to maintain structural integrity.
Seam Joinery and Epoxy Selection
When a marble bar exceeds the length of a single slab (typically 105 to 120 inches), seams are unavoidable. Polyester resins (commonly sold as 'knife grade' or 'flow grade' marble glues) are strictly for aesthetic patching and minor edge bonding. They lack the tensile and shear strength required for structural seam joinery.
For structural seams, you must use a two-part structural epoxy, such as Tenax AKE or AKEMI Akepox. The installation sequence requires:
- Dry-Fitting and Routing: Dry-fit the slabs and route a shallow groove across the seam on the underside of the stone. Embed a fiberglass or Kevlar seam stick into the groove with epoxy to lock the slabs together laterally.
- Color Matching: Mix the structural epoxy with precise mineral pigments. Marble is highly translucent; an epoxy that is even slightly too dark will cast a visible shadow line through the stone.
- Clamping: Use pneumatic or manual seam setters (suction cup clamps) to pull the slabs tight. Apply even pressure across the top and bottom to prevent 'lippage' (vertical misalignment).
- Curing and Scraping: Allow the epoxy to cure to a 'leather' hardness (usually 30-45 minutes depending on ambient temperature) before scraping the excess flush with a single-edged razor blade. Scraping too early will pull epoxy out of the joint; scraping too late risks chipping the marble arris (edge).
The Sealing Protocol: Impregnators vs. Topical Coatings
Marble bars are subjected to high-acid spills (citrus juices, wine, cocktails, coffee). It is a fundamental industry misconception that 'sealing' marble makes it acid-proof. Standard penetrating sealers (impregnators) only fill the microscopic pores to prevent oil and water-based staining; they do absolutely nothing to prevent acid etching (the chemical dissolution of the surface polish).
For a commercial or heavy-use residential bar, you must choose between two distinct protection strategies:
Option A: High-Solids Fluoropolymer Impregnators (Recommended)
Use a solvent-based, fluorocarbon-resin impregnator (such as Miracle Sealants 511 Porous Plus or Tenax Ager). Fluoropolymers provide superior resistance to both oil and water compared to standard siloxanes. Apply two coats, allowing 24 hours between applications. This maintains the natural, uncoated feel of the stone but requires the owner to accept that acidic spills will still etch the surface if not wiped immediately.
Option B: Etch-Proof Topical Coatings (For High-Acid Environments)
If the client demands zero etching from cocktails, you must apply a permanent, topical anti-etch coating (like More Anti-Etch or TuffSkin). These are specialized, optically clear polyurethane or PET films applied in liquid form or as a factory-bonded sheet. Do not use standard hardware-store polyurethanes. Topical coatings alter the tactile feel of the stone, can trap moisture vapor if applied incorrectly, and will require professional recoating every 3 to 5 years in a commercial bar setting.
Troubleshooting Common Installation Failures
Symptom: Hairline crack radiating from the corner of an undermount sink cutout.
Cause: Square corners were cut during fabrication, or the substrate beneath the sink sagged due to the weight of a cast-iron or fireclay prep sink.
Fix: The sink must be temporarily supported from below. If the crack has not propagated to the surface edge, inject a low-viscosity, color-matched acrylic resin into the fissure using a syringe. If the crack has breached the polished surface, professional repolishing of the entire top is required.
Symptom: 'Ghosting' or dark shadow lines visible along the cabinet rails beneath the marble.
Cause: The installer used too much construction adhesive or silicone to bond the marble to the cabinet rails, and the adhesive bled into the unsealed back of the marble.
Fix: This is largely irreversible once the stone is installed. To prevent this, always apply a 'back-seal' coat of impregnating sealer to the underside of the marble slab before setting it on the cabinets, or use mechanical fasteners and minimal, neutral-cure adhesive beads rather than full-spread mastic.
Executing a flawless marble bar installation requires moving beyond basic carpentry and understanding the geological limitations of calcite. By enforcing strict L/720 deflection limits, engineering hidden steel supports for overhangs, utilizing structural epoxies for seams, and selecting the correct chemical protection, you ensure the installation survives both the physical loads and the chemical realities of a high-traffic bar environment.