How to Choose the Right Stone Veneer Cap: 2026 Buyer's Guide
Expert 2026 buyer's guide to selecting a stone veneer cap. Compare natural vs. manufactured materials, edge profiles, drip kerfs, and installation costs.

The Anatomy and Purpose of a Stone Veneer Cap
A stone veneer cap (often referred to as coping) is not merely a decorative finish; it is the primary moisture-management component of any masonry wall, pillar, or mailbox. While the veneer protects the vertical faces of the substrate, the capstone shields the vulnerable horizontal top from direct precipitation, snowmelt, and UV degradation. According to dimension stone terminology defined in ASTM C119, coping must be designed to shed water away from the wall face and prevent capillary action from drawing moisture back into the masonry core. Selecting the wrong profile or material will inevitably lead to efflorescence, freeze-thaw spalling, and structural rot in the underlying framing.
Material Matrix: Natural vs. Manufactured Capstones
The market is split between quarried natural stone and architectural precast alternatives. Your choice dictates the absorption rate, compressive strength, and long-term maintenance cycle of the installation.
| Material Type | Absorption Rate | Compressive Strength | Best Application |
|---|---|---|---|
| Bluestone (Natural) | < 1.0% | 15,000+ psi | Freeze-thaw climates, high-traffic seating walls |
| Limestone (Natural) | 3.0% - 7.0% | 8,000 - 12,000 psi | Mild climates, traditional estate aesthetics |
| Cast Stone (Precast) | < 6.0% | 5,000 - 8,000 psi | Custom profiles, long continuous runs, budget projects |
| Sintered Stone (2026 Trend) | Near 0% | 18,000+ psi | Modern architecture, ultra-thin profiles, pool coping |
Edge Profiles and Moisture Management
The physical shape of the stone veneer cap dictates how efficiently it sheds water. Never select a profile based solely on aesthetics; climate and wall orientation must drive the decision.
1. Pitched (Gable or Pyramid)
Featuring a sloped top that peaks in the center, pitched caps are the gold standard for regions with heavy snow loads. The minimum recommended slope is 15 degrees to ensure rapid runoff before water can penetrate the stone's microscopic pores.
2. Bullnose (Rounded)
Characterized by a smooth, rounded front edge, bullnose caps are ideal for seating walls and parapets where human contact is expected. However, because the top surface is often flat or only slightly crowned, they require a meticulously installed drip kerf to prevent water from wrapping around the rounded edge.
3. Flat with Beveled Edges
Common in modern and commercial architecture. Flat caps must be installed with a deliberate pitch (minimum 1/4 inch per foot) toward the interior or a designated drainage plane. Never install a perfectly level flat cap.
Contractors frequently mortar flat capstones perfectly level to satisfy a laser level. This creates microscopic pooling zones. When water pools and undergoes freeze-thaw cycles, the hydraulic pressure will delaminate the cap from the mortar bed within two to three winters.
Sizing, Overhangs, and the Drip Kerf
Proper sizing is non-negotiable for protecting the veneer below. Guidelines referenced by the National Park Service Preservation Briefs emphasize that masonry copings must project beyond the wall face to keep runoff away from the vertical joints.
- The Overhang: The cap must extend a minimum of 1.5 inches past the veneer face on all sides. For areas with driving rain, a 2.0-inch to 2.5-inch overhang is strongly recommended.
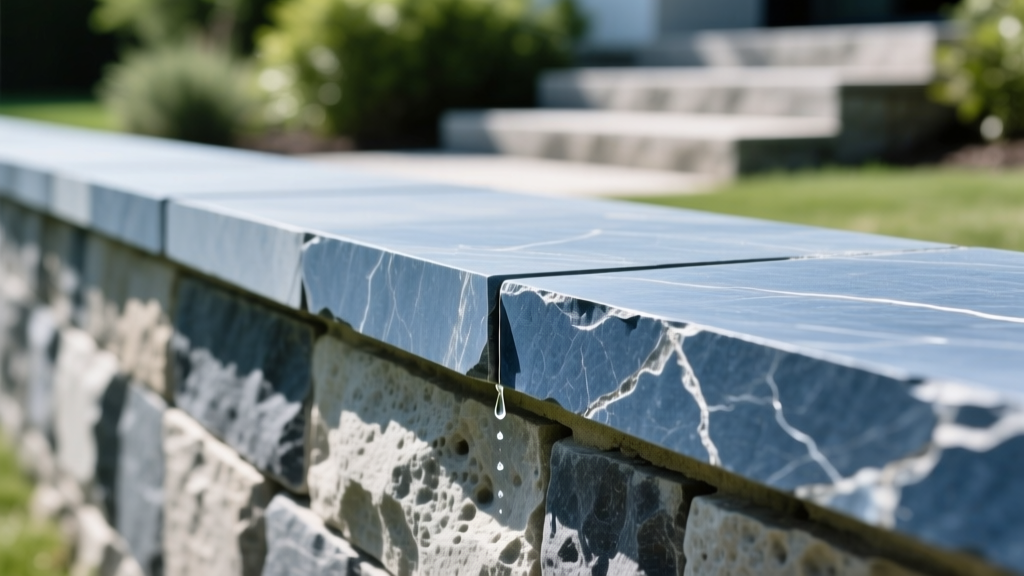
- The Drip Kerf (Groove): This is a continuous channel cut into the underside of the capstone's overhang. It breaks the surface tension of water, forcing it to drop to the ground rather than capillary back under the cap and into the wall. The kerf must be exactly 3/8-inch wide, 3/8-inch deep, and located 3/4-inch inward from the outer edge of the cap.
- Thickness: Natural stone caps should be a minimum of 2 inches thick to resist snapping under point-loads. Cast stone caps require a minimum thickness of 2.5 inches due to lower tensile strength.
Installation Methods and Structural Anchoring
Setting a stone veneer cap requires more than just smearing mortar on the top course. The bond must withstand thermal expansion differentials and wind uplift.
Standard Mortar Bed Application
Use a Type S or Type N masonry cement mortar. Type S provides higher flexural bond strength, making it ideal for copings. Apply a full, unbroken mortar bed at least 1/2-inch thick. Butter the ends of adjacent capstones with mortar before pushing them together to ensure vertical head joints are completely filled, preventing water ingress between cap segments.
Mechanical Anchoring (Seismic and High-Wind Zones)
In coastal or seismic regions, mortar alone is insufficient. You must use mechanical doweling:
- Drill 3/8-inch diameter holes into the masonry core wall (not just the veneer) to a depth of 4 inches.
- Drill corresponding blind holes into the underside of the stone veneer cap.
- Insert 304-grade (or 316-grade for coastal salt environments) stainless steel dowel pins.
- Secure the pins using a two-part structural epoxy designed for masonry. This creates a structural tether that survives even if the mortar bed cracks.
2026 Cost Breakdown by Material
Pricing for stone veneer caps varies wildly based on quarry origin, fabrication complexity, and profile. Below is the current market average for materials only, excluding labor and freight.
| Capstone Material | Cost per Linear Foot | Weight per Linear Foot | Fabrication Lead Time |
|---|---|---|---|
| Cast Stone (Standard Gray) | $14 - $22 | 25 - 35 lbs | 2 - 4 Weeks |
| Limestone (Indiana Buff) | $28 - $45 | 30 - 45 lbs | 4 - 6 Weeks |
| Bluestone (Thermal Finish) | $35 - $60 | 35 - 50 lbs | 3 - 5 Weeks |
| Sintered Stone (12mm Profile) | $55 - $85 | 10 - 15 lbs | 6 - 8 Weeks |
Sealing Protocols: Breathability vs. Trapping Moisture
Applying the wrong sealer to a stone veneer cap is one of the most common and destructive errors in masonry. The Building Stone Institute explicitly warns against using film-forming sealers (like acrylics, urethanes, or epoxies) on exterior masonry. These sealers create a plastic-like barrier on the surface that traps internal moisture. When the sun heats the cap, the trapped water turns to vapor, builds pressure, and causes the face of the stone to spall or flake off.
Frequently Asked Questions
Can I use interior stone veneer panels as an exterior cap?
No. Interior veneer panels are typically 1/2-inch to 3/4-inch thick and lack the structural mass to resist warping, UV degradation, and freeze-thaw cycling. Exterior caps require a minimum 2-inch thickness and a low absorption rate to survive outdoor exposure.
How do I handle corners and transitions with stone caps?
For 90-degree corners, order custom-fabricated 'L' shaped mitered caps from the quarry or manufacturer. Attempting to butt-cut two flat caps at a 45-degree angle on-site often results in chipped edges and a vulnerable joint that will inevitably crack and leak. Factory-mitered and epoxied corners ensure structural continuity and a seamless visual flow.
Written by
Marcus ChenMarcus Chen is a licensed structural engineer (PE) and building materials analyst with over 12 years of experience across residential, commercial, and industrial construction. He holds a Master of Science in Civil Engineering from UC Berkeley and spent six years at Thornton Tomasetti before transitioning to independent consulting and technical writing. Marcus specializes in material selection for seismic-prone regions, concrete reinforcement strategies, and lifecycle cost analysis. His work has been cited by the American Concrete Institute (ACI) and the Structural Engineers Association of California (SEAOC). When he is not on a job site or at his desk, you will find him hiking the Sierra Nevada or restoring a 1920s craftsman bungalow in Oakland, CA.
More from Marcus Chen
View all
Construction Cost
How Much Did the Eiffel Tower Cost to Build?
How much did the Eiffel Tower cost to build in 1889? We adjust for inflation and compare its budget to modern skyscraper construction.
Aug 4, 2026

Fire Resistance
What Is a Fire Resistant Material? Testing & Certification Guide
Discover what is a fire resistant material through ASTM and UL testing. Learn how fire ratings, certifications, and assemblies work in construction.
Aug 4, 2026

Construction Cost
How Much Did the Burj Khalifa Cost to Build?
How much did the Burj Khalifa cost to build? We break down the $1.5B project and extract 5 money-saving strategies for your next build.
Jul 30, 2026