Travertine Coffee Table Setup: Base Assembly and Sealing Guide
Learn how to properly assemble, seal, and place a travertine coffee table. Expert guide on base hardware, load distribution, and porous stone protection.
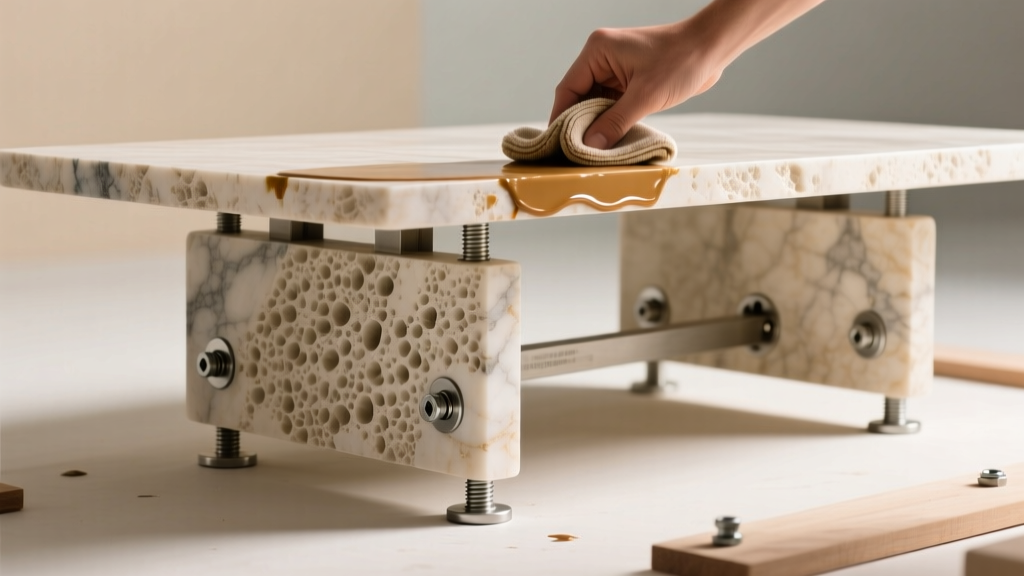
The Weight Factor: Pre-Placement Floor Assessment
Travertine is a dense, sedimentary rock with an average density of 160 to 170 pounds per cubic foot. A standard 48-inch by 24-inch travertine coffee table top with a 1-inch thickness weighs approximately 135 pounds on its own. When combined with a steel or solid wood base, the total unit weight frequently exceeds 200 pounds. Before moving the table into its final position, you must evaluate the point-load impact on your flooring.
For suspended wood-framed floors, ensure the table is placed perpendicular to the floor joists rather than parallel, distributing the dead load across multiple structural members. Avoid placing heavy stone furniture on cantilevered floor extensions or unreinforced balcony decks.
Base Assembly: Attaching Hardware to Natural Stone
Unlike manufactured quartz or sintered stone, natural travertine contains inherent voids, fissures, and varying mineral densities. Overtightening hardware or using the wrong fasteners will cause micro-fractures that eventually lead to catastrophic cracking along the vein lines.
Hardware Selection and Insertion
Most premium travertine tables utilize threaded brass or stainless steel inserts epoxied into the underside of the stone at the factory. If your table requires you to install the base hardware yourself, follow these strict parameters:
- Drilling: Use a diamond-tipped core bit, not a standard masonry bit. Standard bits hammer the stone, causing spalling on the exit side. Drill at a low RPM (under 400) with continuous water cooling.
- Insert Sizing: M8 (metric) or 5/16-inch (imperial) threaded inserts are standard for coffee table bases. Ensure the hole depth is 1/8-inch deeper than the insert length to allow for epoxy displacement.
- Adhesive: Use a two-part, stone-specific epoxy (such as Tenax Tenaset or Akemi Akepox). Do not use cyanoacrylate (Super Glue) or standard hardware store epoxies, which lack the shear strength and thermal flexibility required for stone.
- Curing Time: Allow a minimum of 24 hours at 70°F (21°C) before applying any torque to the inserts.
The Sealing Protocol: Protecting Porous Travertine
Travertine is primarily composed of calcium carbonate, making it highly susceptible to etching from acidic substances. Coffee, wine, citrus, and even some commercial glass cleaners will permanently dull the finish within minutes if the stone is unsealed. Furthermore, the natural voids in travertine (even when factory-filled with resin) act as sponges for oils and tannins.
Selecting the correct sealer is critical for a coffee table, which faces high traffic, frequent spills, and constant contact with condensation from glasses.
| Sealer Type | Mechanism | Pros | Cons | Best For |
|---|---|---|---|---|
| Impregnating (Penetrating) | Sub-surface polymers block pores | Invisible finish, allows stone to breathe, UV stable | Does not prevent surface etching from acids | Honed or polished tables in high-use living areas |
| Enhancing | Penetrates and darkens stone colors | Brings out natural veining, hides minor scratches | Can look blotchy on inconsistently porous travertine | Tumbled or unfilled travertine with dull coloration |
| Topical (Surface) | Sits on top as a physical barrier | Prevents both staining and acid etching | Traps moisture, yellows in UV, looks plasticky, requires stripping | Strictly avoided for natural stone furniture |
For a travertine coffee table, a high-quality solvent-based impregnating sealer (such as Miracle Sealants 511 Impregnator or StoneTech BulletProof) is the industry standard. Solvent-based carriers penetrate deeper into the dense calcium carbonate structure than water-based alternatives. According to the Natural Stone Institute, penetrating sealers do not alter the slip resistance or natural tactile feel of the stone, which is vital for maintaining the premium aesthetic of travertine.
Step-by-Step Impregnator Application
- Deep Clean: Wash the table with a pH-neutral stone cleaner (pH 7.0). Avoid generic household cleaners, which often contain ammonia or citric acid. Allow the stone to dry completely for 24 hours; trapped moisture will block the sealer from penetrating.
- First Coat Application: Apply the sealer using a lint-free microfiber cloth or a low-pressure pump sprayer. Work in 3-foot sections, ensuring the surface remains visibly wet for 10 to 15 minutes.
- Wipe Excess: Before the sealer dries on the surface, buff off all excess with a clean, dry terry cloth towel. Failure to wipe the excess will result in a permanent, hazy residue that requires professional mechanical polishing to remove.
- Second Coat: Wait 2 hours, then apply a second, lighter coat to ensure complete saturation of the deeper fissures.
- Cure Time: Allow 72 hours of curing time before placing any objects, coasters, or decorative items on the surface.
Placement and Environmental Controls
The physical environment where you place your travertine coffee table dictates its long-term structural integrity and visual appearance. Stone is a dynamic material that reacts to its surroundings.
- UV Exposure and Resin Yellowing: Many modern travertine slabs are factory-filled with polyester or epoxy resins to stabilize natural voids. Prolonged exposure to direct, unfiltered ultraviolet (UV) sunlight will cause these resins to oxidize and yellow, creating a patchy appearance. Position the table at least 4 feet away from south-facing or west-facing windows, or apply UV-blocking window film (minimum 99% UV rejection).
- Thermal Shock: Never place hot items (like pizza boxes, heated styling tools, or hot ceramic mugs directly from the microwave) on the stone. Rapid localized heating causes differential expansion, leading to 'thermal shock' cracks that radiate outward from the heat source.
- Humidity Fluctuations: Maintain indoor relative humidity between 35% and 55%. Extreme dry conditions can cause the factory fill resins to shrink and pull away from the stone edges, while high humidity can cause efflorescence (white mineral salt deposits) if the stone was sealed with a non-breathable topical coating.
Troubleshooting Common Setup Mistakes
Problem: White Rings or Haze on the Surface
Cause: This is typically efflorescence or trapped moisture under a topical sealer, or acid etching from a spilled beverage.
Solution: If the spot feels rough to the touch, it is an etch mark. The calcium carbonate has been physically dissolved. You must use a travertine-specific polishing powder (tin oxide based) and a low-speed buffer with a white pad to re-crystallize the surface. If the spot is smooth but hazy, it is likely sealer residue; wipe with a small amount of acetone on a rag to dissolve the excess polymer, then re-seal the spot.
Problem: Wobbling Base on a Flat Floor
Cause: The metal base was bolted to the stone while resting on an uneven surface, introducing torsional stress to the stone top, or the floor itself is uneven.
Solution: Never force the table to sit flat by tightening one leg more than the others; this will snap the stone. Loosen all base hardware by two turns. Place the table on a perfectly level surface (use a 48-inch spirit level). Allow the base to settle naturally into its unforced geometry, then hand-tighten the bolts evenly in a star pattern. If the floor is uneven, use adjustable leveling glides on the base feet rather than shimming the stone.
Proper installation and sealing of a travertine coffee table bridges the gap between raw geological material and functional interior design. By respecting the stone's density, utilizing isolation hardware, and applying the correct sub-surface chemical barriers, you ensure the piece remains a durable focal point for decades. For ongoing maintenance, always refer to professional stone care manufacturers for pH-balanced cleaning formulations designed specifically for calcareous stones.