Placing Tiffany Floor Lamps: Floor Protection & Cord Routing
Learn how to safely place Tiffany floor lamps on hardwood and tile. Discover floor protection, weight distribution, and cord routing procedures.
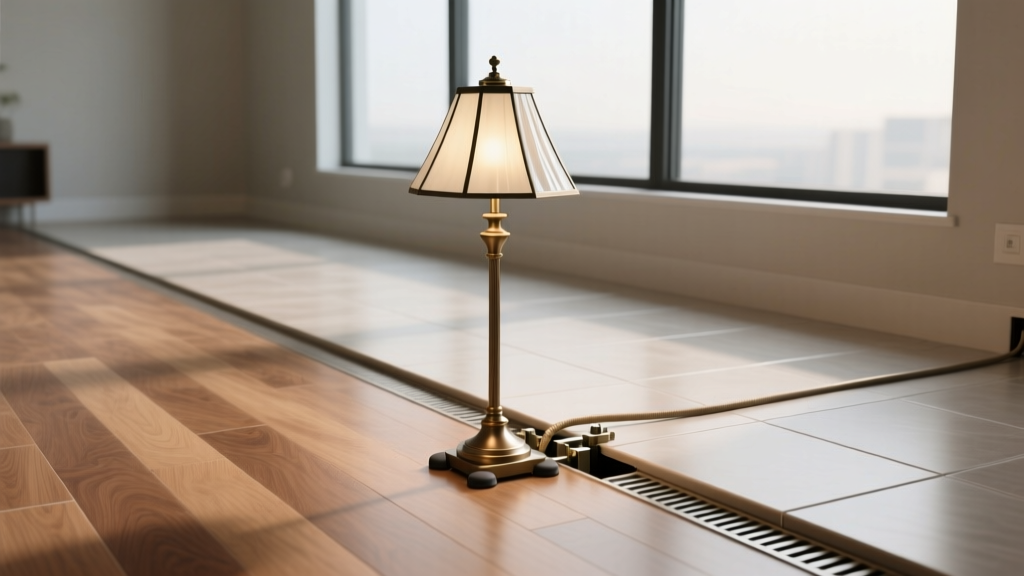
The Intersection of Heavy Lighting and Finish Flooring
Authentic Tiffany floor lamps and high-quality artisanal reproductions share a distinct physical profile: a heavy cast bronze or brass base supporting a fragile, leaded glass shade. These fixtures typically weigh between 35 and 65 pounds, concentrating significant mass onto a small footprint (often a 4-inch to 6-inch diameter base). Integrating these heavy, corded fixtures into a room requires specific flooring procedures to prevent point-load damage, finish scratching, and trip hazards. This guide details the exact installation and application procedures for placing Tiffany floor lamps on modern hardwood, luxury vinyl plank (LVP), and tile surfaces.
Calculating Point-Load and Preparing the Substrate
Before placing a 50-pound bronze lamp base on your flooring, you must evaluate the point-load pressure. Point load is calculated by dividing the weight of the object by the surface area of its base. A 50-pound lamp on a 5-inch diameter base (19.6 square inches) exerts approximately 2.55 PSI (pounds per square inch). While this seems low, dynamic forces—such as bumping the lamp or shifting it during cleaning—can spike this pressure exponentially, risking damage to the flooring's wear layer or click-lock mechanism.
Hardwood and Engineered Wood Substrates
Solid 3/4-inch hardwood and high-density engineered wood can easily withstand static loads of 2.55 PSI. However, the primary risk is mechanical abrasion. Bronze bases often have microscopic casting burrs or oxidized edges that act like sandpaper against polyurethane or aluminum oxide floor finishes. The application procedure requires deburring the base edge with 400-grit sandpaper and applying a secondary protective barrier (detailed below).
Luxury Vinyl Plank (LVP) and Rigid Core
Modern rigid core LVP (SPC/WPC) is highly susceptible to point-load indentation over time. According to the National Wood Flooring Association (NWFA) guidelines for resilient and hard-surface flooring, sustained point loads can cause the wear layer to compress and the click-lock joints to separate if the subfloor is not perfectly level. If placing a Tiffany lamp on LVP, you must install a load-dispersing rosette—a custom-cut 12-inch diameter disk of finished wood or brass—beneath the lamp base to drop the PSI below 0.5 and distribute the weight across multiple floor planks.
Never use standard rubber, latex, or PVC-backed non-slip pads under heavy metal lamp bases. The plasticizers in these materials react with polyurethane and UV-cured acrylic floor finishes, causing permanent yellowing and chemical bonding to the wood. Always use 100% natural wool felt or PTFE (Teflon) interfaces.
Applying Surface Protection: Felt vs. Polymer Pads
Selecting the correct interface material between the bronze base and the floor is a critical application step. For a 50+ pound Tiffany lamp, standard adhesive felt dots will compress to zero thickness and fail within weeks.
- Heavy-Duty Wool Felt (3/8-inch minimum): Products like the X-Protector Heavy Duty Felt Pads provide excellent shock absorption and prevent micro-scratches. For a curved bronze base, use a contact cement (such as Weldwood Original) to adhere a custom-cut sheet of 3/8-inch industrial wool felt to the bottom of the base, trimming the excess with a flush-cut razor.
- PTFE (Teflon) Sliders: If the lamp needs to be moved frequently for vacuuming, heavy-duty PTFE sliders (e.g., SuperSliders) offer a lower coefficient of friction. However, they provide less shock absorption than felt and are better suited for tile or polished concrete than for soft-finish hardwood.
- Load-Dispersing Rosettes: For LVP or older, softer pine floors, fabricate a 12-inch to 14-inch round rosette from 1/2-inch plywood, veneered to match the floor. Apply a full-coverage felt pad to the bottom of the rosette, and place the lamp on top of the rosette. This aesthetic and functional addition mimics the traditional "floor medallions" used in Victorian and Arts & Crafts interiors.
Routing Power: Floor Box Installation Procedure
A major hazard associated with floor lamps is the heavy-gauge power cord stretching across walking paths. OSHA standard 1910.22 strictly mandates keeping walking-working surfaces free of trip hazards. To cleanly integrate a Tiffany floor lamp into a room's center, the most professional application procedure is installing a flush floor receptacle directly beneath or adjacent to the lamp base.
Step-by-Step Floor Box Installation
- Joist and Utility Mapping: Use a deep-scanning stud finder to map the floor joists. The floor box must be installed between joists (typically 16 inches on center). Verify there are no HVAC ducts, plumbing lines, or radiant heat PEX tubing directly below the cut site.
- Core Drilling the Finish Floor: To prevent splintering the hardwood or chipping the tile, apply painter's tape over the cut area. Use a 4-inch bi-metal hole saw (for round floor boxes like the Carlon E971F) or a multi-tool (for square boxes like the Hubbell FFR3). Drill at a low RPM with a vacuum shroud attached to capture dust and protect the floor finish.
- Subfloor Penetration: Once through the 3/4-inch finish floor, switch to a reciprocating saw to cut through the 3/4-inch OSB or plywood subfloor.
- Wiring and Code Compliance: Run 12/2 NM-B (Romex) cable from the nearest accessible wall junction box or switch loop. According to NFPA 70 (National Electrical Code) Article 314.27, floor boxes must be listed for the specific application and securely fastened to the subfloor structure to prevent movement.
- Trim and Seal: Install the brass or bronze cover plate to aesthetically match the Tiffany lamp's hardware. Apply a bead of color-matched silicone caulk around the exterior flange to prevent liquid spills from migrating into the subfloor cavity.
Cord Management Matrix: Selecting the Right Raceway
If installing a flush floor box is structurally or financially unfeasible, surface cord management must be applied. Below is a comparison matrix of routing procedures based on flooring type and visual requirements.
| Routing Method | Installation Procedure | Best Flooring Type | Visual Impact |
|---|---|---|---|
| D-Line 1.18" Surface Raceway | Peel-and-stick adhesive channel; paintable to match baseboards or floor. | Laminate, LVP, Low-Pile Carpet | Moderate (visible bump, but paintable) |
| Flush Brass Floor Box (Carlon/Hubbell) | Core drilling subfloor; running NM-B wiring; finishing with metal lid. | Solid Hardwood, Engineered Wood, Concrete | Low (blends with lamp hardware) |
| Area Rug Routing | Slitting rug backing; feeding cord underneath; securing with rug tape. | Any hard surface covered by a large rug | Zero (cord completely hidden) |
| Floor Cord Protector Ramp (Rubber) | Lay over cord; secure edges with double-sided carpet tape. | Commercial Carpet, Garage Epoxy | High (industrial look, tripping hazard reduction only) |
Special Considerations for Radiant Heated Floors
Many modern tile and engineered wood installations utilize hydronic or electric radiant heating systems. Placing a heavy, stationary Tiffany lamp on a radiant heated floor introduces two distinct complications:
- Thermal Expansion Interference: Flooring materials expand and contract with heat cycles. If a 60-pound lamp base is locked in place by high-friction rubber pads, it can restrict the natural lateral movement of floating engineered wood floors, leading to buckling or joint separation elsewhere in the room. Always use low-friction PTFE or smooth felt pads on radiant floors to allow the floor to "slide" microscopically beneath the lamp base.
- Heat Trapping and Wire Insulation: A solid bronze base acts as a heat sink. If placed directly on a heated tile floor, the base will absorb and retain heat. Over years of continuous exposure, this localized heat can degrade the internal cloth or PVC wiring insulation inside the lamp's lower stem. To mitigate this, install a 1/4-inch thick ceramic or cork spacer beneath the felt pad to provide thermal breaking between the heated floor and the metal base.
Frequently Asked Questions
How do I clean the floor under a heavy Tiffany lamp without dragging it?
Never drag a 50-pound bronze base across a floor, even with felt pads, as debris trapped under the pad will gouge the finish. Use a furniture lifting strap or have a second person tilt the lamp slightly while sliding a microfiber dust mop underneath. For wet cleaning, use a pH-neutral hardwood cleaner (like Bona) applied directly to the mop pad, never sprayed onto the floor where it could pool and seep under the lamp base.
Can the vibration from a nearby subwoofer cause the leaded glass shade to rattle and crack?
Yes. Tiffany shades are constructed with copper foil and solder, which can fatigue and crack under sustained low-frequency vibration. If the lamp is placed on a suspended wood floor that flexes from bass vibrations, install a 1/2-inch high-density EVA foam anti-vibration pad (such as those used for washing machines) beneath the load-dispersing rosette to decouple the lamp from the floor's resonant frequency.
What is the safest way to move the lamp during a room renovation?
Remove the leaded glass shade and pack it in a custom-built, foam-lined crate. The base and stem should be wrapped in moving blankets and laid horizontally in a box. Never attempt to move the lamp fully assembled; the leverage applied to the stem during transport can easily snap the internal threaded brass pipe that connects the base to the harp.