Installing Insulation Materials: Fiberglass Batts and Blown-In Guide
Learn proper installation techniques for fiberglass insulation materials. Maximize R-value with expert batt fitting and blown-in density control.

The Physics of Fiberglass: Why Installation Technique Dictates R-Value
Fiberglass insulation operates on a simple thermodynamic principle: it traps millions of microscopic pockets of dead air within spun glass fibers to resist conductive heat flow. When installers compress, gap, or misalign these insulation materials, fiberglass loses its structural ability to trap air, directly degrading its thermal resistance. According to the North American Insulation Manufacturers Association (NAIMA), compressing a standard R-19 batt (nominally 6.25 inches thick) into a standard 5.5-inch 2x6 wall cavity reduces its effective R-value to roughly R-18. Forcing that same R-19 batt into a 3.5-inch 2x4 cavity collapses the R-value to R-13 or lower, entirely defeating the purpose of purchasing higher-grade materials.
Modern energy codes, including the 2024 and upcoming 2026 IECC updates, mandate strict Grade I installation standards. This means no gaps, no compressions, and no voids around wiring or plumbing. Mastering the installation of fiberglass requires moving beyond basic friction-fitting and adopting precision cutting, density management, and rigorous air-sealing protocols.
Material Selection Matrix: Batts vs. Loose-Fill vs. High-Density
Selecting the correct fiberglass product for the specific cavity geometry is the first step in preventing installation failures. Below is a technical comparison of current market-leading fiberglass products and their ideal applications.
| Product Type | Brand / Model Example | Nominal Thickness | R-Value | Best Application | Est. Cost (per sq. ft.) |
|---|---|---|---|---|---|
| Standard Kraft-Faced Batt | Owens Corning EcoTouch R-19 | 6.25 in. | R-19 | 2x6 exterior walls, floor joists | $0.85 - $1.05 |
| High-Density Unfaced Batt | Knauf EcoBatt R-15 | 3.5 in. | R-15 | 2x4 exterior walls (maximizes cavity) | $0.95 - $1.20 |
| Blown-In Loose-Fill | Johns Manville InsulSafe XC | Variable (Depth) | R-2.2 to R-4.3 / in. | Attic floors, irregular cavities | $1.30 - $1.80 (installed) |
| Acoustic Unfaced Batt | Owens Corning SoundControl | 3.5 in. / 5.5 in. | R-13 / R-19 | Interior partition walls, media rooms | $1.10 - $1.40 |
Step-by-Step Installation: Unfaced and Kraft-Faced Batts
Achieving a Grade I installation in framed walls requires meticulous attention to obstructions. The most common failure mode is 'stuffing' batts behind electrical boxes or plumbing stacks, which creates severe compression points and thermal bridges.
1. Precision Cutting and the 'No-Compression' Rule
Never tear fiberglass by hand; this creates uneven edges that leave gaps at the studs. Use a straightedge and a sharp utility knife. Place the batt on a flat surface, compress it slightly with a board to create a dense cutting plane, and slice through. When fitting around standard 16-inch on-center studs, cut the batt exactly 15.5 inches wide to ensure a snug friction fit without bulging.
2. Managing Wiring and Plumbing Obstructions
When encountering Romex wiring or PVC pipes running through studs, do not push the batt behind the obstruction. Instead, split the batt's thickness in half. Place one half behind the wire or pipe, and lay the second half over the front. This maintains the total insulation thickness and prevents the wire from being compressed against the drywall, which can also create a visible bulge in the finished wall.
3. Electrical Box Cutouts
Trace the outline of the electrical box onto the batt using the box itself as a template. Cut the hole slightly smaller than the box outline (by about 1/8 inch) so the fiberglass wraps tightly around the junction box, eliminating air infiltration pathways.
Blown-In Fiberglass Techniques: Achieving Target Density
For attic applications and retrofits, blown-in fiberglass (loose-fill) provides superior coverage over irregular joist bays and complex truss webs. However, the U.S. Department of Energy warns that improper machine calibration leads to under-density, resulting in severe settling over the first 24 months.
Machine Calibration and Hose Management
Blowing machines must be calibrated to the specific manufacturer's coverage chart. For open attic floors, the target installed density for most modern blown-in fiberglass is between 1.5 and 2.0 pounds per cubic foot (pcf).
- Agitator Speed: Set to break up the factory-compressed bales without pulverizing the fibers into dust.
- Air Pressure: Too much air shreds the fibers (lowering R-value per inch); too little air causes clumping in the hose.
- Application Technique: Use a sweeping, side-to-side motion, keeping the nozzle parallel to the attic floor and approximately 3 to 4 feet away from the target area. Never point the nozzle directly down into the joist bays, as this creates 'volcanoes' of uneven density.
Vapor Retarders and Air Sealing: The Critical Pre-Install Step
Fiberglass is entirely transparent to air movement. If air can pass through it, its thermal performance drops to near zero. According to the Building America Solution Center, fiberglass must always be paired with a continuous air barrier.
For exterior walls, this means the drywall (sealed at the top and bottom plates with acoustic sealant) or exterior sheathing (taped seams) serves as the primary air barrier. Kraft-facing on batts acts as a Class II vapor retarder, not an air barrier. When installing Kraft-faced batts, staple the flanges to the face of the studs—not the inside edge—to maintain a continuous vapor retarder plane and allow for proper drywall fastening.
In unvented attics or mixed-humid climates, consult local building codes regarding vapor retarder placement. Installing a polyethylene sheet over Kraft-faced batts creates a 'double vapor barrier,' trapping moisture inside the wall cavity and leading to catastrophic mold growth and wood rot.
Safety and PPE Protocols for Glass Fiber Handling
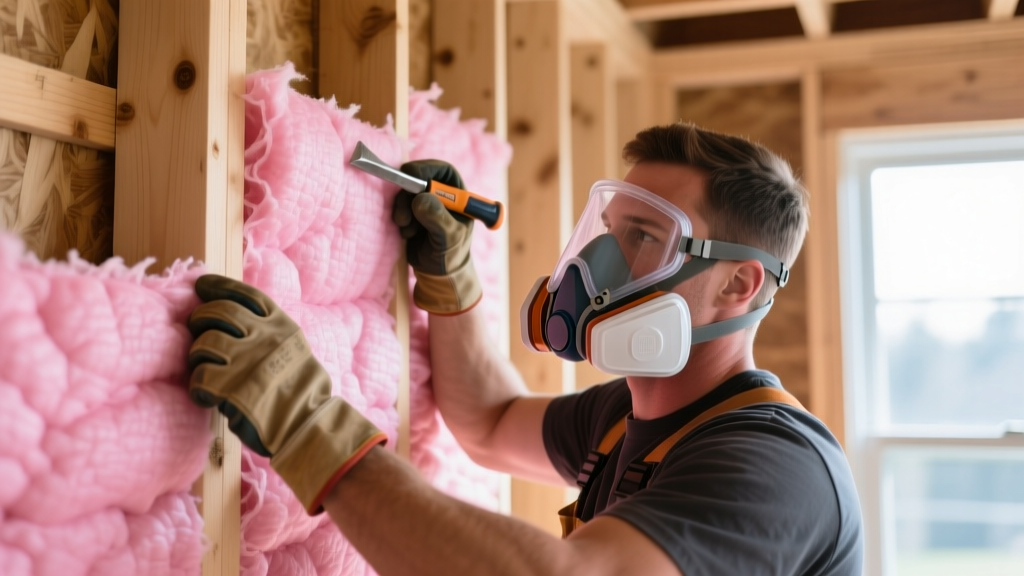
Fiberglass is a mechanical irritant, not a chemical hazard. The microscopic glass shards can embed in the skin, eyes, and respiratory tract. Proper PPE is non-negotiable for professional and DIY installers alike.
- Respiratory Protection: A standard N95 mask is the absolute minimum. For blown-in applications or overhead work, a half-face respirator with P100 particulate filters is required to prevent inhaling airborne glass dust.
- Eye Protection: Use sealed, vented safety goggles. Standard safety glasses leave the sides of the eyes exposed to falling fibers.
- Skin Protection: Wear long sleeves, long pants, and loose-fitting gloves. Tape the cuffs of your gloves to your sleeves to prevent fibers from migrating inside. After installation, wash work clothes separately in cold water to prevent glass fibers from embedding into other fabrics in the wash.
Written by
Marcus ChenMarcus Chen is a licensed structural engineer (PE) and building materials analyst with over 12 years of experience across residential, commercial, and industrial construction. He holds a Master of Science in Civil Engineering from UC Berkeley and spent six years at Thornton Tomasetti before transitioning to independent consulting and technical writing. Marcus specializes in material selection for seismic-prone regions, concrete reinforcement strategies, and lifecycle cost analysis. His work has been cited by the American Concrete Institute (ACI) and the Structural Engineers Association of California (SEAOC). When he is not on a job site or at his desk, you will find him hiking the Sierra Nevada or restoring a 1920s craftsman bungalow in Oakland, CA.
More from Marcus Chen
View all
Construction Cost
How Much Did the Eiffel Tower Cost to Build?
How much did the Eiffel Tower cost to build in 1889? We adjust for inflation and compare its budget to modern skyscraper construction.
Aug 4, 2026

Fire Resistance
What Is a Fire Resistant Material? Testing & Certification Guide
Discover what is a fire resistant material through ASTM and UL testing. Learn how fire ratings, certifications, and assemblies work in construction.
Aug 4, 2026

Construction Cost
How Much Did the Burj Khalifa Cost to Build?
How much did the Burj Khalifa cost to build? We break down the $1.5B project and extract 5 money-saving strategies for your next build.
Jul 30, 2026