Sliding Glass Door Lock Maintenance: Fix Sticky Latches Fast
Master sliding glass door lock maintenance with our expert playbook. Learn to clean tracks, lubricate cylinders, and fix jammed latches in 30 minutes.
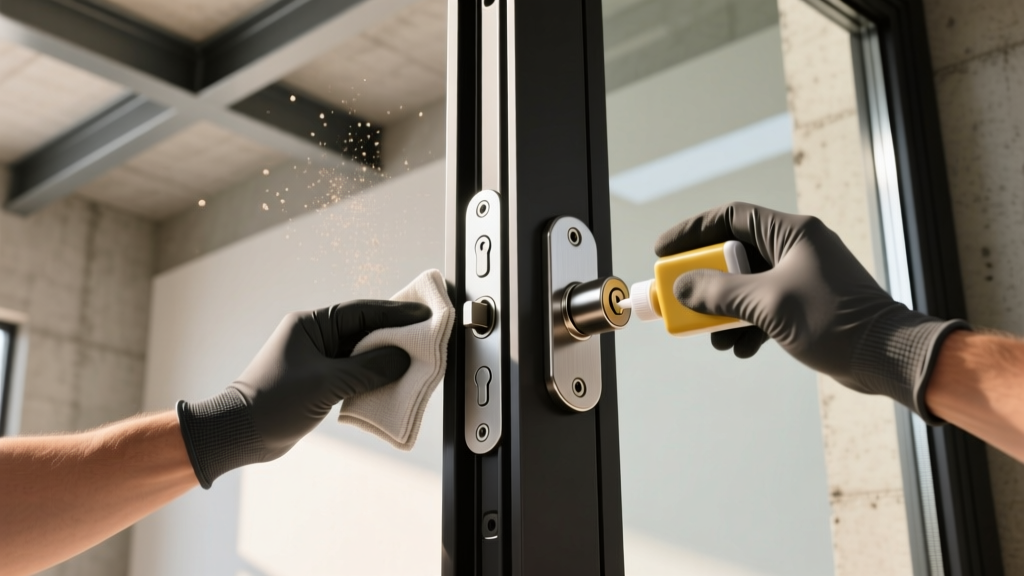
The Anatomy of a Sliding Glass Door Lock Mechanism
Before attempting any maintenance, you must understand the specific hardware you are working with. Most modern sliding patio doors utilize a mortise lock body recessed into the edge of the door stile, paired with a surface-mounted handle assembly. The critical components include the latch bolt (the moving metal hook or bevel), the cam (the internal rotating piece driven by the handle spindle), the tailpiece (connecting the key cylinder to the lock body), and the strike plate or keeper (mounted on the jamb).
Unlike standard interior door locks, sliding glass door locks are uniquely vulnerable to environmental degradation. Because the bottom track sits flush with the floor, the lock mechanism is constantly exposed to upward drafts carrying silica dust, pet hair, and moisture. When this debris mixes with improper lubricants, it forms a grinding paste that seizes the cam and prevents the latch bolt from fully retracting.
Routine Cleaning Playbook: Removing Track and Latch Debris
Proper cleaning is the foundation of lock longevity. Perform this 5-step playbook every six months, or immediately if you notice resistance when turning the thumb-turn or key.
- Vacuum the Track and Latch Cavity: Use a crevice tool attachment to remove loose debris from the bottom track and the recessed mortise cavity on the door edge. Do not skip this step; blowing compressed air without vacuuming first will simply pack the dust deeper into the lock body.
- Flush the Lock Mechanism: Insert the red straw of a compressed air duster (held perfectly upright to prevent liquid propellant discharge) into the latch opening. Apply short, one-second bursts to dislodge impacted grit from the cam and spring mechanisms.
- Dissolve Oxidation and Grime: Dip a nylon-bristled detailing brush into 90% or higher isopropyl alcohol. Scrub the exposed latch bolt and the strike plate on the jamb. The high-concentration alcohol cuts through organic grease and evaporates rapidly without leaving moisture that could cause rust on steel components or oxidation on aluminum.
- Clean the Key Cylinder: Insert and remove the key 10 to 15 times while spraying a dedicated lock cleaner (such as Houdini All-Purpose Lock Lube) directly into the keyway. This flushes out microscopic brass shavings and dirt from the internal pins.
- Wipe the Weatherstripping: Use a damp microfiber cloth to wipe down the fin-seal weatherstripping adjacent to the lock. Dirty weatherstripping creates excess friction against the sliding panel, putting lateral stress on the latch bolt when the door is closed.
Lubrication Matrix: What to Use on Lock Cylinders vs. Rollers
Selecting the correct lubricant for specific door components is where most homeowners make critical errors. Use the matrix below to ensure you are applying the right chemistry to the right part.
| Lubricant Type | Best Application | Where NOT to Use | Recommended Product Examples |
|---|---|---|---|
| PTFE / Teflon Dry Lube | Lock cylinders, latch bolts, internal cam mechanisms. | Bottom door tracks (lacks load-bearing durability). | 3-IN-ONE Lock Dry Lube, WD-40 Specialist Dry Lube. |
| Graphite Powder | Interior-only key cylinders in low-humidity climates. | Exterior doors, high-humidity areas, or latch tracks (clumps when wet). | AGS Extra Graphite, Hillman Graphite Tube. |
| Silicone Spray | Bottom door tracks, vinyl weatherstripping, nylon rollers. | Lock cylinders and keyways (attracts dust and gums up pins). | 3-IN-ONE Silicone Spray, CRC Heavy Duty Silicone. |
| White Lithium Grease | Heavy-duty metal hinges, surface-mounted loop lock pivots. | Mortise lock bodies, key cylinders, plastic tracks. | WD-40 Specialist White Lithium Grease. |
For the mortise lock body itself, a PTFE-based dry lubricant is the undisputed standard. Apply a one-second spray directly onto the latch bolt, cycle the handle five times to work the PTFE into the cam, and wipe away any excess drip with a clean rag.
Troubleshooting Decision Tree: Misalignment and Jammed Latches
If your lock is clean and lubricated but still failing to engage or retract, the issue is almost certainly mechanical misalignment caused by door sag or thermal expansion. Follow this diagnostic tree to resolve the issue.
Symptom: The latch hits the strike plate instead of sliding into the cavity.
- Cause: The sliding door panel has sagged, dropping the lock body below the strike plate keeper.
- Fix: Locate the roller adjustment screws at the bottom edge of the sliding door panel (usually covered by small plastic plugs). Using a 3/32-inch Allen wrench or a #2 Phillips screwdriver (depending on the manufacturer), turn the adjustment screw on the lock-side roller clockwise. Three full turns will typically raise the door edge by approximately 1/8th of an inch. Test the lock after every two turns to avoid over-lifting the door, which will cause the top guide wheels to bind against the header track.
Symptom: The key turns, but the latch does not retract.
- Cause: The tailpiece (the long metal bar connecting the exterior key cylinder to the mortise lock body) has slipped out of the cam slot, or the set screw on the handle spindle has backed out.
- Fix: Remove the interior handle assembly by unscrewing the two mounting screws. Pull the handle straight off to expose the tailpiece and spindle. Ensure the tailpiece is fully seated into the rectangular slot of the lock cam. Tighten the handle set screw using a 5/64-inch Allen wrench until it is flush against the flat side of the spindle.
Symptom: The lock engages, but the door rattles in high winds.
- Cause: The strike plate on the jamb is positioned too far from the latch bolt, preventing the hook from fully pulling the door tight against the weatherstripping.
- Fix: Loosen the two #2 Phillips screws securing the strike plate. Many modern strike plates feature elongated mounting holes allowing for 1/4-inch of lateral adjustment. Shift the plate slightly toward the interior of the home, tighten the screws, and test the handle tension. According to Pella's official maintenance guidelines, ensuring a tight seal is critical not just for security, but for maintaining the thermal efficiency of the glazing unit.
When to Replace: Upgrading to Multi-Point and Smart Locks
If the internal cam of your mortise lock is stripped or the zinc-alloy housing is fractured, cleaning will not save it. Replacing a standard mortise lock body costs between $35 and $65 for the part, plus 45 minutes of labor. However, if you are replacing the hardware, consider upgrading to address the inherent security weaknesses of sliding glass doors.
| Upgrade Option | Security Level | Estimated Cost (2026) | Installation Complexity |
|---|---|---|---|
| Direct Mortise Replacement | Standard | $35 - $65 | Low (Direct swap) |
| Surface-Mounted Security Bar (Charley Bar) | High (Physical block) | $40 - $75 | Low (Surface screws) |
| Track Blocker / Drop Pin | Medium (Anti-lift) | $15 - $30 | Low (Drill into top track) |
| Smart Sliding Door Lock (e.g., Lockly Guard) | High (Remote monitoring) | $250 - $400 | High (Requires wiring/WiFi) |
When evaluating smart locks for sliding doors, ensure the model is specifically rated for the lateral pull of a sliding mechanism. Standard deadbolts designed for hinged doors will fail when subjected to the side-loading forces of a sliding panel. As noted by security experts at Schlage's home security resource center, reinforcing the glass and the track is just as important as the lock itself; consider applying a shatter-resistant security film (minimum 8-mil thickness) to the lower 36 inches of the glass to prevent intruders from simply breaking the pane to reach the interior thumb-turn.
Seasonal Maintenance Schedule
To maintain optimal operation and protect your warranty, adhere to this biannual schedule:
- Spring (Post-Winter): Flush the tracks and lock cavity with compressed air. Inspect the bottom rollers for flat spots caused by freezing to the track. Apply PTFE dry lube to the lock mechanism and silicone spray to the bottom track.
- Fall (Pre-Winter): Clean the weatherstripping and inspect for tears. Verify strike plate alignment to ensure the door pulls tight against the seals, preventing cold air infiltration. Test the key cylinder with graphite or PTFE to ensure it doesn't freeze during temperature drops.
By treating your sliding glass door lock as a precision mechanical system rather than a static piece of hardware, you eliminate the frustration of jammed latches and ensure the long-term security of your home's most vulnerable glass entry point.