Fiberglass Batt Insulation Installation: Step-by-Step Guide
Learn professional fiberglass batt insulation installation procedures. Maximize R-value, avoid compression mistakes, and ensure airtight wall cavities.
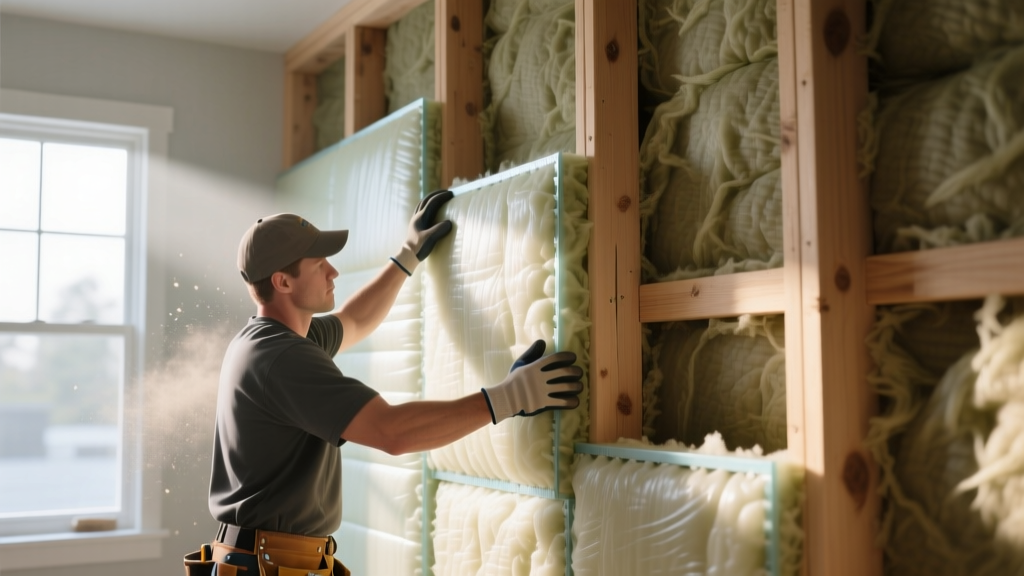
The Physics of Fiberglass: Why Installation Dictates Performance
Fiberglass batt insulation relies on a matrix of spun glass fibers to trap microscopic pockets of still air, which slows conductive and convective heat transfer. The material itself is inherently stable and non-combustible. However, its thermal resistance (R-value) is entirely dependent on maintaining its manufactured thickness and loft. According to the North American Insulation Manufacturers Association (NAIMA), compressing a standard-density batt by even one inch can reduce its effective R-value by up to 15%. Professional installation is not merely about stuffing cavities; it is a precise procedure of friction-fitting, air-sealing, and detailing around obstructions to ensure the insulation performs to its laboratory-rated specifications.
Pre-Installation Preparation and Air Sealing
The most common failure in modern insulation is ignoring air movement. Fiberglass batt insulation is a thermal barrier, not an air barrier. If convective air loops are allowed to flow through the wall cavity, the insulation's performance is neutralized. Before unrolling a single batt, the framing must be prepared.
Step 1: Comprehensive Air Sealing
Using a high-quality acoustical sealant or two-part polyurethane spray foam, seal all penetrations in the framing envelope. Focus on the following critical junctions:
- The intersection of the bottom plate and the subfloor.
- The intersection of the top plate and the ceiling drywall or roof deck.
- All wire penetrations, plumbing stacks, and HVAC duct boots.
- Window and door rough openings (the shim spaces).
Step 2: Framing Inspection
Verify that studs are spaced exactly 16 or 24 inches on-center. Bowed or warped studs must be planed down or sistered. A stud that protrudes more than 1/8" past the wall plane will compress the insulation locally and cause drywall fastener pops later.
Selecting the Correct Batt Density and Facing
Not all fiberglass batts are manufactured equally. The U.S. Department of Energy categorizes batts by both thickness and density. Choosing the wrong density for your wall depth guarantees a loss in thermal performance.
| Wall Framing | Target R-Value | Required Batt Type | Actual Thickness |
|---|---|---|---|
| 2x4 (16" O.C.) | R-13 / R-15 | Standard / High-Density | 3.5" |
| 2x6 (16" O.C.) | R-19 | Standard Density | 6.25" (Compresses to 5.5") |
| 2x6 (16" O.C.) | R-21 | High-Density (HD) | 5.5" (Exact fit) |
| 2x6 (24" O.C.) | R-21 | High-Density (HD) | 5.5" |
Facing Selection: Use Kraft-faced batts in cold climates (Zones 5 and higher) to act as a Class II vapor retarder on the interior warm-in-winter side. Use unfaced batts in hot, humid climates (Zones 1-3) or when applying over existing insulation to prevent trapping moisture between vapor barriers.
Step-by-Step Wall Cavity Installation Procedure
1. Measuring and Cutting for Friction Fit
Batts are manufactured slightly wider than standard stud cavities (e.g., a 15" wide batt for a 14.5" cavity) to ensure a friction fit. When cutting to length, add 1/2" to 1" of extra material so the batt springs back to fill the vertical space completely.
2. Fitting Around Electrical Boxes and Pipes
Stuffing insulation behind electrical boxes creates a void in front of the box, leaving a direct thermal bridge to the exterior. Instead, use the "notch and slit" method:
- Measure the exact location of the electrical box relative to the top or bottom of the batt.
- Cut a rectangular notch in the back of the batt, leaving the front half of the batt intact.
- Slit the intact front half horizontally to the center of the box outline.
- Push the notched back half behind the electrical box, and fold the slit flaps tightly around the sides and face of the box.
3. Securing the Flange
For faced batts, the flange must be stapled to the face of the stud, not the inside edge. This creates a continuous vapor retarder plane and allows the drywall to sit flush against the stud without bulging. Use a pneumatic or manual stapler loaded with 3/8" or 5/16" crown staples. Space staples every 8 to 12 inches along the flange. Pull the flange taut before stapling to prevent sagging.
Common Installation Failures and Corrections
According to field studies referenced by the Building America Solution Center, poor installation can degrade whole-wall R-value by up to 30%. Below is a diagnostic matrix for identifying and correcting field errors.
| Installation Defect | Thermal Impact | Corrective Action |
|---|---|---|
| Compression (e.g., R-19 in a 2x6 wall) | Drops R-19 to approx. R-18; increases conductive heat loss. | Remove and replace with High-Density R-21 (5.5" thick). |
| Void at top/bottom plates | Creates convective looping; warm air rises and escapes into attic. | Cut small "mini-batts" or use spray foam to seal the 1/2" gap. |
| Inverted Kraft Flange | Traps moisture inside the wall cavity, risking mold and rot. | Slash the flange and fold it flat against the drywall side. |
| Wire/Pipe Compression | Creates localized thermal bridges and compresses surrounding glass. | Split the batt vertically, passing one half behind and one half in front of the obstruction. |
Attic and Floor Application Nuances
While wall cavities require strict friction-fitting, horizontal applications like attic floors and suspended floors rely on gravity and different support mechanisms.
Attic Floors (Unconditioned Attics)
When laying batts over attic floor joists, do not compress the material. If existing insulation is present, lay the new unfaced batts perpendicular to the existing layer to cover the thermal bridges created by the wood joists. Critical requirement: Install rigid foam or sheet metal baffles at the eaves to maintain a minimum 2-inch clearance between the insulation and the roof deck, ensuring soffit ventilation is not blocked.
Suspended Floors (Over Vented Crawlspaces)
Fiberglass batts installed in floor joists must be supported by wire insulation hangers (tiger teeth) spaced every 16 inches. The kraft facing must be oriented upward, pressed directly against the warm-in-winter subfloor. Never allow the batt to sag away from the subfloor, as the resulting air gap will render the insulation virtually useless due to convective air washing.
2026 Material and Labor Cost Estimates
Budgeting for fiberglass batt insulation requires separating material costs from the labor required for meticulous, code-compliant installation. Prices below reflect national averages for early 2026.
- Standard R-13 Unfaced (3.5"): $0.55 - $0.70 per sq. ft.
- R-15 Kraft-Faced High-Density (3.5"): $0.75 - $0.95 per sq. ft.
- R-21 Kraft-Faced High-Density (5.5"): $1.15 - $1.45 per sq. ft.
- Professional Installation Labor: $1.25 - $1.85 per sq. ft. (Includes air sealing prep and detailed cutting around obstructions).
Cost-Saving Insight: While DIY installation saves the $1.25+ per square foot labor cost, improper cutting and failure to air-seal typically result in a 15-20% increase in annual HVAC energy loads, negating the labor savings within 4 to 6 years. For complex framing with numerous plumbing and electrical penetrations, professional installation yields a superior ROI.
Quality Assurance and Final Inspection
Do not close the walls with drywall until a third-party or municipal inspector has verified the insulation grade. The industry standard for grading is the RESNET Insulation Grading Standard. A "Grade I" installation requires no compression, no gaps larger than 2% of the total insulated area, and complete filling around all obstructions.
To verify this objectively, request an infrared thermography scan during the winter months when there is at least a 20°F temperature differential between the interior and exterior. An IR camera will instantly reveal convective voids, compressed zones, and missing batts as distinct thermal anomalies. Pair this with a blower door test to confirm that the pre-insulation air sealing protocols successfully achieved the target air changes per hour (ACH50) for your specific climate zone.