Exterior Brick Veneer Installation on Wood Framing Guide
Master exterior brick veneer installation on wood framing. Learn exact spacing, flashing details, wall tie specs, and moisture management techniques.
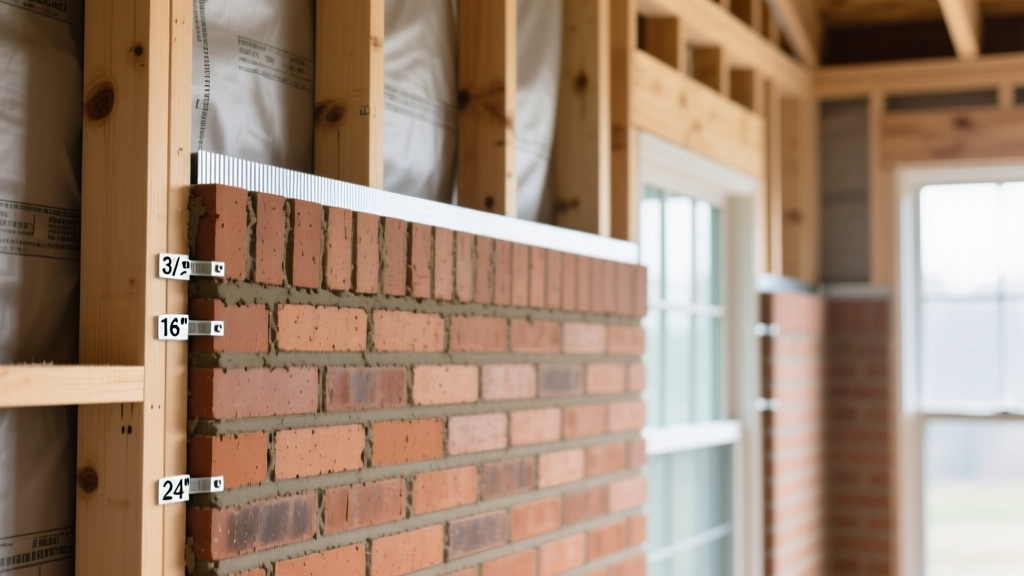
The Anatomy of a Drainage Cavity Wall
Exterior brick veneer on wood framing is a drainage-type wall system, not a barrier system. The fundamental principle governing its installation is that the brick wythe will absorb water, and the cavity behind it must manage and evacuate that moisture. A correctly installed brick veneer system relies on four distinct components: the exterior masonry wythe, a continuous air space, a weather-resistive barrier (WRB), and the structural backup (wood or steel framing).
The most common cause of interior water damage in brick veneer systems is 'mortar bridging'—when excess mortar drops into the cavity and hardens, creating a bridge between the brick and the WRB. This bypasses the drainage plane, allowing capillary action to pull water directly into the wood framing. Always use a mortar collection device (like a mesh fabric) at the base of the cavity during installation.
Material Specifications and 2026 Cost Estimates
Selecting the correct materials is non-negotiable for code compliance and longevity. Below is a breakdown of required components for a standard residential wood-framed brick veneer installation, reflecting current 2026 market pricing.
| Component | Specification / Brand Example | Est. Unit Cost (2026) |
|---|---|---|
| Modular Brick | Standard Clay, Grade SW (Severe Weathering) | $0.65 - $1.10 / unit |
| Mortar | Type N (e.g., SPEC MIX or Sakrete) | $14.00 / 80lb bag |
| Wall Ties | 22-gauge Corrugated (Simpson Strong-Tie BA) | $0.48 / tie |
| Through-Wall Flashing | 40-mil Composite or Copper (Tamlyn) | $1.85 / linear ft |
| Weep Vents | Open-head joint inserts or mesh tubes | $0.90 / unit |
| WRB | Fluid-applied or spunbonded polyolefin (Tyvek) | $0.35 / sq ft |
Step-by-Step Installation Procedure
Phase 1: Weather Barrier and Flashing Preparation
Before laying a single brick, the wood framing must be fully sheathed and covered with a continuous WRB. All window and door penetrations require integrated flashing tape. The critical step at the foundation line is installing the through-wall flashing. According to guidelines published by the Brick Industry Association (BIA), the base flashing must extend from the face of the sheathing, across the air space, and turn down the face of the foundation wall by at least 2 inches.
Use a 40-mil composite flashing or 8-oz copper. At all corners and where the flashing terminates, install pre-formed end dams to prevent water from migrating laterally behind the flashing and into the framing. Seal the top edge of the flashing to the WRB using a compatible termination bar and high-quality polyurethane sealant.
Phase 2: Laying the First Course and Weep Holes
The first course of brick rests directly on the foundation ledge and the through-wall flashing. Do not mortar the brick directly to the flashing; instead, lay a full bed of mortar on the foundation, but keep the back edge of the mortar joint clear to allow water to flow down the flashing.
Weep holes are mandatory for cavity drainage. The International Building Code (IBC) requires weep holes to be spaced at a maximum of 33 inches on center, but best practice dictates placing them every 24 inches (every third standard brick). Install manufactured weep vents, such as corrugated plastic inserts or mesh tubes, in the open head joints of the first course. Avoid simply leaving the head joint completely empty, as this invites pests and debris.
Phase 3: Wall Ties and Running Bond
Brick veneer is a non-structural cladding; it must be anchored to the backup framing. For wood framing, use 22-gauge corrugated galvanized steel wall ties. Fasten the ties directly to the wood studs using 8d or 10d galvanized nails—never rely solely on attaching ties to the OSB or plywood sheathing, as the sheathing cannot handle the lateral wind loads transferred by the brick.
Space the ties a maximum of 24 inches vertically and 32 inches horizontally, ensuring they are embedded at least 1.5 inches into the mortar bed joint of the brick wythe. A critical installation rule highlighted in Building Science Corporation's cavity wall research is that wall ties must be installed perfectly level. If a tie is angled upward, it acts as a conduit, channeling water from the brick directly to the sheathing. If angled downward, it prevents proper mortar embedment.
Always use Type N mortar for standard brick veneer above grade. Type N has a lower compressive strength (750 psi) and higher flexibility than Type S (1800 psi). Because brick veneer is subjected to thermal expansion and contraction, a softer mortar will absorb the micro-movements and crack sacrificially, whereas a rigid Type S mortar will cause the bricks themselves to spall and crack. Only use Type S for retaining walls, below-grade applications, or in high-seismic zones where explicitly required by the structural engineer.
Troubleshooting Matrix: Common Veneer Defects
Even with meticulous installation, environmental factors can cause aesthetic or structural issues. Use this matrix to diagnose and remediate common brick veneer failures.
| Symptom | Root Cause | Remediation Protocol |
|---|---|---|
| Efflorescence (White, powdery deposits on brick face) | Water ingress dissolving soluble salts within the brick or mortar, migrating to the surface and evaporating. | Dry brush the surface. If persistent, wash with a diluted solution of 1 part muriatic acid to 10 parts water. Wait at least 30 days post-installation before acid washing to allow mortar to fully cure. |
| Step Cracking (Diagonal cracks following mortar joints) | Differential settlement of the foundation, or lack of expansion joints in long runs of masonry. | Monitor for 6 months. If active, underpin the foundation. Install vertical expansion joints (compressible backer rod and sealant) every 20 to 25 feet on long wall runs. |
| Spalling (Flaking or crumbling brick faces) | Use of interior-grade (Grade MW) brick in a freeze-thaw climate, or trapping moisture with a non-breathable exterior sealant. | Replace spalled bricks with Grade SW (Severe Weathering) units. Never apply film-forming acrylic sealers to exterior brick; use only silane/siloxane penetrating water repellents if sealing is required. |
Air Gap Specifications and Code Compliance
The air space between the back of the brick and the face of the WRB is the primary drainage mechanism. The International Building Code (IBC Section 2104.1.8) mandates a minimum 1-inch nominal air space. However, field experience and recommendations from The Masonry Society (TMS) strongly advocate for a 2-inch air space.
A 2-inch cavity provides a critical buffer against mortar droppings. In a 1-inch cavity, a standard mortar dropping can easily bridge the entire gap, rendering the drainage plane useless. A 2-inch gap ensures that even with typical mason droppings, a continuous vertical drainage channel remains intact. To maintain this gap, masons should use temporary spacers or a specialized mortar collection mesh at the base of the wall, which catches droppings while allowing water to pass through to the weep holes.
Joint Tooling and Curing
The final step in the installation process is tooling the mortar joints. Tooling compresses the mortar against the brick edges, creating a dense, water-resistant seal. For exterior veneer, always use a concave or V-joint tooling profile. Avoid flush or raked joints, as they create ledges where water can pool and accelerate mortar degradation. Tool the joints only when the mortar is 'thumbprint hard'—typically 30 to 60 minutes after laying, depending on ambient temperature and humidity. Protect fresh masonry from rain and direct, hot sun using breathable canvas tarps for the first 48 hours to ensure proper hydration and curing of the Portland cement.