Fireplace Stone Veneer Installation: Complete Material Guide
Master fireplace stone veneer installation with our complete material guide. Compare manufactured vs. natural stone, costs, and step-by-step prep.

Fireplace stone veneer installation transforms a standard firebox into a high-end architectural focal point. Unlike full-thickness masonry, veneer systems rely on a lightweight, mechanically anchored substrate and specialized mortars to achieve the aesthetic of solid stone without the structural load. This guide details material selection, substrate engineering, and precise mortaring techniques required for a durable, code-compliant hearth surround.
Material Selection Matrix
Choosing the correct veneer type dictates your substrate requirements, mortar selection, and overall budget. The three primary categories for fireplace surrounds are manufactured stone, natural thin veneer, and interlocking panelized systems.
| Material Type | Weight (per sq. ft.) | Avg. Cost (Materials) | Best Application | Installation Complexity |
|---|---|---|---|---|
| Manufactured Stone (e.g., Cultured Stone, Eldorado) | 10 - 12 lbs | $8.50 - $14.00 | Traditional hearths, full-wall surrounds | High (Requires scratch coat & buttering) |
| Natural Thin Veneer (e.g., Limestone, Slate, Fieldstone) | 12 - 15 lbs | $15.00 - $28.00 | Luxury custom builds, high-heat zones | High (Irregular shapes require advanced fitting) |
| Panelized Systems (e.g., AirStone, GenStone) | 4 - 6 lbs | $10.00 - $16.00 | DIY projects, rapid renovations, flat walls | Low (Interlocking, adhesive-based) |
For high-heat areas immediately adjacent to the firebox opening, natural thin veneer or high-density manufactured stone rated for thermal cycling is mandatory. Panelized systems utilizing polyurethane or lightweight aggregate should be kept outside the manufacturer's specified clearance zone, typically 12 to 18 inches from direct flame exposure.
Substrate Engineering and Preparation
The most common cause of veneer delamination is inadequate substrate preparation. Stone veneer cannot be applied directly to drywall, painted surfaces, or bare wood framing.
The 4-Layer Substrate System
- Structural Framing: Standard 2x4 or 2x6 wood studs, or metal studs spaced 16 inches on center.
- Water-Resistive Barrier (WRB):strong> Two layers of Grade D asphalt-impregnated paper or a high-quality house wrap. This prevents moisture from the mortar scratch coat from degrading the framing.
- Cement Backer Board: 1/2-inch thick, screwed to studs with corrosion-resistant cement board screws every 6 inches.
- Metal Lath: 2.5 lb/yd² galvanized woven wire mesh or diamond mesh lath (ASTM C847). Attach using furring nails or staples that hold the lath 1/4-inch away from the backer board to allow the mortar to encapsulate the wire.
Step-by-Step Installation Sequence
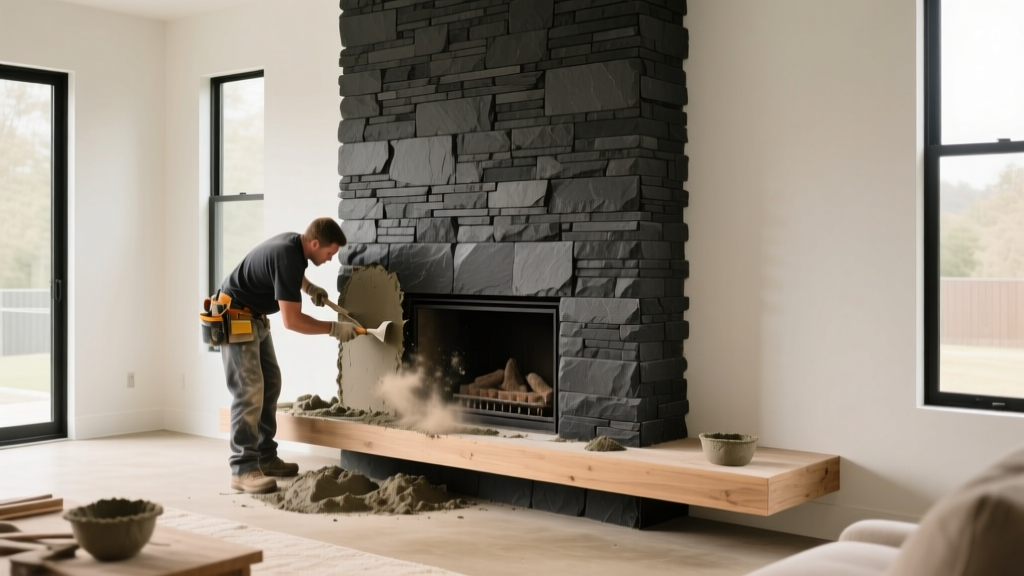
Proper fireplace stone veneer installation requires a systematic approach to ensure mechanical bonding and aesthetic consistency. Refer to comprehensive guidelines from the Masonry Veneer Manufacturers Association (MVMA) for baseline industry standards.
Phase 1: The Scratch Coat
Mix a Type S masonry mortar or a polymer-modified veneer stone mortar (such as QUIKRETE Veneer Stone Mortar). Polymer modifiers increase bond strength and flexibility, which is crucial for fireplace surrounds that experience thermal expansion and contraction.
- Apply a 1/2-inch thick layer of mortar over the metal lath using a flat trowel, pressing firmly to force the mortar through the mesh.
- Before the mortar sets (usually within 45-60 minutes), use a notched trowel or a scratch tool to score horizontal grooves 1/8-inch deep into the surface.
- Allow the scratch coat to cure for a minimum of 24 to 48 hours. Keep it slightly damp by misting with water if the ambient temperature exceeds 80°F to prevent rapid drying and cracking.
Phase 2: Dry-Fitting and Mortaring
Never pull stones directly from the box and apply them to the wall. Unpack 10 to 15 square feet of material and lay them out on the floor. Blend stones from different pallets to distribute color variations and avoid clustering similar sizes or hues.
Use the buttering method for application: apply a 1/2-inch to 1-inch layer of mortar to the back of the stone, creating a raised ridge around the perimeter. Press the stone firmly into the scratch coat with a slight twisting motion until the mortar squeezes out around the edges. This ensures 100% coverage and eliminates air pockets that can lead to future popping.
Phase 3: Grouting and Tooling
For applications requiring a grouted joint (such as cobblefield or fieldstone profiles), use a grout bag to fill the joints after the stones have set for at least 24 hours. Do not smudge mortar across the face of the stone. Once the grout becomes thumbprint-hard, use a jointing tool to compress and smooth the mortar, which increases its density and weather resistance.
Common Failure Modes and Troubleshooting
Understanding why veneer systems fail allows you to preemptively address vulnerabilities during installation.
| Failure Mode | Primary Cause | Prevention Strategy |
|---|---|---|
| Delamination / Popping | Lack of mechanical key; applying over dusty/painted surfaces; insufficient mortar coverage. | Ensure lath is furred out 1/4-inch; use the buttering method for 100% back-coverage; clean natural stone backs with a wire brush before mortaring. |
| Efflorescence | Water-soluble salts migrating to the surface due to excess moisture in the mortar or substrate. | Use low-alkali Portland cement; ensure proper WRB installation; avoid over-wetting the scratch coat during curing. |
| Thermal Cracking | Rigid mortar failing under the expansion/contraction cycles of the fireplace heat. | Use polymer-modified mortar; install expansion joints if the surround exceeds 12 feet in any direction. |
Cost Breakdown for a Standard 50-Sq-Ft Fireplace
The following estimates reflect current market pricing for a standard 50-square-foot fireplace surround (e.g., 5 ft wide by 10 ft high, minus the firebox opening) using mid-range manufactured stone.
| Line Item | Quantity | Unit Cost | Total Estimated Cost |
|---|---|---|---|
| Manufactured Stone Veneer (Flat) | 45 sq. ft. | $10.50 / sq. ft. | $472.50 |
| Manufactured Stone Corners | 10 lin. ft. | $14.00 / lin. ft. | $140.00 |
| Cement Backer Board & Screws | 2 sheets (3x5) | $45.00 / sheet | $90.00 |
| Galvanized Metal Lath & Staples | 60 sq. ft. | $1.20 / sq. ft. | $72.00 |
| Polymer-Modified Veneer Mortar | 6 bags (80 lb) | $38.00 / bag | $228.00 |
| Professional Masonry Labor | 16 hours | $85.00 / hr | $1,360.00 |
| Total Project Cost (Materials + Labor) | $2,362.50 | ||
For DIY installations, omitting the labor cost reduces the project expense to approximately $1,002. However, factor in the cost of specialized tools, including a wet saw with a diamond masonry blade for cutting natural stone, hawk and trowel sets, and a grout bag.
Maintenance and Heat Tolerance Considerations
Once installed, stone veneer requires minimal maintenance. However, the high-heat environment of a fireplace demands specific precautions. Never apply acrylic or polyurethane sealers to the interior hearth surround. When exposed to the extreme heat radiating from a wood-burning or gas firebox, these topical sealers will yellow, blister, and emit toxic fumes. If sealing is desired to protect against soot stains, use only a penetrating, breathable silane/siloxane masonry sealer rated for high-temperature applications, and apply it only to the outer periphery of the surround, maintaining a 12-inch buffer from the firebox opening.
Written by
Priya KapoorPriya Kapoor is a real estate market analyst and construction economics researcher with expertise in housing affordability, development feasibility, and infrastructure investment. She holds a Master of Regional Planning from Cornell University and previously worked as a senior analyst at CBRE's Investment Properties group, where she modeled returns for $4B in mixed-use development pipelines. Priya now runs an independent research practice advising developers, municipalities, and REITs on construction cost forecasting and market timing. She publishes the quarterly "BuildMat Market Pulse" report tracking material price indices across 12 commodity categories. Based in Austin, TX, Priya serves on the board of Habitat for Humanity Austin and is a marathon runner.
More from Priya Kapoor
View all
Construction Cost
Cost to Build a 1600 Sq Ft Home in 2026: Full Breakdown
Accurate 2026 cost to build a 1600 sq ft home—material, labor, and regional pricing breakdowns included. Plan your budget with real-time estimates.
Aug 11, 2026

Wood & Lumber
Name the Types of Wood for Pressure Treatment and Preservation
Learn how to name the types of wood best suited for pressure treatment. Compare species treatability, chemical retention levels, and 2026 preservation costs.
Aug 4, 2026

Stone & Masonry
Stone Veneer Suppliers Lindenhurst: 2026 Cost Analysis
Analyze 2026 stone veneer costs in Lindenhurst, NY. Compare local supplier pricing, delivery fees, and Suffolk County installation labor rates.
Aug 4, 2026