Top Fireplace Stone Veneer Ideas & Complete Material Guide
Explore top fireplace stone veneer ideas for 2026. This complete material guide covers costs, installation specs, clearance rules, and design profiles.

The Anatomy of a Stone Veneer Fireplace
Transforming a standard builder-grade fireplace into a architectural focal point requires more than just aesthetic vision; it demands a precise understanding of material properties, substrate preparation, and thermal clearances. Stone veneer—whether manufactured (MSV) or natural thin stone—offers the mass and visual weight of full-bed masonry at a fraction of the structural load. When evaluating fireplace stone veneer ideas, the primary technical constraint is heat tolerance and substrate integrity. Unlike standard accent walls, fireplace surrounds must accommodate thermal expansion, resist efflorescence from temperature differentials, and strictly adhere to NFPA 211 clearance standards for combustible materials.
Decision Matrix: Manufactured vs. Natural Thin Stone
Manufactured Stone Veneer (MSV): Cast in molds from natural stone using Portland cement, lightweight aggregates, and iron oxide pigments. Weighs 10-15 lbs/sq ft. Ideal for intricate profiles like ledgestone where uniform thickness aids dry-stack installation.
Natural Thin Stone: Sawn from full-bed quarried stone (granite, limestone, slate) to a 1-inch thickness. Weighs 13-18 lbs/sq ft. Offers superior UV stability and authentic mineral variation, but requires more skilled masonry work to align irregular depths.
5 High-Impact Fireplace Stone Veneer Ideas
1. Floor-to-Ceiling Stacked Ledgestone
Linear ledgestone profiles create a contemporary, horizontal rhythm that draws the eye upward. For a true dry-stack appearance, utilize manufactured profiles with precision-milled edges (such as Eldorado Stone's 'Stacked Stone' series). Installation requires a perfectly plumb substrate and a polymer-modified mortar (ANSI A118.4) applied via back-buttering to prevent any mortar from squeezing into the joints. The resulting shadow lines create deep, dramatic textures under directional hearth lighting.
2. Herringbone Pattern Fieldstone
While fieldstone is traditionally laid in a random, organic ashlar pattern, cutting rectangular thin-stone veneers into 45-degree angles and laying them in a herringbone configuration bridges rustic materiality with formal geometry. This technique requires a wet saw with a continuous rim diamond blade designed specifically for masonry to prevent chipping the aggregate face. Use a contrasting Type S mortar joint (approximately 1/2 inch) to highlight the geometric layout.
3. Whitewashed Limestone Veneer
For coastal or transitional interiors, natural thin limestone veneer treated with a lime-based whitewash softens the high-contrast veining typical of sedimentary rock. Unlike painted stone, which traps moisture and causes spalling when exposed to fireplace heat, a breathable mineral silicate wash penetrates the pore structure. This allows the fireplace to expand and contract without the finish flaking or yellowing over time.
4. Dark Basalt Geometric Panels
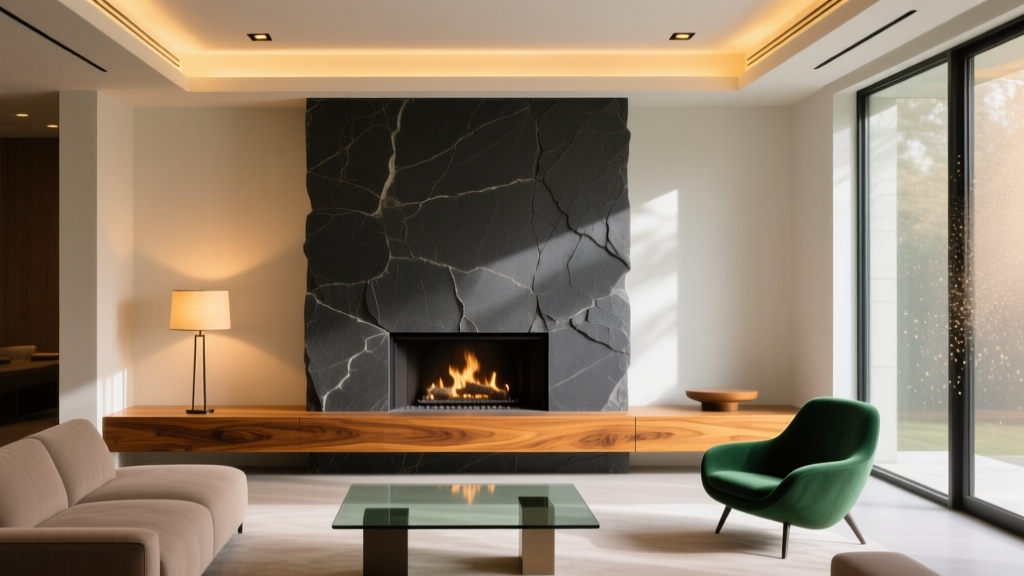
Large-format, precision-cut basalt panels (typically 12x24 inches or 24x48 inches) offer a monolithic, ultra-modern aesthetic. Basalt is an igneous rock with exceptional heat tolerance and a naturally dark, fine-grained texture. Because these panels are heavy and large, mechanical anchoring via stainless steel L-brackets hidden in the kerf cuts is required in addition to the mortar bond, especially for vertical fireplace chases extending past 8 feet.
5. Rustic River Rock with Mortar Wash
Smooth, rounded river rock veneer evokes traditional craftsman and cabin aesthetics. To prevent the 'busy' look of highly variegated stones, apply a German smear or mortar wash technique. After the stone is set and the primary mortar has cured for 48 hours, a diluted Portland cement and lime slurry is troweled over the face and partially wiped off. This unifies disparate stone colors and creates a weathered, historic patina that pairs exceptionally well with reclaimed timber mantels.
Material Comparison Matrix
| Material Type | Weight (lbs/sq ft) | Avg. Material Cost | Heat Tolerance | Best Application Profile |
|---|---|---|---|---|
| Manufactured (MSV) | 10 - 15 | $8.00 - $14.00 | High (Non-combustible) | Ledgestone, Ashlar, Dry-Stack |
| Natural Thin Limestone | 13 - 16 | $12.00 - $18.00 | Very High | Sawn squares, Tumbled fieldstone |
| Natural Thin Granite/Basalt | 15 - 19 | $16.00 - $28.00 | Extreme | Large format panels, Precision cut |
| Natural Thin Slate | 12 - 15 | $14.00 - $22.00 | High (May delaminate if layered) | Mosaic, Random flagstone |
Technical Specifications & Clearance Requirements
Adhering to structural and fire safety codes is non-negotiable when executing fireplace stone veneer ideas. The Masonry Veneer Manufacturers Association (MVMA) outlines strict substrate and clearance protocols that must be followed to prevent catastrophic failure or fire hazards.
- Combustible Clearances (NFPA 211): Any combustible material (wood mantels, drywall, wood trim) must maintain a minimum clearance of 12 inches above the firebox opening and 8 inches to the sides. Non-combustible stone veneer can extend directly to the firebox opening, provided it is backed by an approved non-combustible substrate.
- Substrate Preparation: Never apply stone veneer directly to painted drywall, greenboard, or plywood. The fireplace chase must be sheathed with 1/2-inch cement backer board (e.g., USG Durock or James Hardie HardieBacker) fastened with corrosion-resistant screws every 8 inches along the studs.
- Weather Resistive Barrier (WRB) & Lath: For exterior fireplace chimneys, apply two layers of Grade D building paper or a fluid-applied WRB over the sheathing. Follow this with self-furling, galvanized welded wire lath weighing a minimum of 2.5 lbs per square yard, attached with nails or staples that penetrate the framing studs by at least 1 inch.
- Scratch Coat: A 1/2-inch scratch coat of ASTM C270 Type S mortar is mandatory. Score the scratch coat horizontally with a coarse rake to provide a mechanical key for the setting bed. Allow 24 to 48 hours of curing time before setting the stone.
Cost Breakdown: What to Budget in 2026
Pricing for stone veneer fireplace projects varies significantly based on the profile complexity, ceiling height, and regional labor rates. The following breakdown reflects national averages for a standard 40-square-foot fireplace facade (floor to ceiling).
| Cost Category | Manufactured Stone (MSV) | Natural Thin Stone |
|---|---|---|
| Material (Stone) | $320 - $560 | $480 - $900 |
| Substrate, Lath & Mortar | $150 - $220 | $150 - $220 |
| Professional Labor | $600 - $1,000 | $800 - $1,400 |
| Total Estimated Cost | $1,070 - $1,780 | $1,430 - $2,520 |
Installation Best Practices & Failure Prevention
The most common failure modes in fireplace stone veneer installations are delamination, efflorescence, and thermal cracking. Preventing these issues requires strict adherence to material science principles.
Preventing Delamination
Delamination occurs when the stone separates from the scratch coat. This is almost always caused by failing to back-butter the stone or using expired mortar. Every piece of veneer must have a 1/2-inch layer of fresh mortar applied directly to its back before being pressed into the scratch coat. Press firmly and twist slightly to ensure 100% mortar contact. Never 'dot' the corners with mortar; full coverage is required to prevent hollow spots that will eventually crack under thermal stress.
Mitigating Efflorescence
Efflorescence manifests as a white, powdery residue on the stone surface, caused by water-soluble salts migrating through the Portland cement matrix. To minimize this on interior fireplaces, ensure the masonry materials are stored in a dry environment before installation. For exterior chimneys, install a proper weep screed at the base of the veneer to allow trapped moisture to escape, and apply a breathable, silane/siloxane-based masonry sealer after the mortar has fully cured for 28 days. Never use acrylic or film-forming sealers, which trap moisture inside the wall cavity.
Managing Thermal Expansion
Fireplaces experience extreme temperature gradients. The stone directly above the firebox will expand significantly more than the stone near the ceiling. If the veneer is installed tight against a rigid combustible mantel without a flexible caulk joint, the expanding stone will push against the wood, causing the veneer to buckle or the mantel to crack. Always leave a 1/4-inch expansion gap between the top of the stone veneer and any wooden mantel or ceiling trim, filling the gap with a high-temperature, paintable silicone caulk.
Frequently Asked Questions
Can I install stone veneer directly over an existing brick fireplace?
Yes, but preparation is critical. The existing brick must be structurally sound, unpainted, and free of soot or efflorescence. Clean the brick with a stiff brush and a solution of trisodium phosphate (TSP). If the brick is painted or sealed, you must attach metal lath directly into the brick mortar joints using masonry tapcon screws before applying a scratch coat. You cannot bond mortar directly to painted surfaces.
Do I need a special mortar for the firebox interior?
Stone veneer is strictly for the exterior surround and chase. The interior firebox must be lined with specialized refractory bricks and refractory mortar (rated for temperatures exceeding 2,000°F). Standard Portland cement mortar will calcine, crack, and fail rapidly when exposed to direct flame. For detailed interior specifications, consult the manufacturer's installation resources or a certified chimney sweep.
How long does a stone veneer fireplace installation take?
For a standard 40-square-foot facade, expect a 3-day timeline. Day 1 involves substrate preparation, hanging the cement board, and applying the wire lath and scratch coat. Day 2 is dedicated to setting the stone and cutting corner pieces. Day 3 is reserved for pointing the mortar joints (if not using a dry-stack profile) and final cleanup. The mortar requires a full 28 days to reach maximum compressive strength, though it will be hard to the touch within 48 hours.
Written by
Sarah WhitfieldSarah Whitfield is a chartered quantity surveyor (MRICS) and construction cost analyst with 15 years of experience in material pricing, procurement strategy, and project budgeting. She earned her degree in Construction Management from the University of Reading (UK) and has worked on projects ranging from $2M custom homes to $180M mixed-use developments across North America and Europe. Sarah currently leads cost estimating for BuildMat Insight, maintaining a proprietary database of 4,000+ material price points updated quarterly. She is a frequent contributor to RSMeans cost data panels and has presented at the International Cost Engineering Council (ICEC) congress. Based in Denver, CO, Sarah is an avid trail runner and volunteer mentor for Women in Construction.
More from Sarah Whitfield
View all
Wood & Lumber
What Are the Different Types of Wood? A Builder's Guide
Compare structural softwoods, finish hardwoods, and engineered lumber. Analyze Janka ratings, MOE values, and 2026 pricing for construction.
Aug 4, 2026

Walls & Panels
Steel Framing vs Wood Framing: Corrosion and Moisture Defense
Compare steel framing vs wood framing for moisture resistance. Learn about galvanized coatings, condensation risks, and corrosion protection strategies.
Jul 21, 2026

Stone & Masonry
How to Cut Stone Veneer: Wet Saw vs Grinder Comparison
Compare the best tools for cutting stone veneer. We review wet saws, angle grinders, and chop saws to help you achieve clean, chip-free cuts.
Jul 21, 2026