Fireplace Stone Veneer Panels: Complete Material Guide
Explore types, costs, and installation specs for fireplace stone veneer panels. Compare manufactured vs. natural stone for your hearth upgrade.

The Core Material Matrix: Natural vs. Manufactured vs. Faux
Selecting the right fireplace stone veneer panels requires understanding the structural and thermal differences between the three primary material categories. While all three provide a masonry aesthetic, their weight, installation requirements, and heat tolerance vary drastically. Manufactured stone veneer (MSV) has become the industry standard for interior hearth surrounds due to its optimal balance of weight, cost, and visual fidelity.
| Material Type | Weight (lbs/sq ft) | Thickness | Heat Tolerance | Avg Material Cost (2026) |
|---|---|---|---|---|
| Natural Stone (Thin Veneer) | 15 - 25 lbs | 0.75 - 1.5 inches | Non-combustible (ASTM E136) | $14.00 - $28.00 |
| Manufactured Stone Veneer (MSV) | 10 - 15 lbs | 0.5 - 1.25 inches | Non-combustible (ASTM E136) | $8.00 - $16.00 |
| Polyurethane Faux Stone Panels | 1 - 2 lbs | 1.5 - 2.5 inches | Combustible (Requires Clearances) | $10.00 - $18.00 |
Natural thin veneer is sliced from real quarried stone, offering authentic mineral variations but requiring heavy-duty substrate reinforcement. MSV is cast from Portland cement, lightweight aggregates, and iron oxide pigments in molds taken from real stone. High-density polyurethane faux panels are the lightest and install with construction adhesive, but they cannot be placed directly against high-heat firebox openings without maintaining strict manufacturer-specified combustible clearances.
Heat Tolerance, Clearances, and Substrate Specs
The most critical failure point in fireplace stone veneer panel installations is ignoring thermal dynamics. Both natural stone and MSV are inherently non-combustible and will not ignite or off-gas when exposed to the radiant heat of a wood-burning or gas fireplace. However, the substrate behind the stone and the adhesives used must also be rated for high-heat environments.
Never apply mortar-based stone veneer directly to standard gypsum drywall or green board. The moisture from the scratch coat will degrade the gypsum core, and the weight of the stone will cause catastrophic structural failure. You must install a minimum 1/2-inch cement backer board (such as USG Durock or James Hardie HardieBacker) secured with alkali-resistant screws spaced 8 inches on center.
According to the NFPA 211 standard for chimneys, fireplaces, and vents, combustible materials must maintain specific clearance distances from the firebox opening. While the stone itself is non-combustible, if you are using a zero-clearance gas insert, you must follow the insert manufacturer's exact framing and finishing clearances. Typically, this means leaving a 1/4-inch expansion gap between the stone veneer and the metal chassis of the fireplace insert, filled with a high-temperature, non-combustible ceramic fiber rope and sealed with refractory caulk.
Profile Selection: Matching Veneer to Fireplace Type
The visual profile of your stone veneer should complement the architectural style and the type of fireplace insert you are using. Leading manufacturers like Eldorado Stone and Cultured Stone categorize their panels into distinct profiles that dictate the installation pattern and mortar joint technique.
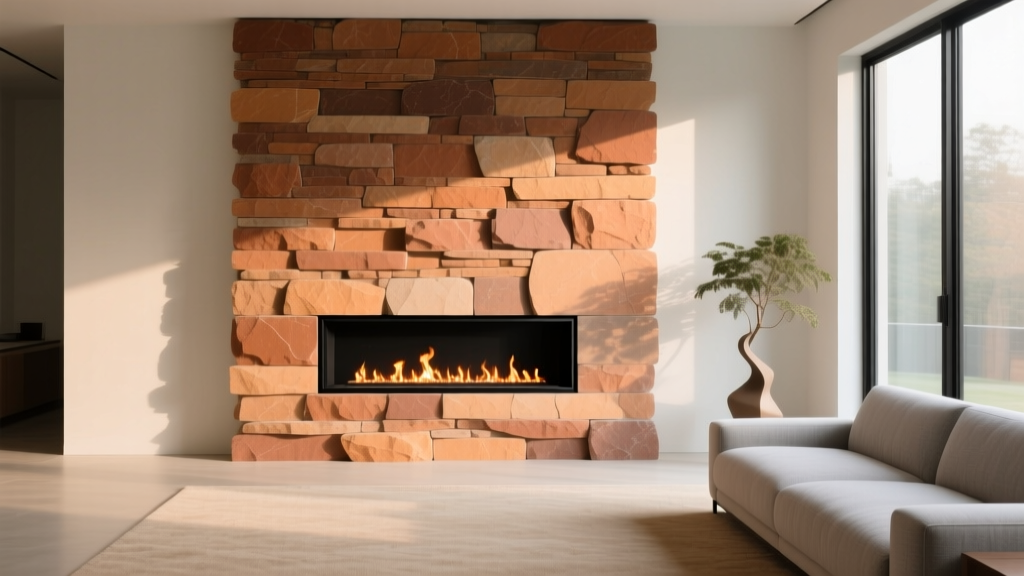
- Ledgestone / Stacked Profiles: Characterized by long, horizontal, linear stones with tight, dry-stacked joints (no visible mortar). This profile is the definitive choice for modern, linear gas fireplaces. The horizontal lines emphasize the wide, low-profile shape of contemporary fireboxes. Installation requires a level laser line and precise cutting to maintain continuous horizontal reveals.
- Fieldstone / Cobble Profiles: Features rounded, irregular, and varied stone sizes with prominent, recessed mortar joints. This profile pairs perfectly with traditional wood-burning masonry fireplaces or rustic cast-iron stove alcoves. The installation is more forgiving regarding leveling but requires careful 'chinking' of smaller stones to fill gaps between larger fieldstones.
- Ashlar / Cut Stone Profiles: Mimics squared, quarried masonry with clean lines and consistent joint widths. Ideal for transitional or craftsman-style homes. This profile requires a wet saw with a continuous rim diamond blade to achieve the precise 45-degree miter cuts needed for outside corners on a protruding hearth chimney breast.
Step-by-Step Substrate and Mortar Preparation
Proper preparation dictates the longevity of interior fireplace stone veneer panels. Mortar-based installations require a multi-layer approach to ensure adequate bond strength and prevent thermal spalling.
- Substrate Installation: Screw 1/2-inch cement board to the wall studs. Tape all seams with 2-inch alkali-resistant fiberglass mesh tape. Do not use standard drywall tape, as it will dissolve in the alkaline environment of Portland cement.
- Weather-Resistive Barrier (Optional but Recommended): While not strictly required for interior applications, applying a layer of 15-lb asphalt felt or Grade D building paper over the cement board protects the substrate from moisture during the mortar application phase.
- Wire Lath Application: Staple or screw self-furring 2.5 lb galvanized woven wire lath over the barrier. Ensure the lath overlaps by 1 inch at all seams and wraps continuously around outside corners by at least 16 inches to prevent corner cracking.
- The Scratch Coat: Apply a 1/2-inch layer of Type S masonry mortar or a polymer-modified veneer mortar over the lath. Use a notched trowel to horizontally rake the surface, creating deep grooves that provide a mechanical key for the final stone application. Allow the scratch coat to cure for a minimum of 24 to 48 hours.
- Stone Setting: Butter the back of each stone panel with a 1/2-inch layer of mortar. Press firmly into the scratch coat until mortar squeezes out slightly at the edges. For dry-stack profiles, carefully wipe away excess mortar immediately with a stiff, dry brush before it cures.
2026 Cost Breakdown for Fireplace Surrounds
Budgeting for a fireplace stone veneer upgrade requires factoring in not just the stone, but the specialized prep materials and skilled masonry labor. The average interior fireplace surround (including the chimney breast up to the ceiling) covers between 30 and 60 square feet.
| Cost Component | Low Estimate (Basic MSV) | High Estimate (Premium Natural) |
|---|---|---|
| Stone Material (per sq ft) | $8.00 | $28.00 |
| Prep Materials (Cement board, lath, mortar) | $2.50 | $4.50 |
| Masonry Labor (per sq ft) | $18.00 | $35.00 |
| Sealer and Finishing Supplies | $1.00 | $3.00 |
| Total Estimated Cost (40 sq ft surround) | $1,180 | $2,820 |
Labor costs fluctuate significantly based on the profile chosen. Dry-stack ledgestone installations often command a 15% to 20% labor premium over standard fieldstone because the lack of mortar joints means every single stone must be perfectly leveled; there is no mortar to hide uneven cuts or gaps.
Troubleshooting Common Fireplace Veneer Failures
Even high-quality fireplace stone veneer panels can fail if subjected to improper environmental conditions or incorrect installation techniques. Understanding these failure modes allows for proactive prevention.
Symptom: White, Powdery Residue on Stone Surface (Efflorescence)
Cause: Water-soluble salts within the Portland cement mortar or the masonry chimney structure are being drawn to the surface by moisture evaporation. In interior fireplaces, this is often caused by applying stone to a damp chimney breast or using mortar with excessive water content.
Fix: Allow the veneer to fully cure for 30 days. Brush the surface with a dry, stiff nylon brush. If the residue persists, wash with a diluted solution of white vinegar and water (1 part vinegar to 5 parts water), then rinse thoroughly. Never use muriatic acid on manufactured stone veneer, as it will strip the iron oxide pigments and permanently bleach the stone.
Symptom: Stone Delaminating or Popping Off Near the Firebox
Cause: Thermal expansion and contraction. The metal firebox and the masonry veneer expand at different rates when heated. If the stone was mortared directly against the metal chassis without an expansion joint, the thermal stress will break the mortar bond.
Fix: Remove the affected stones. Install a non-combustible expansion gap (minimum 1/4 inch) between the veneer and the firebox metal. Re-set the stones using a high-quality, flexible, polymer-modified mortar that can withstand minor thermal deflection.
Symptom: Surface Spalling or Flaking After Sealing
Cause: Applying a film-forming acrylic sealer to interior fireplace stone. When the fireplace is lit, the heat drives residual moisture within the masonry outward. A film-forming sealer traps this moisture, causing the face of the stone to blister and flake off under steam pressure.
Fix: If spalling has begun, the sealer must be stripped using a commercial masonry sealer remover. Once stripped and dried, apply only a breathable, penetrating silane/siloxane sealer. These sealers line the pores of the stone to repel liquid water and stains while allowing water vapor to escape freely during heating cycles.
Expert Sourcing and Maintenance
When sourcing fireplace stone veneer panels, always request the manufacturer's technical data sheet (TDS) and verify the product's compliance with ASTM C1670 (Standard Specification for Adhered Manufactured Stone Masonry Veneer). For interior hearths, prioritize products that explicitly state zero VOC emissions when exposed to temperatures up to 200°F to maintain indoor air quality. Routine maintenance requires only occasional dusting with a microfiber cloth; avoid using harsh chemical cleaners or abrasive scrubbing pads that can dull the matte finish of manufactured stone pigments.
Written by
James ThorntonJames Thornton is a construction industry veteran with 25 years of hands-on experience in wood framing, lumber grading, and residential building codes. He started as a framing carpenter in rural Oregon, earned his ICC Residential Building Inspector certification, and eventually became a senior plan reviewer for the City of Portland Bureau of Development Services. James holds a B.S. in Wood Science & Technology from Oregon State University and is a certified lumber grader through the West Coast Lumber Inspection Bureau (WCLIB). He has inspected over 3,000 residential construction sites and authored the city's internal guide on advanced framing techniques (2x6 at 24" O.C.). James lives in Bend, OR, where he builds custom timber-frame cabins and competes in lumberjack sports.
More from James Thornton
View all
Insulation
Best Home Insulation Materials: Complete 2026 Guide
Compare top home insulation materials for 2026. Find R-values, installed costs per square foot, and best uses for fiberglass, spray foam, and mineral wool.
Aug 4, 2026

Sustainable Building
Certify Your Green Building Material for LEED and WELL
Step-by-step guide to certifying a green building material for LEED v5 and WELL v2. Master EPDs, HPDs, and VOC limits for 2026 project specifications.
Aug 4, 2026

Stone & Masonry
Veneer Stacked Stone Panels: Interior Design & Style Showcase
Discover how veneer stacked stone panels transform interiors. Explore modern design profiles, material pairings, and technical installation specs.
Aug 4, 2026