How to Install Stone Veneer Fireplace for Low-Maintenance Care
Learn how to install stone veneer fireplace surrounds with a focus on long-term care, moisture prevention, and heat-resistant mortar and sealing techniques.

The Maintenance-First Approach to Fireplace Veneer
When researching how to install stone veneer fireplace surrounds, most guides focus exclusively on aesthetics and basic adhesion. However, a fireplace is a high-heat, high-soot, and high-moisture transition zone. If you install veneer without considering long-term maintenance, you will inevitably deal with efflorescence, heat-induced spalling, and soot trapped in porous mortar joints. The secret to a zero-maintenance fireplace surround is making specific, intentional choices during the installation phase. This guide reframes the installation process through a maintenance lens, ensuring your stone veneer looks pristine for decades with minimal upkeep.
Substrate & Clearances: Preventing Heat and Moisture Damage
The most common maintenance failure in fireplace veneer isn't the stone itself; it is the degradation of the substrate behind it due to thermal cycling and moisture trapping. Drywall and standard green board are entirely unsuitable for the immediate firebox surround.
The 18-Inch Non-Combustible Rule
According to NFPA 211 standards for chimneys and fireplaces, combustible materials must maintain strict clearances from the firebox opening. For the immediate surround, you must use a non-combustible cement backer board, such as USG Durock Next Gen or HardieBacker 500. These boards withstand the extreme thermal expansion and contraction that causes standard gypsum to crack, which would otherwise lead to veneer delamination and costly repairs.
Moisture Management with Metal Lath
Before applying mortar, staple 2.5 lb self-furring galvanized metal lath over a weather-resistive barrier (if exterior) or directly to the cement board (if interior). The self-furring dimples hold the lath away from the board, allowing the scratch coat to fully encapsulate the wire. This prevents rust stains from bleeding through the stone pores—a common maintenance nightmare in humid climates.
Mortar Selection: Avoiding Efflorescence Before It Starts
Efflorescence (the white, powdery salt deposit on stone and mortar) is the number one aesthetic maintenance issue with masonry. It occurs when water-soluble salts migrate to the surface. While you cannot eliminate salts entirely, your mortar choice during installation dictates how severe the problem will be.
| Mortar Type | Composition | Maintenance Profile & Heat Resistance |
|---|---|---|
| Standard Type S (ASTM C270) | Portland cement, lime, sand | High compressive strength. Moderate efflorescence risk. Requires periodic sealing to prevent salt migration. |
| Polymer-Modified (e.g., LATICRETE 4-XLT) | Cement fortified with acrylic polymers | Excellent non-sag properties. Polymers reduce water permeability, significantly lowering efflorescence risk. Highly recommended for fireplace surrounds. |
| Mastic / Organic Adhesive | Acrylic emulsion paste | AVOID. Not rated for high-heat fireplace applications. Will degrade, yellow, and lose adhesion under thermal cycling. |
For a low-maintenance fireplace, invest in a high-quality polymer-modified mortar. While it costs roughly 30% more upfront than standard ASTM C270 Type S mix, the reduction in water permeability virtually eliminates the need for aggressive efflorescence cleaning down the line.
Installation Techniques for Zero-Maintenance Joints
How you tool the mortar joints during installation determines how much soot, ash, and dust your fireplace will collect over its lifetime. Fireplaces are inherently dirty environments; your joint profile must actively shed particulate matter rather than trap it.
The Problem with Raked and V-Joints
A raked joint (where mortar is scraped back 1/4 inch from the stone face) or a deep V-joint creates a horizontal shelf. On a fireplace surround, these shelves act as microscopic catch-basins for airborne soot, wood ash, and household dust. Within a single burning season, raked joints will turn black and require painstaking scrubbing with a wire brush and masonry cleaner.
The Solution: Flush and Concave Tooling
To minimize future cleaning, use a flush or slightly concave joint profile.
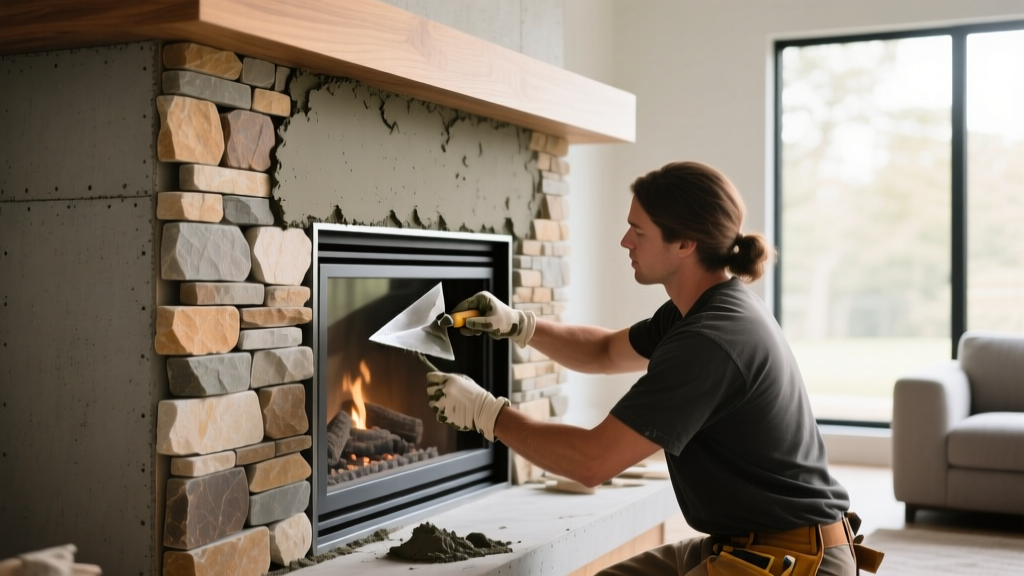
- Flush Joints: Strike the mortar perfectly level with the stone face using a margin trowel. This leaves no ledges for dust to settle on.
- Concave Joints: Use a convex jointing iron to compress the mortar into a smooth, inward curve. This not only sheds dust but also compresses the mortar surface, making it denser and more resistant to moisture absorption.
Sealing Strategies: To Seal or Not to Seal?
The National Concrete Masonry Association and most manufactured stone veneer (MSV) producers advise against sealing exterior veneer, as it can trap moisture and cause spalling. However, an interior fireplace surround is a controlled environment, and sealing is highly recommended to prevent soot and smoke staining. The critical factor is choosing a sealer that can withstand high heat without yellowing or off-gassing.
Silane/Siloxane vs. Acrylic Sealers
Never use a film-forming acrylic or urethane sealer on a fireplace surround. When exposed to the radiant heat of a roaring fire, acrylics will soften, turn yellow, and emit a foul chemical odor. Furthermore, they create a plastic-like sheen that ruins the natural look of the stone.
Instead, use a penetrating Silane/Siloxane sealer (such as Prosoco Siloxa-Tek 8505 or SX-5000). These sealers react chemically within the pores of the stone and mortar to create a hydrophobic barrier without altering the surface appearance or forming a topical film. They are completely heat-stable, odorless once cured, and allow the masonry to breathe, preventing trapped moisture from blowing the stone off the wall during rapid heating.
Post-Installation Care & Cleaning Protocols
Even with a perfect, maintenance-focused installation, your fireplace will require occasional cleaning. Follow these protocols to protect your mortar and stone:
- Routine Dusting: Use a dry, soft-bristle masonry brush or a vacuum with a brush attachment. Never use a wet cloth for routine dusting, as water will turn fine ash into a caustic lye paste that stains the mortar.
- Soot Removal: For stubborn soot stains on the stone face, use a specialized, pH-neutral masonry soot remover. Avoid muriatic acid or harsh brick cleaners near the firebox; acid degrades the lime in the mortar joints, leading to crumbling and repointing needs.
- Sealer Reapplication: Penetrating siloxane sealers typically last 5 to 7 years on interior fireplaces. Test the sealer annually by flicking a few drops of water onto the stone. If it beads up, the sealer is intact. If it absorbs, it is time to reapply.
Frequently Asked Questions
Can I install stone veneer over an existing brick fireplace?
Yes, but only if the brick is unpainted and structurally sound. If the brick is painted, the paint must be completely removed via sandblasting or chemical stripping. Heat from the fireplace will cause the paint to blister, taking the new stone veneer with it. If you cannot remove the paint, you must install cement board over the brick using masonry tapcons before applying the veneer.
Do I need a weep screed for an interior fireplace?
Weep screeds are mandatory for exterior applications to allow moisture to escape the wall assembly. For a strictly interior, above-grade fireplace surround built with cement board, a weep screed is generally not required by code, provided the substrate is completely dry and protected from ambient household humidity.
How close can the stone veneer be to the actual fire?
The stone and mortar themselves are non-combustible, but the clearance is dictated by the firebox manufacturer's specifications and NFPA 211. Generally, the veneer can abut the metal firebox flange, but you must leave the expansion gaps specified by the fireplace insert manufacturer to prevent the expanding metal from cracking your mortar joints during heating cycles.
Written by
David NakamuraDavid Nakamura is a licensed architect (AIA) and construction technology writer focused on sustainable building methods, mass timber engineering, and high-performance building envelopes. He holds a Master of Architecture from the University of Washington and is a certified Passive House Consultant (CPHC). David spent eight years at the Seattle firm Mithun, where he led the design of three LEED Platinum projects, before founding his own practice specializing in net-zero residential design. He serves on the editorial advisory board of GreenBuilder Magazine and has authored peer-reviewed papers on cross-laminated timber (CLT) connections for the Journal of Structural Engineering. In his spare time, David teaches woodworking at Pratt Fine Arts Center and kayaks the Puget Sound.
More from David Nakamura
View all
Construction Cost
Labor Cost to Build a Deck Per Sq Ft: 2026 Installation Guide
Discover the exact labor cost to build a deck per sq ft in 2026. This installation guide breaks down contractor rates, complexity factors, and hidden fees.
Aug 4, 2026

Construction Cost
How Much Does It Cost to Build a 3 Bedroom House? Financing Guide
Learn exactly how much it costs to build a 3 bedroom house and explore 2026 financing options, construction loan types, and budget frameworks for your build.
Aug 4, 2026

Construction Cost
Cost to Build a Tennis Court: 2026 Guide
How much does it cost to build a tennis court in 2026? Breakdowns for asphalt, concrete, and synthetic surfaces plus fencing and lighting.
Jul 30, 2026