How to Install Real Stone Veneer Near Me: A Mason's Guide
Master the installation of real stone veneer. Learn local sourcing tips, structural prep, mortar selection, and step-by-step masonry techniques.

Sourcing Real Stone Veneer Near Me: What to Look For
When searching for "real stone veneer near me," you are looking for natural stone—such as limestone, granite, fieldstone, or sandstone—that has been diamond-sawn to a thickness of 1 to 2 inches. Unlike full-bed natural stone which weighs upwards of 40 pounds per square foot, real thin stone veneer typically weighs between 10 and 15 pounds per square foot. This weight reduction allows it to be installed on standard wood-framed or CMU (concrete masonry unit) substrates without requiring additional structural footings.
When you buy natural thin veneer from a local quarry or architectural stone supplier, the back of the stone is often smooth from the diamond saw slicing process. Unlike manufactured concrete veneer which has a textured back, or full-bed stone which has a natural split back, a sawn natural stone back offers poor mechanical adhesion. To prevent delamination, you must either score the back of the stone with a masonry blade before installation or use a polymer-modified mortar specifically designed for low-porosity, smooth-backed natural stone.
To find high-quality real stone veneer locally, bypass big-box home improvement centers and search for regional stone quarries, masonry supply yards, or landscape stone distributors. Ask the supplier if their veneer meets ASTM C616 (for sandstone) or ASTM C568 (for limestone) standards for exterior durability, specifically regarding absorption and density.
Pre-Installation: Structural and Moisture Prep
Proper substrate preparation is the most critical phase of exterior stone veneer installation. Failure in the moisture management layer will lead to rot, mold, and eventual veneer collapse.
Step 1: Weather-Resistive Barrier (WRB)
For wood-framed structures, install two layers of Grade D asphalt felt paper or a high-performance commercial WRB like Tyvek CommercialWrap over the exterior sheathing. Overlap horizontal seams by 2 inches and vertical seams by 6 inches. Integrate the WRB with all window and door flashings using compatible flashing tapes.
Step 2: Metal Lath Application
Apply 2.5 lb self-furring galvanized wire lath (compliant with ASTM C847) horizontally over the WRB. The self-furring dimples must face outward, away from the wall, to allow the scratch coat to wrap behind the wire.
- Fasteners: Use 1-1/4 inch galvanized roofing nails or staples driven directly into the wall studs every 6 inches on center.
- Overlaps: Overlap lath seams by 1 inch horizontally and 2 inches vertically.
- Corners: Wrap the lath around all exterior and interior corners by at least 8 inches to prevent corner cracking.
The Scratch Coat and Mortar Selection
Before applying the stone, you must apply a scratch coat of mortar to embed the lath and create a rigid, textured base. Apply a 1/2-inch to 3/4-inch layer of mortar over the lath. While the mortar is still wet, use a raking tool or a coarse brush to score horizontal lines into the surface. This provides a mechanical key for the setting mortar. Allow the scratch coat to cure for a minimum of 24 to 48 hours, keeping it damp by misting with water if temperatures exceed 80°F.
Mortar Selection Matrix
Choosing the correct mortar is vital for natural stone. The Portland Cement Association outlines specific mortar types based on compressive strength and flexibility. According to guidelines from The Masonry Society, the mortar should generally be slightly weaker than the stone it binds to prevent spalling.
| Mortar Type | Compressive Strength | Best Application for Real Stone |
|---|---|---|
| Type S | 1,800 PSI | Exterior applications, below-grade, and dense stones (granite, quartzite). High bond strength. |
| Type N | 750 PSI | Exterior above-grade for softer, high-porosity stones (sandstone, soft limestone) to allow for thermal movement. |
| Polymer-Modified Veneer | Varies (High Bond) | Sawn-back natural thin veneer. Brands like SPEC MIX Veneer Stone Mortar contain polymers for superior adhesion to smooth surfaces. |
Step-by-Step Installation of Natural Stone Veneer
Once the scratch coat has cured, you are ready to set the stone. Follow this sequence to ensure structural integrity and aesthetic consistency.
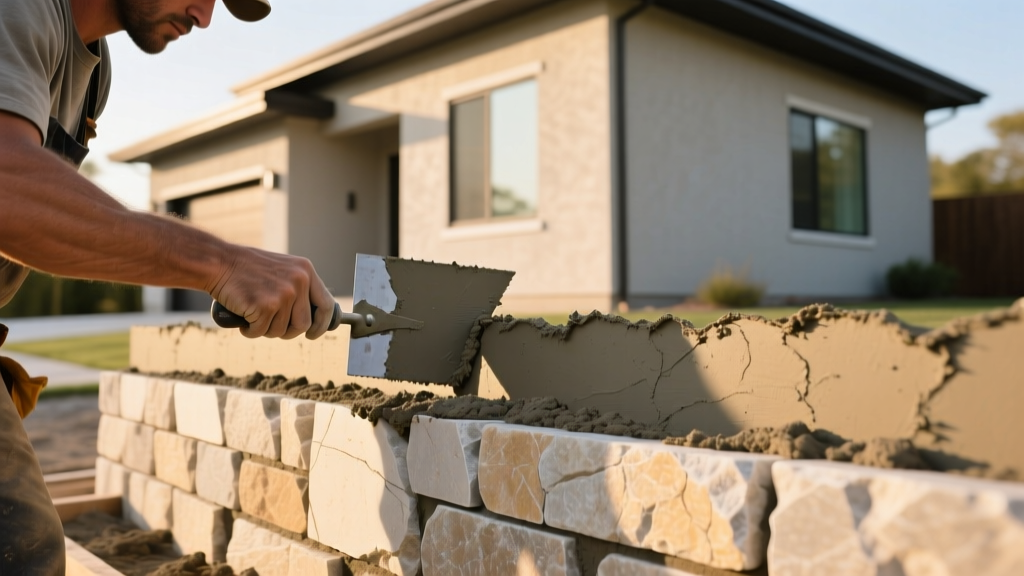
- Dry Layout and Corner First: Lay out your stones on the ground to mix sizes, colors, and shapes. Always install cornerstones first. This establishes the plumb lines and the depth of the return for the field stones.
- Buttering the Stone: Using a masonry trowel, apply a 1/2-inch thick layer of setting mortar to the entire back of the stone. Ensure complete coverage; voids behind the stone will trap water, which will freeze and expand in winter, popping the stone off the wall.
- Setting and Twisting: Press the mortared stone firmly into the scratch coat. Apply a slight twisting motion to squeeze the mortar out the sides and ensure full contact with the substrate.
- Maintaining Joints: Keep a consistent joint width, typically between 1/2-inch and 1-inch for dry-stacked or tight-fit profiles, and up to 2 inches for rustic fieldstone. Use wooden spacers or a jointing tool to maintain consistency.
- Pointing the Joints: Once the mortar has set enough to support the stone (usually 30 to 60 minutes), fill the joints using a pointing bag. Avoid smearing mortar on the face of the natural stone, as real stone is highly porous and mortar stains are notoriously difficult to remove.
- Striking and Cleaning: Strike the joints with a convex jointing tool to compact the mortar and shed water. Brush off excess mortar with a stiff, dry natural-bristle brush. Never use a wire brush on natural stone, as it will leave rust stains and scratch the surface.
To prevent efflorescence (white salt deposits) and water wicking, real stone veneer must terminate at least 4 inches above final grade for soil, and 2 inches above paved surfaces like concrete patios. Never allow the stone or the mortar joints to make direct contact with the ground.
Cost Breakdown: Local Real Stone vs. Manufactured
Sourcing real stone veneer near you can significantly reduce freight costs, which is a major factor when dealing with heavy masonry materials. Below is a comparative cost analysis for 2026 exterior installations.
| Cost Factor | Real Natural Stone Veneer | Manufactured Concrete Veneer |
|---|---|---|
| Material Cost (per sq. ft.) | $14.00 - $26.00 | $8.00 - $14.00 |
| Prep & Mortar Materials | $3.50 - $5.00 | $3.50 - $5.00 |
| Professional Labor (per sq. ft.) | $18.00 - $35.00 | $15.00 - $25.00 |
| Total Installed Cost | $35.50 - $66.00 | $26.50 - $44.00 |
| Expected Lifespan | 100+ Years | 50 - 75 Years |
Maintenance and Sealing Protocols
Natural stone is a breathable material. Sealing it incorrectly can trap moisture inside the wall cavity, leading to catastrophic freeze-thaw damage. If you choose to seal your exterior real stone veneer to prevent staining and water intrusion, you must use a penetrating, vapor-permeable sealer.
- Recommended: Silane/Siloxane penetrating sealers (e.g., PROSOCO Siloxa-Tek 8500). These chemicals react within the pores of the stone to create a hydrophobic barrier while allowing water vapor to escape.
- Avoid: Film-forming acrylic or urethane sealers. These create a plastic-like shell on the surface that traps moisture behind the stone and will eventually yellow, peel, and degrade under UV exposure.
Apply the sealer using a low-pressure pump sprayer in two wet-on-wet coats, ensuring the stone surface is completely dry and free of efflorescence prior to application. Reapplication is typically required every 5 to 7 years depending on local weather exposure and UV intensity.
Written by
Priya KapoorPriya Kapoor is a real estate market analyst and construction economics researcher with expertise in housing affordability, development feasibility, and infrastructure investment. She holds a Master of Regional Planning from Cornell University and previously worked as a senior analyst at CBRE's Investment Properties group, where she modeled returns for $4B in mixed-use development pipelines. Priya now runs an independent research practice advising developers, municipalities, and REITs on construction cost forecasting and market timing. She publishes the quarterly "BuildMat Market Pulse" report tracking material price indices across 12 commodity categories. Based in Austin, TX, Priya serves on the board of Habitat for Humanity Austin and is a marathon runner.
More from Priya Kapoor
View all
Construction Cost
Cost to Build a 1600 Sq Ft Home in 2026: Full Breakdown
Accurate 2026 cost to build a 1600 sq ft home—material, labor, and regional pricing breakdowns included. Plan your budget with real-time estimates.
Aug 11, 2026

Wood & Lumber
Name the Types of Wood for Pressure Treatment and Preservation
Learn how to name the types of wood best suited for pressure treatment. Compare species treatability, chemical retention levels, and 2026 preservation costs.
Aug 4, 2026

Stone & Masonry
Stone Veneer Suppliers Lindenhurst: 2026 Cost Analysis
Analyze 2026 stone veneer costs in Lindenhurst, NY. Compare local supplier pricing, delivery fees, and Suffolk County installation labor rates.
Aug 4, 2026