Building Cost to Knock Through a Wall: Full Breakdown
Discover the exact building cost to knock through a wall. Detailed pricing for load-bearing beams, permits, demolition, and hidden expenses.

The True Building Cost to Knock Through a Wall
Removing an interior wall to create an open-concept layout is one of the highest-ROI renovations a homeowner can undertake, but the financial variables are complex. The building cost to knock through a wall ranges from $800 for a simple non-load-bearing partition to over $15,000 for a multi-span load-bearing wall requiring steel beams, foundation reinforcement, and HVAC rerouting. Understanding where your budget goes—and where contractors hide their margins—requires a granular breakdown of structural engineering, material selection, and hidden site conditions.
Cost Matrix: Non-Load-Bearing vs. Load-Bearing Removal
| Project Phase | Non-Load-Bearing (Partition) | Load-Bearing (Single Span) | Load-Bearing (Multi-Span/Flush) |
|---|---|---|---|
| Engineering & Permits | $0 - $150 | $600 - $1,500 | $1,200 - $2,500 |
| Demolition & Disposal | $400 - $800 | $800 - $1,500 | $1,500 - $2,500 |
| Structural Beam / Support | N/A | $1,200 - $3,500 | $4,000 - $8,000+ |
| MEP Rerouting | $150 - $500 | $500 - $2,500 | $1,500 - $4,000 |
| Drywall & Flooring Patch | $600 - $1,200 | $1,200 - $2,500 | $2,500 - $4,500 |
| Estimated Total | $1,150 - $2,650 | $4,300 - $11,500 | $10,700 - $21,500+ |
The Structural Divide: Identifying Your Wall Type
Before calculating material costs, you must determine if the wall is load-bearing. Load-bearing walls transfer the weight of the roof, upper floors, and snow loads down to the foundation. Non-load-bearing walls simply divide space. You can identify a load-bearing wall by checking the attic or basement: if the floor joists or roof trusses run perpendicular to the wall in question, or if the wall sits directly above a central steel I-beam in the basement, it is load-bearing. Removing a load-bearing wall without installing a properly sized replacement beam will result in catastrophic structural deflection, sagging floors, and drywall cracking within weeks.
Itemized Cost Breakdown by Project Phase
1. Structural Engineering and Permitting
Local building departments require stamped architectural or engineering drawings for any load-bearing alteration. A licensed structural engineer will calculate the required beam size based on the span, dead loads (weight of the structure), and live loads (occupants and furniture). Expect to pay $500 to $1,500 for this service. Permit fees typically range from $150 to $400, depending on your municipality's valuation of the project. Skipping the permit risks code enforcement fines and will inevitably derail a future real estate transaction during the buyer's inspection phase.
2. Demolition, Abatement, and Debris
Demolition is not just swinging a sledgehammer. It requires systematic deconstruction to protect adjacent finishes and manage dust. For homes built before 1980, the EPA mandates testing for asbestos and lead-based paint. Testing costs $250 to $450. If asbestos is found in the drywall joint compound or flooring mastic, professional abatement will add $1,500 to $3,500 to the budget. Standard demolition and hauling for a 12-foot wall, including a 15-yard roll-off dumpster rental ($400), typically costs $800 to $1,200.
3. Beam Selection: LVL vs. Steel RSJ
The replacement beam is the core structural component. You have two primary choices:
- Laminated Veneer Lumber (LVL): Engineered wood beams are the industry standard for residential spans up to 20 feet. LVLs are lightweight, easy for carpenters to cut on-site, and cost between $4 and $9 per linear foot. They must be protected from moisture during installation to prevent warping.
- Steel Rolled Steel Joist (RSJ): Required for spans exceeding 20 feet or when minimizing the beam's depth is critical. Steel costs $15 to $30 per linear foot, but the hidden costs are higher. Steel requires specialized labor to bolt or weld, heavy equipment to lift, and must be coated with intumescent fireproofing paint to meet the International Code Council (ICC) fire-resistance ratings for residential structures.
4. MEP Rerouting (Mechanical, Electrical, Plumbing)
Interior walls are the primary highways for a home's utilities. Rerouting these systems is where budgets frequently explode.
- Electrical: Moving standard 12/2 Romex wiring and outlets costs $150 to $300 per drop.
- Plumbing: Relocating a 3-inch PVC drain line or copper supply lines from a wall to the floor joists costs $600 to $1,500.
- HVAC: If a main 10-inch metal trunk line runs through the wall, rerouting the ductwork through the ceiling or floor cavity can cost $1,200 to $3,000, requiring a licensed HVAC technician to rebalance the system's static pressure.
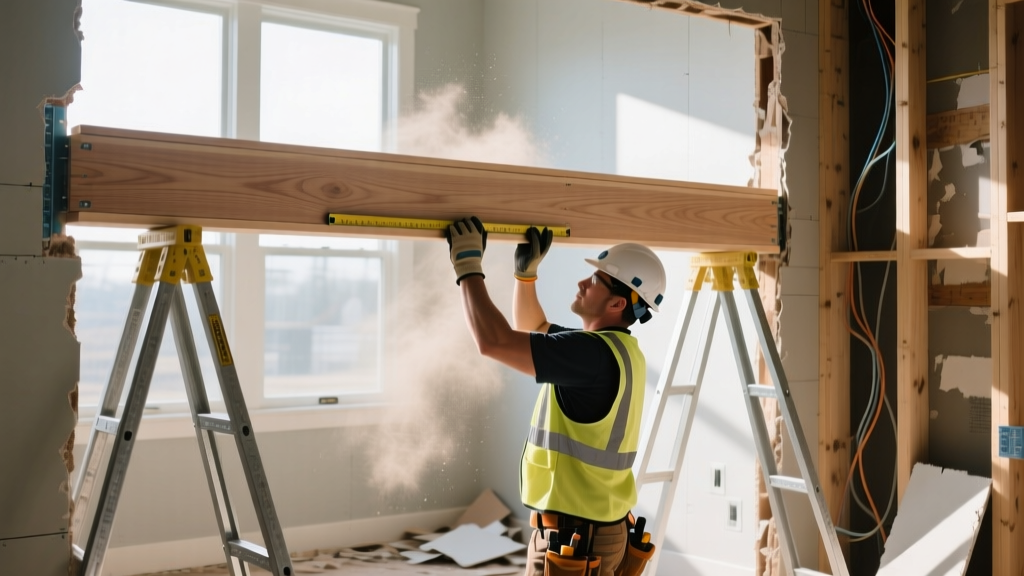
When you install a beam, the massive weight it carries transfers to the two ends (point loads). If these ends rest on standard 2x10 floor joists without reinforcement, the floor will sag. A structural engineer will often specify a structural post (like a 4x4 steel tube) extending down to the basement, requiring a new concrete footing pad (minimum 3000 PSI, 18x18 inches) poured directly on undisturbed soil. Budget an extra $800 to $1,500 for footing excavation and concrete work if point load reinforcement is required.
Edge Cases That Inflate the Budget
Standard pricing assumes a dropped beam (a beam that hangs below the ceiling line, creating a visible soffit). However, many homeowners want a flush beam (recessed into the ceiling cavity to maintain a flat, uninterrupted ceiling). Installing a flush beam costs 30% to 50% more than a dropped beam. It requires the contractor to install temporary shoring walls, cut the existing ceiling joists, and attach them to the new beam using heavy-duty joist hangers (such as the Simpson Strong-Tie LUS series) with structural screws. The labor intensity and additional hardware required for a flush beam easily add $2,000 to $4,000 to the project.
Another edge case is masonry walls. If the interior wall is constructed of brick or cinder block rather than wood studs, demolition requires rotary hammers, masonry blades, and significantly more labor. Expect demolition costs for masonry walls to be double or triple that of standard timber-framed walls.
Execution Timeline: What to Expect
A professional crew will typically execute a load-bearing wall removal in the following sequence:
- Day 1: Site protection, dust barriers, and installation of temporary shoring walls (acrow props and strongboys) to hold the ceiling load.
- Day 2: Careful demolition of drywall and stud framing. MEP rough-in rerouting begins.
- Day 3: Beam delivery, hoisting, and securing. Installation of post-to-beam and beam-to-foundation connections.
- Day 4: MEP final connections, removal of temporary shoring, and structural inspection by the local building official.
- Days 5-7: Drywall hanging, taping, mudding, sanding, and flooring patching.
Safety and Compliance Standards
Demolition and structural alteration are heavily regulated to protect worker safety and structural integrity. Contractors must adhere to OSHA demolition guidelines, which mandate specific shoring protocols to prevent premature structural collapse during the removal process. Furthermore, when selecting engineered wood beams, ensure the materials meet the specifications outlined by APA - The Engineered Wood Association, which governs the manufacturing tolerances, moisture resistance, and load-span tables for LVL products used in residential construction.
Ultimately, accurately estimating the building cost to knock through a wall requires looking past the demolition phase and focusing on the structural load path, utility rerouting, and finish-matching complexities. Always secure three itemized bids that separate engineering, structural materials, and finish work to ensure you are comparing equivalent scopes of work.
Written by
James ThorntonJames Thornton is a construction industry veteran with 25 years of hands-on experience in wood framing, lumber grading, and residential building codes. He started as a framing carpenter in rural Oregon, earned his ICC Residential Building Inspector certification, and eventually became a senior plan reviewer for the City of Portland Bureau of Development Services. James holds a B.S. in Wood Science & Technology from Oregon State University and is a certified lumber grader through the West Coast Lumber Inspection Bureau (WCLIB). He has inspected over 3,000 residential construction sites and authored the city's internal guide on advanced framing techniques (2x6 at 24" O.C.). James lives in Bend, OR, where he builds custom timber-frame cabins and competes in lumberjack sports.
More from James Thornton
View all
Insulation
Best Home Insulation Materials: Complete 2026 Guide
Compare top home insulation materials for 2026. Find R-values, installed costs per square foot, and best uses for fiberglass, spray foam, and mineral wool.
Aug 4, 2026

Sustainable Building
Certify Your Green Building Material for LEED and WELL
Step-by-step guide to certifying a green building material for LEED v5 and WELL v2. Master EPDs, HPDs, and VOC limits for 2026 project specifications.
Aug 4, 2026

Stone & Masonry
Veneer Stacked Stone Panels: Interior Design & Style Showcase
Discover how veneer stacked stone panels transform interiors. Explore modern design profiles, material pairings, and technical installation specs.
Aug 4, 2026