Putting Railings on a Deck: Step-by-Step Installation Guide
Learn the exact procedures for putting railings on a deck, including IRC code compliance, post anchoring, and baluster spacing for a safe, durable build.
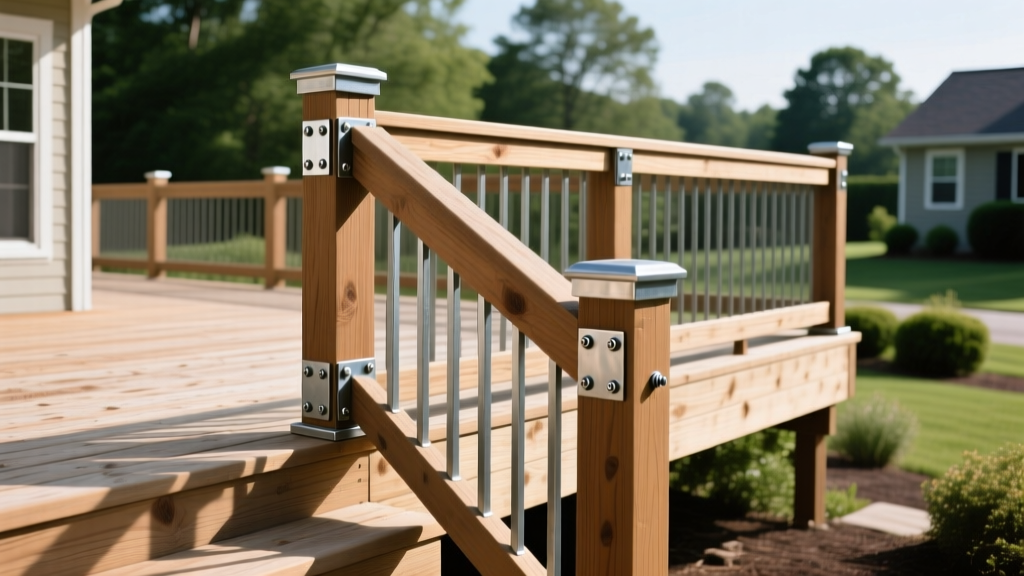
Pre-Installation: IRC Code Compliance and Load Requirements
Before cutting a single piece of lumber or composite, you must understand the structural demands placed on deck railings. According to the International Residential Code (IRC) Section R312.1, a guardrail is legally required on any deck surface that is more than 30 inches above the surrounding grade. The minimum height for these guardrails is 36 inches measured vertically from the deck surface to the top of the rail.
Critical IRC Guardrail Metrics
- Minimum Height: 36 inches (residential), 42 inches (commercial).
- Concentrated Load: Must withstand 200 lbs of force applied laterally or downward at any point on the top rail.
- Infill Load: Balusters and bottom rails must resist 125 lbs of force.
- The Sphere Rule: A 4-inch diameter sphere cannot pass through any opening in the lower rail section. A 4.375-inch sphere cannot pass through the triangular opening formed by the riser, tread, and bottom rail on stairs.
For comprehensive structural details and approved fastening schedules, always cross-reference your local building department's amendments with the American Wood Council's DCA-6 Deck Construction Guide, which remains the industry standard for translating IRC code into actionable framing and railing details.
Material and Hardware Selection Matrix
The hardware you select dictates the longevity and structural integrity of the railing. Galvanized steel (G185 coating) is the minimum standard for pressure-treated wood, while Type 304 or Type 316 stainless steel is mandatory for composite decking or coastal environments to prevent galvanic corrosion and unsightly rust bleeding.
| Deck Material | Post Anchor Strategy | Fastener Specification | Pro-Tip for 200lb Load |
|---|---|---|---|
| Pressure-Treated Wood | Internal through-bolting or Simpson E-Z Base | 1/2' Galvanized Carriage Bolts or SDWS Structural Screws | Add 2x4 solid blocking between joists directly behind the rim joist at every post location to prevent joist rotation under lateral load. |
| Capped Composite | Internal structural wood core with aluminum sleeve | Type 316 Stainless Steel structural screws | Never mount hollow composite post sleeves directly to the deck. The internal 4x4 wood or steel core must bear the structural load. |
| PVC Decking | Standoff post base (elevated 1/2' above deck) | Stainless steel lag screws with neoprene washers | Use standoff bases to prevent water from wicking into the bottom of the PVC post, which can cause algae buildup and freeze-thaw cracking. |
Step-by-Step Procedure for Putting Railings on a Deck
Phase 1: Layout and Post Positioning
Begin by marking your post locations. Standard practice dictates placing a post at every corner, at the top and bottom of every stair flight, and at intervals no greater than 6 feet along straight runs. Snap a chalk line 3.5 inches in from the outer edge of the rim joist (assuming a standard 4x4 post, which actually measures 3.5 x 3.5 inches). This ensures the post sits perfectly flush with the inside edge of the deck framing, allowing the top rail to overhang cleanly.
Phase 2: Securing the 4x4 Posts (The Critical Connection)
This is where most DIY installations fail. Toe-nailing a 4x4 post to a rim joist with standard deck screws will not pass a building inspection and is highly dangerous. A toe-nailed connection typically fails at roughly 120 pounds of lateral force, well short of the 200-pound IRC requirement.
WARNING: Never rely on toe-nails or surface-mounted post bases secured only with short screws for guardrail posts. The leverage exerted on a 36-inch post multiplies the force at the base exponentially.
The Correct Method: Drill two 9/16-inch holes through the 4x4 post and the rim joist. Insert 1/2-inch x 6-inch hot-dipped galvanized carriage bolts. Place a washer and nut on the inside of the rim joist and tighten with a socket wrench. Alternatively, use heavy-duty structural screws like the Simpson Strong-Tie SDWS series, driving two 3-inch or 4-inch screws through the post into the rim joist, and two more screws at a 45-degree angle downward through the post into the deck joist below.
Phase 3: Attaching Top and Bottom Rails
For wood railings, use 2x4 lumber for both the top and bottom rails. Position the bottom rail exactly 3.5 inches above the deck surface to prevent debris accumulation while maintaining code compliance. Secure the rails to the posts using structural brackets or by pocket-screwing from the inside using exterior-rated Kreg screws. For composite railings, follow the manufacturer's specific bracket system, ensuring that the hidden fasteners engage the internal structural core of the post, not just the outer decorative sleeve.
Phase 4: Baluster Spacing and the 'Sphere Rule'
Calculating baluster spacing requires precision to pass the 4-inch sphere inspection rule. Standard wood or aluminum balusters are typically 1.5 inches wide. To maintain a strict 4-inch gap, the maximum center-to-center spacing is 5.5 inches.
However, accounting for wood shrinkage, composite thermal expansion, and cutting tolerances, professional installers target a 4.75-inch center-to-center spacing. This yields a 3.25-inch clear gap, ensuring you pass inspection even if the balusters warp or shrink slightly over the first summer. Use a custom-cut wooden spacer block to guarantee uniform spacing during installation, securing each baluster with two 2.5-inch exterior screws at the top and bottom.
Common Installation Failures and Troubleshooting
- Wobbly Posts: Caused by a lack of blocking behind the rim joist. Fix: Remove the decking boards adjacent to the post and install solid 2x8 blocking between the floor joists to create a rigid backer for the rim joist.
- Water Trapping and Rot: Occurs when flat-bottomed wood posts sit directly on the decking surface. Fix: Install a 1/4-inch PVC shim under the post during installation to allow water drainage, or use elevated standoff post bases.
- Rail Sagging: Happens when spans between posts exceed 6 feet. Fix: Limit straight-run spans to a maximum of 6 feet. For composite railings, some manufacturers require internal aluminum stiffener rails for spans over 4 feet.
- Stair Rail Alignment: Stair rails often fail to align with the deck rail height. Fix: Measure the 36-inch height vertically from the nose of the stair tread, not perpendicular to the stair stringer angle.
Final Inspection Checklist
Before calling your local building inspector, run through this field-tested checklist to ensure your railing system is fully compliant and structurally sound:
- Verify all posts are plumb in both directions using a torpedo level.
- Confirm top rail height is exactly 36 inches (or 42 inches for commercial) at all points, including stair transitions.
- Test the 4-inch sphere rule using a physical 4-inch wooden block or sphere along the entire lower run, paying special attention to the corners and stair transitions.
- Apply physical lateral pressure to the top rail at mid-span and at the posts to check for deflection or squeaking.
- Ensure all exposed fastener heads are countersunk and plugged (for wood) or capped (for composite) to prevent water intrusion.
- Check that all structural bolts have washers and are fully tightened, with no threads stripped.