Deck Flashing Installation Guide: Prevent Ledger Board Rot
Learn the exact steps to install deck flashing on your ledger board. Prevent wood rot and structural failure with our expert application guide.
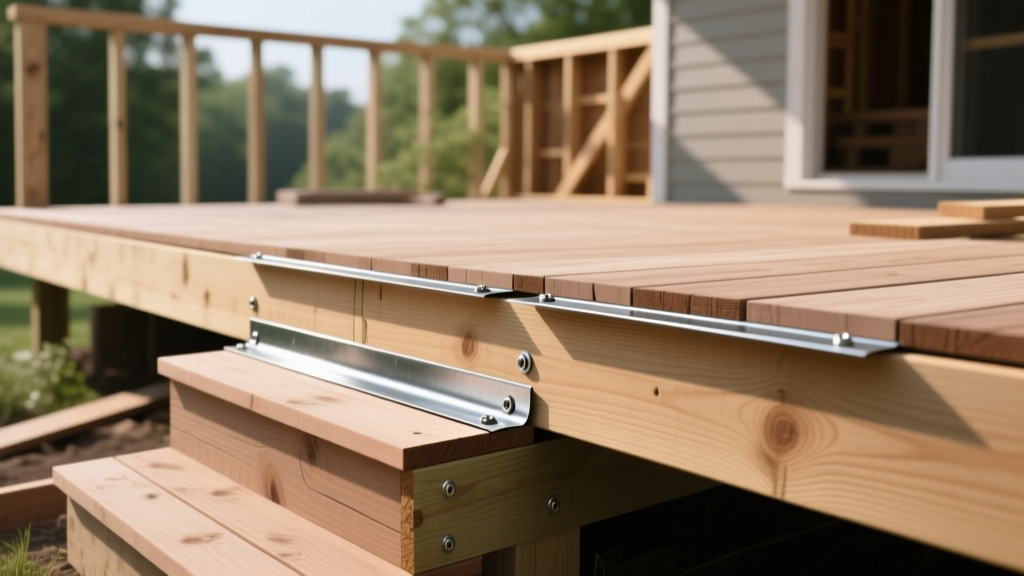
The Hidden Threat: Why Ledger Board Flashing Fails
Water intrusion at the ledger board is the single most common cause of catastrophic deck collapse in residential construction. When moisture becomes trapped between the deck ledger and the home's rim joist, wood rot compromises the structural lag bolts, leading to sudden and dangerous failure. Proper deck flashing installation is not an optional aesthetic upgrade; it is a critical building science requirement mandated by modern building codes.
The primary function of deck flashing is to create an impermeable barrier that directs water away from the vulnerable end-grain of the ledger board and the home's rim joist. This guide details the exact procedures, material specifications, and code-compliant techniques for installing Z-flashing on residential deck ledgers, ensuring your outdoor structure remains safe and durable for decades.
Material Selection: Choosing the Right Deck Flashing
Selecting the correct flashing material is heavily dependent on the type of pressure-treated lumber you are using and your local climate. Modern pressure-treated wood utilizes copper-based preservatives like ACQ (Alkaline Copper Quaternary) or MCA-C (Micronized Copper Azole), which are highly corrosive to certain metals.
| Material | Thickness | Cost (per LF) | Compatibility with ACQ/MCA Lumber | Best Use Case |
|---|---|---|---|---|
| Galvanized Steel | 24-gauge | $1.50 - $2.50 | Good (Hot-dipped only) | Standard residential decks, painted finishes |
| Aluminum | 0.019 inch | $1.20 - $2.00 | Poor (Severe galvanic corrosion) | Untreated wood or cedar/redwood only |
| Copper | 16 oz | $4.50 - $7.00 | Excellent (Biocidal properties) | High-end custom builds, masonry interfaces |
| PVC / Plastic | 0.040 inch | $1.00 - $1.80 | Excellent (Immune to corrosion) | Budget builds, high-moisture coastal areas |
Pre-Installation: House Wrap and Siding Preparation
Before any metal or plastic touches the house, the weather-resistant barrier (WRB) must be properly prepared. The most common mistake contractors make is installing deck flashing over the top of the existing house wrap, which traps water behind the siding.
Siding Clearance and Cutting
- Mark the Clearance Line: Measure and snap a chalk line exactly 2 inches above the top edge of where your ledger board will be installed. This provides the necessary clearance for the vertical leg of the Z-flashing.
- Cut the Siding: Using a circular saw with a siding blade or an oscillating multi-tool, cut the vinyl, wood, or fiber cement siding along the chalk line. Remove the bottom section of the siding to expose the house wrap and sheathing.
- Score the House Wrap: Cut the house wrap horizontally along the top of the exposed sheathing, creating a flap that can be folded upward. Do not cut the wrap in a simple straight line; instead, cut an inverted 'U' shape at the ends to allow for overlapping integration with the flashing.
Step-by-Step Deck Flashing Installation Procedure
For optimal water management, a custom-bent Z-flashing is required. Standard L-flashing does not provide a drip edge and allows capillary action to pull water back toward the ledger. Your Z-flashing should have a 5-inch vertical leg, a 2-inch horizontal leg (to rest on the ledger), and a 1-inch downward-angled drip edge.
Step 1: Apply Butyl Flashing Tape
Apply a 4-inch wide strip of butyl-based flashing tape (such as Protecto Wrap Butyl or Zip System Flashing Tape) directly to the exposed OSB or plywood sheathing. The tape should extend 2 inches above the siding cut line and 2 inches below it. Press firmly with a J-roller to ensure a continuous, airtight seal.
Step 2: Integrate the House Wrap
Fold the upper flap of the house wrap down over the top edge of the butyl tape. This creates a shingle-lap effect where water shedding down the wall flows over the tape, rather than behind it.
Step 3: Position and Fasten the Z-Flashing
Slide the 5-inch vertical leg of the Z-flashing up and behind the house wrap, resting it directly against the butyl tape. Fasten the vertical leg to the sheathing using 1.5-inch exterior-grade screws equipped with neoprene washers. Space fasteners every 12 inches along the length of the board.
Step 4: Seal the Top Edge
Run a continuous, generous bead of high-quality polyurethane sealant (such as Sikaflex-1a or Loctite PL S30) along the top edge where the flashing meets the house wrap and siding. Tool the sealant with a putty knife to create a smooth, watertight cove.
Step 5: Install the Ledger Board
Position your pressure-treated ledger board so it rests squarely on the 2-inch horizontal leg of the Z-flashing. Drill your structural lag bolt or through-bolt holes, apply a dab of sealant to each hole to prevent moisture ingress, and secure the ledger to the rim joist according to your engineered load specs.
If your Z-flashing lacks the final 1-inch downward bend (the drip edge), water will travel along the flat bottom surface and wick upward into the end-grain of the ledger board via capillary action. Always verify the drip edge is bent at a minimum 45-degree angle away from the house.
Critical Failure Modes and Troubleshooting
Even with the right materials, improper execution leads to failure. Inspect your work against these common installation errors:
- Trapped Moisture (The 'Bathtub' Effect): If the bottom horizontal leg of the flashing is sealed tightly against the ledger board with caulk, any water that gets behind the flashing has no escape route. The horizontal leg should rest on the ledger, but the bottom edge should remain unsealed to allow incidental moisture to weep out.
- Fastener Penetration Errors: Never drive nails or screws through the horizontal or drip-edge legs of the flashing. Every puncture below the top vertical leg is a potential leak point. All fasteners must be isolated to the vertical leg, high up on the wall.
- Inadequate Siding Overlap: When reinstalling the siding above the flashing, ensure the bottom edge of the siding overlaps the vertical leg of the flashing by at least 1 inch. If the siding terminates above the flashing, wind-driven rain will easily blow into the gap.
Code Compliance and Final Inspection
Modern building codes are explicit regarding ledger board water management. According to the American Wood Council's DCA-6 Prescriptive Residential Deck Construction Guide, which forms the basis for most municipal inspections, deck ledgers must be flashed to prevent water from contacting the house band joist.
Furthermore, the 2021 and 2024 International Residential Code (IRC) Section R507.9.1.1 explicitly states that approved flashing must be installed at the ledger connection. Inspectors will specifically look for the integration of the flashing behind the weather-resistant barrier. As outlined by the North American Deck and Railing Association (NADRA) Deck Codes and inspection standards, a deck lacking proper ledger flashing will fail the final structural inspection, regardless of how robust the mechanical bolt connections are.
For further reading on structural attachment and flashing integration, the Decks.com Ledger Board Attachment Guide provides excellent visual diagrams of the shingle-lap WRB integration required by local building officials.
By strictly adhering to these material specifications and installation procedures, you eliminate the primary vector for wood rot, ensuring the deck's structural integrity and passing municipal inspections on the first attempt.