How to Install a Wood Lattice Fence: Step-by-Step DIY Guide
Learn how to install a wood lattice fence with our step-by-step DIY guide. Covers post setting, framing, lattice panel attachment, and cap rail finishing.
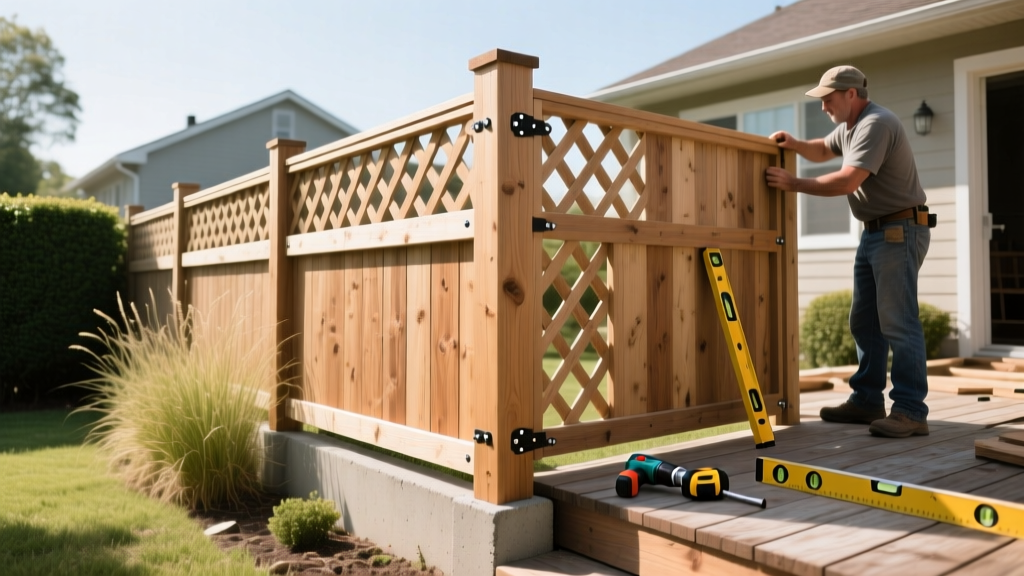
Why Proper Framing Dictates Lattice Fence Longevity
A lattice fence offers a unique architectural balance: it provides partial privacy, allows airflow, and serves as a trellis for climbing flora. However, the most common failure point in DIY lattice installations is severe warping within the first 12 months. This occurs because thin lattice strips (typically 1/2-inch to 3/4-inch thick) lack the structural rigidity to resist seasonal humidity changes. To prevent this, professional installers never attach lattice directly to fence posts. Instead, they build a rigid perimeter frame and use a 'sandwich' or 'rabbeted' mounting technique. This guide details the exact materials, measurements, and framing procedures required to build a wood lattice fence that remains plumb and stable for decades.
Material and Fastener Specifications
Selecting the correct lumber grade and corrosion-resistant hardware is critical. Cedar and redwood are the industry standards for above-ground framing due to their natural rot resistance, while pressure-treated pine is best reserved for in-ground posts.
| Component | Specification & Material | Purpose / Notes |
|---|---|---|
| Posts | 4x4 Pressure-Treated Pine (Ground Contact) | Must be rated for direct soil burial. 8-foot or 10-foot lengths depending on desired height and frost line depth. |
| Frame Lumber | 2x4 Western Red Cedar (Select Structural) | Forms the rigid perimeter. Select grade ensures straight, knot-free boards for precise mitering. |
| Lattice Panels | 1/2-inch Cedar or Vinyl Lattice (4x8 sheets) | Diagonal or square pattern. Cedar requires sealing; vinyl is maintenance-free but expands/contracts more. |
| Fasteners (Framing) | #9 3-inch Exterior Structural Screws | Provides sheer strength for the 2x4 frame. Do not use standard drywall or deck screws. |
| Fasteners (Lattice) | #8 1-1/2-inch Stainless Steel Trim Screws | Stainless steel prevents black tannin streaking on cedar. Hot-dipped galvanized is an acceptable secondary choice. |
| Concrete | 50-lb Fast-Setting Concrete Mix | Sets in 20-40 minutes, allowing you to brace and frame on the same day. |
Step 1: Layout, Spacing, and Post Hole Excavation
Lattice panels are manufactured in standard 4x8-foot sheets. To minimize cutting and waste, space your posts exactly 8 feet apart (measured center-to-center). However, you must account for the thickness of the frame and the panels. A more precise approach is to build the framed panels first, measure their exact outside width, and space the posts accordingly, leaving a 1/2-inch shim gap on each side for installation clearance.
Digging to the Frost Line
Post depth is non-negotiable. According to structural guidelines referenced by the American Wood Council, fence posts must extend below the local frost line to prevent frost heave from pushing the posts upward. In northern climates, this means digging 36 to 48 inches deep. In southern regions, 24 inches is typically sufficient. Dig the holes 10 to 12 inches in diameter to allow room for concrete and drainage gravel.
Step 2: Setting and Bracing the Posts
Drop the 4x4 posts into the holes. Use a post level to ensure they are perfectly plumb on two adjacent sides. Brace the posts using 2x4 stakes driven into the ground and screwed temporarily to the post. Once plumb, pour the fast-setting concrete directly into the hole, stopping 2 inches below the soil grade. Slope the top of the wet concrete away from the post with a trowel to shed surface water. Allow the concrete to cure for at least 4 hours before applying any lateral pressure.
Step 3: Constructing the Sandwich Frame (The Anti-Warp Method)
This is the most critical phase. Instead of nailing the lattice directly to the 4x4 posts, you will build a 2x4 frame that houses the lattice. The 'sandwich' method involves creating a front frame and a back frame that clamp the lattice panel between them.
- Cut the Perimeter: Cut 2x4 cedar boards to the exact dimensions of your lattice panel (e.g., 46.5 inches and 94.5 inches to fit inside a 4x8 space with clearance).
- Assemble the Back Frame: Join the 2x4s using structural screws at the corners. For added rigidity, install a horizontal mid-rail across the center of the frame.
- Attach the Lattice: Lay the lattice sheet over the back frame. Secure it using stainless steel trim screws placed every 12 inches along the perimeter.
- Install the Front Frame: Place the second set of 2x4s directly over the first set, trapping the lattice in the middle. Screw through the front 2x4, through the lattice intersection, and into the back 2x4.
Step 4: Mounting the Framed Panels to the Posts
With the framed panels assembled, lift them into position between the set 4x4 posts. Use wooden shims to hold the panel at the correct height (typically 2 to 4 inches off the ground to prevent soil moisture wicking and to allow for lawn maintenance). Drive 3-inch exterior structural screws through the side of the 2x4 frame directly into the 4x4 posts. Place three screws per side: one near the top, one in the middle, and one near the bottom.
Managing Slopes and Grades
If your yard is sloped, you have two options: stepping or racking. For a lattice fence, stepping is highly recommended. Keep the top cap rail perfectly level, and allow the bottom of the lattice panel to follow the slope. You can install a pressure-treated 2x8 'kickboard' along the bottom to close the gap between the lattice and the uneven ground, preventing pets from escaping and hiding the jagged bottom edge.
Step 5: Capping and Weatherproofing
The top edge of the 2x4 frame is end-grain, which acts like a straw, drawing rainwater deep into the wood. You must install a cap rail. Use a 1x6 cedar board, ripped to 4.5 inches wide, and attach it flat across the top of the frame using stainless steel finish nails. Apply a bead of exterior-grade polyurethane sealant along the seam where the cap meets the frame.
For finishing, avoid film-forming paints or solid stains, which will peel and trap moisture inside the lattice strips. Instead, use a penetrating semi-transparent oil-based stain (such as Armstrong Clark or TWP). These oils soak into the wood fibers, repelling water while allowing the wood to breathe and expand without cracking the finish.
Load-Bearing Considerations for Climbing Plants
Many homeowners install a lattice fence specifically to support climbing plants. The weight of mature flora can be immense, especially when wet or subjected to wind loads. You must match your frame construction to the plant species.
| Plant Species | Mature Weight / Wind Load | Required Frame Modification |
|---|---|---|
| Clematis / Sweet Pea | Light (Under 15 lbs per panel) | Standard 2x4 sandwich frame is sufficient. 1/2-inch lattice strips will hold the weight. |
| Star Jasmine / Climbing Rose | Moderate (20-40 lbs per panel) | Add a diagonal 1x2 cross-brace inside the frame. Use 3/4-inch thick lattice strips instead of 1/2-inch. |
| Wisteria / Trumpet Vine | Heavy (100+ lbs, high wind drag) | Standard lattice will fail. Upgrade to 2x2 cedar structural grid or heavy-gauge welded wire mesh integrated into the 2x4 frame. |
2026 Cost Breakdown per Linear Foot
Material costs fluctuate based on regional lumber markets. The following estimates reflect average 2026 pricing for a 6-foot-tall cedar lattice fence, excluding heavy equipment rentals or extreme terrain surcharges.
- Pressure-Treated Pine Posts & Concrete: $8.50 - $12.00 per linear foot
- Cedar 2x4 Framing Lumber: $6.00 - $9.00 per linear foot
- Cedar Lattice Panels & Fasteners: $5.50 - $8.50 per linear foot
- Cap Rail & Penetrating Stain: $3.00 - $4.50 per linear foot
- Total Material Cost: $23.00 - $34.00 per linear foot
By executing the sandwich frame method and using stainless steel hardware, you eliminate the most common maintenance callbacks associated with lattice fencing. The initial investment in precise framing yields a structurally sound, visually striking boundary that withstands both seasonal weather shifts and the biological loads of climbing gardens.