Essential Carpet Installation Tools for Flawless Seams
Master carpet installation tools with our pro guide. Compare knee kickers, power stretchers, and seam irons for flawless, CRI-compliant results.
The Physics of Carpet Tensioning: Why Tooling Dictates Longevity
Carpet installation is fundamentally a mechanical engineering task governed by tension, thermal adhesion, and sheer force. The most common cause of premature carpet failure—buckling, rippling, and seam peaking—stems directly from inadequate tooling or improper tool application. According to the Carpet and Rug Institute (CRI) Residential Installation Guidelines, relying on manual positioning tools for primary stretching voids manufacturer warranties and violates CRI 104 standards for any room exceeding 120 square feet. To achieve a monolithic, drum-tight finish that withstands heavy foot traffic and rolling loads, independent contractors and DIY installers must deploy a highly specific arsenal of carpet installation tools.
The Core Tensioning Arsenal: Knee Kicker vs. Power Stretcher
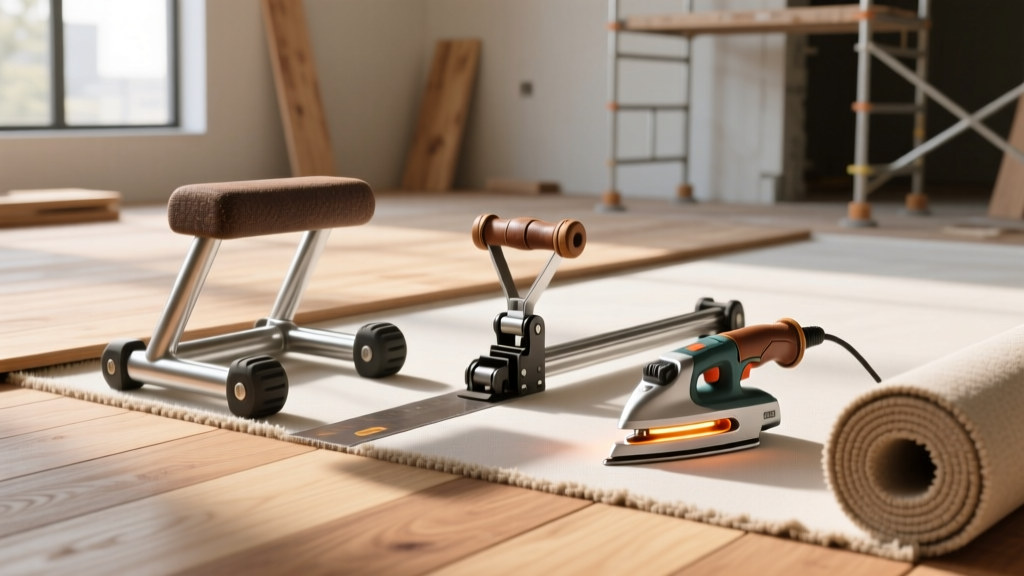
A pervasive myth in novice carpet laying is that a knee kicker is a stretching tool. It is not. A knee kicker is a positioning implement designed to engage the carpet backing with the tack strip and hold it temporarily in place. The power stretcher is the only tool capable of generating the lateral force required to meet industry tension standards.
| Tool Category | Industry Standard Model | Force Output / Throw | Primary Application | CRI 104 Compliance |
|---|---|---|---|---|
| Knee Kicker | QEP 50205 Professional | 1 to 3-inch adjustable throw; ~200 lbs impact | Positioning carpet onto tack strips; minor alignment | Prohibited as primary stretcher >120 sq ft |
| Power Stretcher | Roberts 10-254 Power Stretcher | Up to 1,000 lbs lateral force; 5ft to 12ft tube | Primary bi-directional stretching; eliminating buckling | Mandatory for all primary stretching |
| Mini-Stretcher | Crain 432 Mini Power Stretcher | Up to 400 lbs lateral force; compact tube | Stretching in closets, stairwells, and tight corridors | Approved for confined spaces |
When assembling your power stretcher, the tube length must be exactly 1/2 inch shorter than the distance from the wall to the head of the stretcher. If the tube is too long, you risk damaging the drywall; if it is too short, the stretcher will slip under maximum load, causing severe knuckle injuries.
Seam Construction and Thermal Adhesion Equipment
Invisible seams require precise thermal management. Modern carpet seams rely on hot melt thermoplastic adhesive tape rather than outdated latex or liquid adhesives. The integrity of the seam depends entirely on the installer's ability to melt the adhesive to its exact viscosity without thermally degrading the carpet's primary backing.
Essential Seaming Implements
- Seam Iron: The Roberts 10-305 Seam Iron features a Teflon-coated base and an adjustable thermostat. For standard polypropylene hot melt tape (like Roberts 3095-1), the iron must be set to 750°F. However, when seaming delicate synthetic backings or low-melt yarns, the temperature must be reduced to 650°F to prevent the primary backing from delaminating.
- Heat Shield / Seam Board: A rigid, insulated board placed beneath the seam tape to protect the subfloor and carpet pad from thermal transfer and adhesive bleed-through.
- Carpet Tractor (Seam Roller): A heavy, dual-wheel roller used immediately after ironing. The tractor applies concentrated downward pressure to force the melted adhesive into the secondary backing of both carpet sections before the thermoplastic cools and crystallizes (which occurs in roughly 30 seconds).
Leaving a 750°F seam iron stationary on hot melt tape for more than 15 seconds will scorch the adhesive, turning it brittle and causing the seam to shatter under foot traffic. Always keep the iron in continuous, slow motion along the seam line.
Cutting, Trimming, and Edge Finishing Implements
Precision trimming separates professional installations from amateur attempts. The goal is to achieve a seamless transition at the walls without cutting into the baseboard or leaving a visible gap.
The Trimming Toolkit
- Wall Trimmer: The Roberts 10-219 Wall Trimmer uses a dual-blade mechanism to cut carpet exactly 1/4 inch from the wall while simultaneously protecting the baseboard with a rolling guard.
- Stair Tool (Chisel): The Crain 324 Stair Tool is a blunt, hardened steel chisel used to tuck the cut edge of the carpet into the 1/4-inch expansion gap between the tack strip and the wall. It must be struck with a 2-pound rubber mallet, never a steel hammer, to prevent denting the tool's striking cap.
- Loop Pile Cutter: For Berber or loop-pile carpets, standard utility knives will fray the yarn. A specialized loop pile cutter (like the Crain 428 Super Saw) oscillates to shear the loops cleanly without pulling the yarn out of the primary backing.
Sequential Tool Application Workflow (Standard 12x15 Room)
Executing a flawless installation requires a strict operational sequence. Deviating from this workflow compromises the mechanical lock of the carpet on the tack strips.
- Pad and Tack Preparation: Install tack strips 1/2 inch from all walls (excluding doorways). Roll out the padding and staple every 6 inches along the seams.
- Rough Positioning: Unroll the carpet and use the knee kicker to hook the carpet onto the tack strips along the longest starting wall.
- Primary Power Stretching: Anchor the power stretcher base against the starting wall. Extend the tube to the opposite wall. Engage the pins and pump the lever to stretch the carpet laterally. Hook the stretched edge onto the opposite tack strip using the knee kicker to hold it temporarily.
- Secondary Stretching: Rotate the power stretcher 90 degrees to stretch the carpet into the side walls. This bi-directional stretching ensures the carpet is taut on both axes.
- Seaming (If Required): Overlap carpet sections by 2 inches. Double-cut through both layers simultaneously with a heavy-duty carpet knife. Lay the hot melt tape, apply the 750°F seam iron, and immediately secure with the carpet tractor.
- Final Trimming and Tucking: Run the wall trimmer along all perimeters. Use the stair tool and mallet to tuck the excess into the expansion gap, creating a clean, monolithic edge.
Tool Investment and ROI Analysis for Independent Installers
For independent flooring contractors, investing in professional-grade carpet installation tools is not optional; it is a requirement for profitability. Callbacks to fix buckled carpet cost an average of $250 to $400 in lost labor and fuel, entirely erasing the profit margin of a standard room installation.
Professional Tooling Capital Expenditure (2026 Estimates)
| Equipment Category | Estimated Cost Range | Lifespan / ROI Metric |
|---|---|---|
| Power Stretcher & Tube Set | $250 - $350 | 10+ years; pays for itself in 3 jobs |
| Professional Knee Kicker | $85 - $120 | 5-7 years; replaceable foam pads cost $10 |
| Seam Iron & Tractor | $90 - $140 | 8+ years; critical for high-margin commercial seams |
| Trimming & Tucking Kit | $150 - $200 | Consumable blades; tools last indefinitely |
| Total Initial Investment | $575 - $810 | Recouped within first 400 sq ft installed |
Troubleshooting Tool-Related Installation Failures
Even with the correct carpet installation tools, improper calibration or technique leads to distinct failure modes. Use this diagnostic matrix to identify and correct errors on the job site.
- Symptom: Carpet ripples reappear within 3 months of installation.
Cause: Used a knee kicker for primary stretching, or the power stretcher tube was too short, resulting in inadequate lateral tension.
Fix: Detach the carpet from the tack strips and re-stretch using a fully extended power stretcher anchored to the opposite wall, generating a minimum of 800 lbs of force. - Symptom: Seam peaking (the seam line forms a visible ridge or hump).
Cause: The seam iron was too hot, causing the hot melt tape to boil and expand, or the carpet sections were not perfectly butted before the adhesive cooled.
Fix: Reduce iron temperature by 50°F. Ensure the double-cut edges are perfectly flush and apply immediate, heavy downward pressure with the seam tractor while the adhesive is in a liquid state. - Symptom: Frayed or pulled yarns along the wall perimeter.
Cause: Using a standard utility knife on loop-pile carpet, or holding the wall trimmer at an incorrect angle.
Fix: Switch to an oscillating loop pile cutter. When using a wall trimmer, maintain a strict 90-degree angle to the floor and let the rolling guard ride smoothly against the baseboard.
Ergonomics and Safety Considerations
Carpet installation is highly physically demanding. The repetitive impact of a knee kicker and the heavy lifting of power stretcher tubes place immense strain on the installer's joints. The OSHA Ergonomics Guidelines for Manual Handling emphasize the need for mechanical aids and proper body mechanics to prevent musculoskeletal disorders. Always wear heavy-duty, reinforced knee pads with gel inserts when operating a knee kicker. When pumping the power stretcher lever, use your body weight and leg drive rather than relying solely on shoulder and arm strength to generate lateral force. Proper tool maintenance—such as regularly cleaning the Teflon base of your seam iron and replacing dull utility blades—reduces the physical exertion required and minimizes the risk of slip-and-cut injuries.
Mastering these carpet installation tools transforms a chaotic, physically punishing job into a precise, highly profitable craft. By adhering to Floor Covering Installation Contractors Association (FCICA) best practices and respecting the mechanical limits of your equipment, you ensure every installation remains drum-tight and visually flawless for the lifespan of the flooring.