How to Install Rubber Gym Flooring: Interlocking vs Glue-Down
Learn how to install rubber gym flooring with our step-by-step guide covering interlocking tiles and glue-down rolls over concrete subfloors.
Subfloor Preparation: The Foundation of Durability
The longevity of any rubber gym flooring installation is dictated entirely by the condition of the subfloor. Whether you are laying interlocking tiles or glue-down rolls, concrete is the standard subfloor for commercial and residential gyms. However, raw concrete is porous, alkaline, and prone to moisture vapor emission. Before unrolling any rubber, the slab must be tested and prepped according to ASTM F710 standards for preparing concrete floors to receive resilient flooring.
First, verify the concrete curing time. A newly poured slab requires a minimum of 28 days to cure, though 60 days is optimal for high-density rubber. Next, conduct moisture testing. The industry standard dictates that the Moisture Vapor Emission Rate (MVER) must not exceed 3 lbs per 1,000 square feet per 24 hours when tested via the calcium chloride method (ASTM F1869). Alternatively, in-situ relative humidity (RH) testing per ASTM F2170 should yield readings below 75%. If your slab exceeds these thresholds, you must apply a two-part epoxy moisture mitigation system (such as Mapei Primer PU or Bostik MVP) before proceeding.
Finally, profile the concrete. Rubber is dense but flexible; it will telegraph (mirror) subfloor imperfections. Grind down high spots and fill cracks or divots deeper than 1/16-inch with a Portland cement-based patching compound. Sweep and vacuum thoroughly, then wipe the floor with a damp mop to remove micro-dust. Do not use chemical degreasers, as they leave a film that prevents adhesive bonding.
Method 1: Interlocking Rubber Gym Flooring Tiles
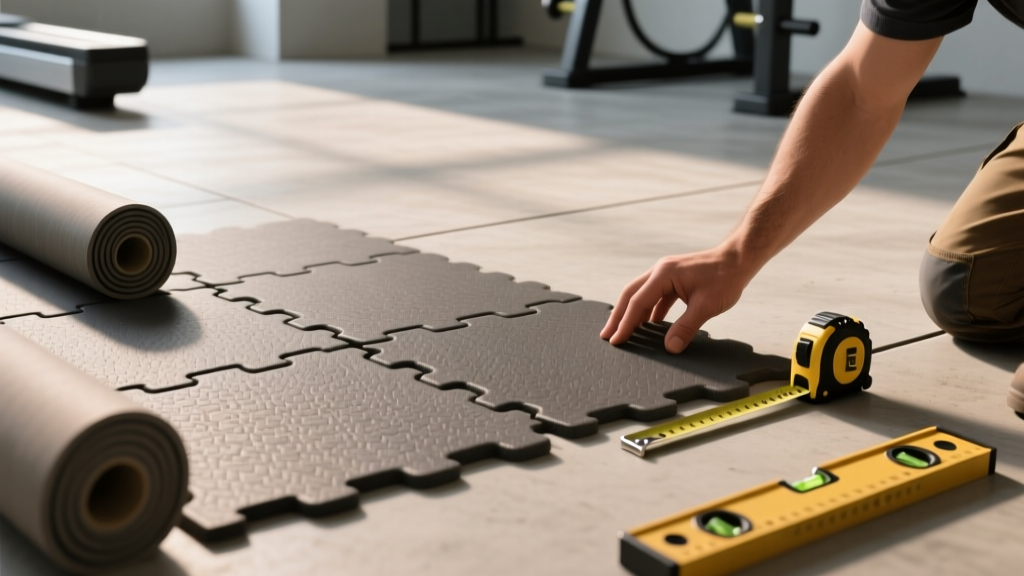
Interlocking tiles (typically 3/8-inch or 1/2-inch thick, measuring 2x2 feet or 4x6 feet) are the preferred choice for home gyms, cross-training boxes, and temporary installations. They rely on friction and gravity rather than chemical bonds, making them DIY-friendly while still supporting heavy deadlift platforms.
Step-by-Step Interlocking Installation
- Acclimation: Unbox the tiles and let them acclimate to the room temperature (65°F to 85°F) for at least 24 hours. Rubber expands and contracts with temperature fluctuations.
- Layout Planning: Find the center of the room and snap two perpendicular chalk lines. Begin laying the first tile at the intersection, working outward in a pyramid pattern to ensure square alignment.
- Seam Engagement: Interlocking rubber tiles feature puzzle-cut edges. Do not simply push them together; use a rubber mallet to tap the seams tightly. For 1/2-inch thick tiles, apply a thin bead of seam sealer (a specialized rubber-flooring polyurethane) in the interlocking grooves to prevent water and chalk dust from penetrating the subfloor.
- Perimeter Cutting: When you reach the walls, leave a strict 1/4-inch expansion gap between the rubber and the wall. Measure and cut the border tiles using a heavy-duty utility knife with a hook blade (e.g., Stanley 99H) or a jigsaw equipped with a fine-tooth metal-cutting blade. Score the rubber deeply on the back side for the cleanest cut.
- Border Finishing: Install matching rubber reducer strips or cove base molding to cover the 1/4-inch expansion gap and provide a clean transition to adjacent flooring.
Method 2: Glue-Down Rubber Gym Flooring Rolls
For commercial health clubs, Olympic weightlifting platforms, and high-traffic functional fitness zones, glue-down rubber rolls (usually 3/8-inch thick and 4 feet wide) are mandatory. Glue-down installations prevent the flooring from shifting under heavy lateral loads, such as sled pushes or dropping bumper plates.
Adhesive Selection and Trowel Specs
Use a high-solids, moisture-curing polyurethane adhesive specifically formulated for rubber, such as Mapei Ultrabond ECO 995 or Bostik BBA. Avoid pressure-sensitive acrylic adhesives for heavy-duty gym environments, as they lack the sheer strength required to resist the lateral friction of heavy equipment.
The correct trowel notch is critical to prevent adhesive starvation or squeeze-through. For non-porous rubber over porous concrete, use a 1/16" x 1/16" x 1/16" square-notched trowel. This yields a coverage rate of approximately 40 to 50 square feet per gallon.
The Glue-Down Procedure
- Dry Fit and Trim: Unroll the rubber and let it relax for 24 hours to eliminate the "memory curl" from shipping. Dry fit the rolls, trimming the factory edges with a straight edge and hook blade to ensure tight, seamless butt joints.
- Adhesive Application: Fold the roll back halfway. Spread the polyurethane adhesive evenly with the flat side of the trowel, then comb it with the notched side. Maintain a consistent 45-degree angle.
- Respect the Open Time: Polyurethane adhesives have an open time of 30 to 45 minutes. Wait until the adhesive is tacky and leaves a slight string when touched, but do not let it skin over. If the adhesive skins, scrape it up and reapply.
- Lay and Roll: Carefully roll the rubber into the adhesive. Immediately roll the entire surface with a 100-lb, three-section floor roller, moving in both directions (north-south, then east-west) to ensure 100% adhesive transfer and eliminate air pockets.
- Secondary Rolling: Polyurethane adhesives expand slightly as they cure. A second pass with the 100-lb roller exactly two hours after the initial installation is mandatory to prevent edge curling and bubbling.
Installation Comparison Matrix
| Feature | Interlocking Tiles (DIY/Light Commercial) | Glue-Down Rolls (Heavy Commercial) |
|---|---|---|
| Material Cost (2026) | $2.50 - $4.50 per sq. ft. | $1.80 - $3.20 per sq. ft. |
| Installation Cost | $0 (DIY) to $1.50/sq. ft. (Pro) | $2.50 - $4.00 per sq. ft. |
| Standard Thickness | 3/8" (8mm) to 3/4" (19mm) | 1/4" (6mm) to 3/8" (8mm) |
| Lateral Stability | Moderate (can shift under sleds) | Maximum (fully bonded) |
| Moisture Resistance | Water can seep through seams | Sealed seams block subfloor moisture |
| Best Use Case | Home gyms, garage gyms, temp spaces | Commercial gyms, weight rooms, studios |
Common Failure Modes and Troubleshooting
Even with premium vulcanized rubber, installation errors lead to costly failures. Understanding these edge cases ensures your floor survives the first year of heavy abuse.
Adhesive Starvation and Blistering
If the concrete subfloor is highly porous and was not primed, it will absorb the liquid components of the polyurethane adhesive before it can bond to the rubber. This results in "adhesive starvation," leaving the rubber loosely attached. Furthermore, if moisture vapor pushes through the slab and reacts with the polyurethane, it creates carbon dioxide gas, leading to hard, un-poppable blisters under the rubber. Fix: Always use a moisture-mitigating primer on porous or damp slabs before applying the primary adhesive.
Telegraphing of Subfloor Imperfections
Rubber gym flooring is incredibly dense, but it is not a structural subfloor. If laid over cracked concrete, expansion joints, or uneven patching compounds, the rubber will eventually deform and mirror these imperfections. Fix: For glue-down rolls thinner than 3/8-inch, use a self-leveling underlayment (SLU) rated for heavy commercial loads to create a perfectly flat surface before gluing.
Edge Curling on Glue-Down Rolls
The most common complaint in commercial gyms is the edges of rubber rolls lifting at the seams. This is almost always caused by skipping the secondary rolling phase or failing to trim the rounded factory edges. Fix: Always butt-cut the factory edges to create flat, square seams. If curling occurs post-installation, inject a syringe of cyanoacrylate-based rubber seam sealer under the lifted edge, apply a localized 50-lb weight, and allow 24 hours to cure.