Mastering Zellige Tile Backsplash Installation: Pro Techniques
Learn professional installation techniques for a zellige tile backsplash, including trowel sizing, sealing, and lippage management for handmade clay tiles.
The Unique Challenges of Handmade Moroccan Clay
Installing a zellige tile backsplash requires a fundamental shift in mindset from standard ceramic or porcelain applications. Authentic zellige is hand-chiseled from natural Moroccan clay and kiln-fired, resulting in profound variations in thickness, surface texture, and edge integrity. While these imperfections create the highly sought-after organic, undulating aesthetic, they also introduce significant installation variables. Standard tile-setting practices will result in severe lippage, grout staining, and structural failures. This guide outlines the exact procedures, material specifications, and edge-case troubleshooting required for a flawless zellige application in 2026.
Pre-Installation: Sorting and the Pre-Sealing Protocol
Unlike factory-calibrated tiles, zellige arrives with up to 15% of the tiles in a box unsuitable for primary field installation due to extreme chipping or kiln warping. Before mixing thinset, you must unbox and sort the material.
The Blending and Sorting Mandate
Never install from a single box. Open a minimum of five boxes simultaneously and blend the tiles. Sort them into three piles:
- Pile A (Field Tiles): Uniform thickness, intact edges, consistent glaze. Use these for the main backsplash area.
- Pile B (Perimeter/Cut Tiles): Chipped edges or slight warping. Reserve these for cuts around outlets, windows, and cabinet edges where the chipped look mimics a natural border.
- Pile C (Discards/Mosaics): Severely warped or cracked tiles. Discard or use for small mosaic accents.
Pre-Sealing the Crackle Glaze
Authentic zellige features a "crazed" or crackle glaze—microscopic fissures in the enamel that give the tile its depth. If you grout before sealing, grout pigment will become permanently trapped in these fissures, ruining light-colored tiles. Apply two coats of a penetrating, solvent-based sealer such as Miracle Sealants 511 Porous Plus or Aqua Mix Sealer's Choice Gold. Use a dense foam roller to avoid brush strokes, allow 24 hours of curing time between coats, and wait an additional 24 hours before applying thinset. According to the Clé Tile Zellige Installation Guidelines, skipping this pre-sealing step is the number one cause of irreversible aesthetic damage in handmade clay installations.
Substrate Preparation and Thinset Selection
Zellige requires a rigid, perfectly plumb substrate. Because the tiles are uneven, any deviation in the wall will be magnified. Use 1/2-inch cement backer board (such as Durock or HardieBacker) or a waterproof gypsum panel like DensShield. Standard drywall is unacceptable, even in dry zones, due to the weight and moisture retention of the thick-set clay.
Thinset Specifications
Because zellige is translucent and often light-colored, gray thinset will cause "shadowing" or darkening of the glaze. You must use a premium, white, polymer-modified thinset. The National Tile Contractors Association (NTCA) recommends high-polymer modified mortars for handmade clay to accommodate slight moisture expansion.
| Thinset Product | Type | Best Use Case |
|---|---|---|
| LATICRETE 254 Platinum (White) | Polymer-Modified | Standard backsplash over cement board; excellent bond strength. |
| Custom Building Products MegaLite (White) | Lightweight Polymer | Drywall substrates; reduces weight load while maintaining high adhesion. |
| Mapei Ultraflex LFT (White) | Large Format/Thick Bed | Highly uneven walls requiring a thicker mortar bed to compensate for tile warping. |
Trowel Sizing and the Back-Buttering Mandate
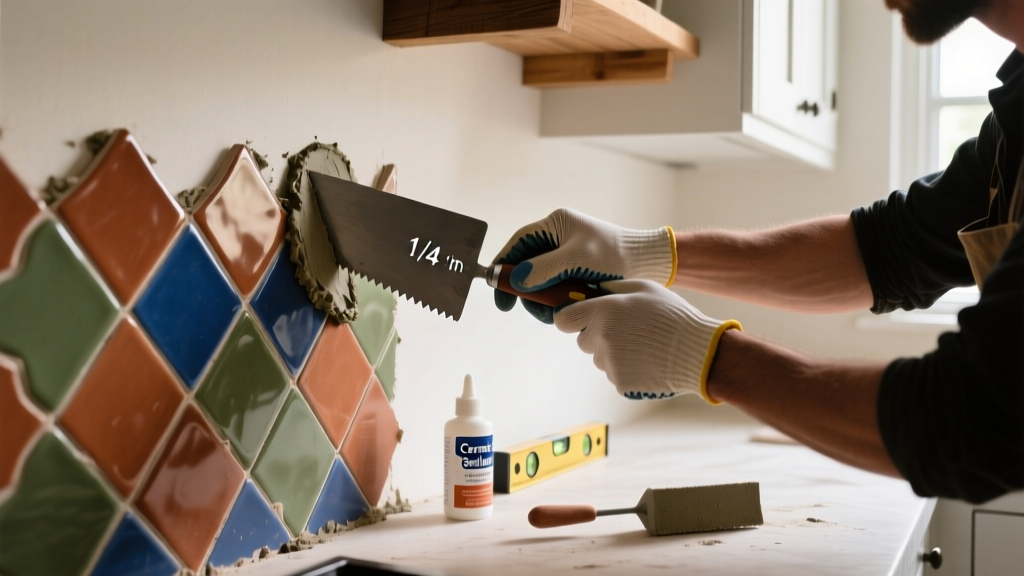
Achieving 100% mortar coverage is non-negotiable for zellige. The uneven backs of the tiles create voids that can lead to cracking if struck. Use a 3/16-inch x 5/32-inch V-notch trowel or a 1/4-inch x 1/4-inch square-notch trowel. The choice depends on the thickness variation of your specific batch; heavily warped batches require the 1/4-inch square notch to allow for depth adjustment.
Comb the thinset on the wall in a single directional pattern (horizontally or vertically, never swirling). Crucially, you must back-butter every single tile. Use the flat edge of your trowel to scrape a thin, 1/16-inch layer of thinset onto the back of each zellige tile before pressing it into the combed wall mortar. This ensures complete adhesion and fills the natural concavities on the back of the handmade clay.
Layout, Spacing, and Lippage Management
The defining visual characteristic of a zellige backsplash is the tight, organic joint. Standard cross spacers will ruin the aesthetic and force uniform gaps that clash with the chiseled edges.
The Tight-Joint Technique
Aim for a 1/16-inch joint, but let the tiles dictate the exact spacing. Place tiles edge-to-edge, gently nudging them together. Use 1/16-inch horseshoe shims or wedge spacers placed horizontally between the tiles to maintain a baseline gap and prevent the tiles from sliding down the wall while the thinset cures. Avoid pushing the tiles so tightly that the chipped edges overlap, which creates severe lippage.
Grouting the Crackle Glaze
Grouting zellige is the highest-risk phase of the installation. The wrong grout type or improper cleaning will permanently stain the crazed glaze. Wait a full 48 hours after setting the tiles before grouting to allow the moisture from the thick-set mortar to evaporate through the joints.
Grout Selection Matrix
| Grout Product | Type | Application Notes |
|---|---|---|
| Mapei Ultracolor Plus FA | Fine Aggregate Cement | Excellent for 1/16" joints. Fast-setting; requires rapid, disciplined cleaning. |
| LATICRETE PermaColor Select | High-Performance Cement | Dense and stain-resistant. Best for kitchens where grease resistance is required. |
| Custom Building Products Prism | Lightweight Acrylic/Cement | Very low risk of efflorescence; easier to tool into tight, irregular joints. |
Never use dark-colored grout on white or light-colored zellige, even if pre-sealed. The risk of pigment trapping in the micro-cracks is too high. If a dark joint is desired, use a mid-tone gray and test on a spare, sealed tile first.
Apply the grout using a hard rubber float, forcing it into the joints at a 45-degree angle. Work in small sections (maximum 15 square feet at a time). Within 10 to 15 minutes, begin the initial wipe with a damp (not soaking wet) cellulose sponge. Rinse the sponge in a bucket of clean water after every single pass. Changing the water frequently is the only way to prevent grout haze from settling back onto the glaze.
Troubleshooting Common Zellige Failures
Even with meticulous preparation, handmade clay can present unexpected challenges during installation. Here is how to handle the most common edge cases:
- Stubborn Grout Haze: If grout dries into the crazing despite pre-sealing, do not use harsh acidic cleaners, which can etch the glaze. Use a specialized haze remover like Aqua Mix Grout Haze Clean-Up combined with a soft white nylon scrub pad. Test in an inconspicuous corner first.
- Edge Chipping During Cuts: Zellige chips aggressively when cut with a standard wet saw blade. Use a continuous-rim diamond blade specifically designed for porcelain or glass (which has a finer grit). Alternatively, use a manual snap cutter for straight cuts, which snaps the clay cleanly without vibrating the edges.
- Shadowing After Grouting: If light-colored tiles appear darker around the edges after grouting, this is "picture framing." It occurs when moisture from the grout is absorbed into the unsealed edges of the tile. This usually dissipates as the wall fully cures over 7 to 14 days. Ensure adequate ventilation to speed the drying process.
- Uneven Outside Corners: Because zellige lacks factory-bullnose edges, outside corners must be mitered. Use a wet saw with a 45-degree jig to miter the edges, and hone the cut edge with a 200-grit diamond polishing pad to remove sharp burrs before setting.
Mastering a zellige tile backsplash installation requires abandoning the pursuit of factory-perfect uniformity and embracing the material's organic nature. By strictly adhering to pre-sealing protocols, utilizing white polymer-modified thinsets, and executing disciplined grout cleaning, you ensure the handmade clay performs flawlessly while delivering its signature luminous, textured aesthetic.