Fiberglass Windows Installation: Pro Step-by-Step Framing Guide
Master fiberglass windows installation with our pro framing guide. Learn exact shimming, flashing, and sealing techniques for a weather-tight fit.
The Physics of Fiberglass: Why Installation Differs from Vinyl
Fiberglass windows represent the premium tier of modern fenestration, offering exceptional structural rigidity, narrow sightlines, and superior thermal stability. However, installing pultruded fiberglass units—such as Marvin Ultrex or Pella Impervia—demands significantly stricter framing tolerances than vinyl or wood-clad alternatives. The core reason lies in the material's Coefficient of Thermal Expansion (CTE).
Glass has a CTE of approximately 1.5 x 10^-5 in/in/°F. Pultruded fiberglass sits at roughly 1.6 x 10^-5, meaning the frame and the glass expand and contract at nearly identical rates. This eliminates the sealant stress and glass bowing common in vinyl windows (which have a CTE closer to 4.0 x 10^-5). While this thermal stability guarantees longevity, it also means fiberglass frames are incredibly rigid. You cannot "flex" a fiberglass window into an out-of-square rough opening (RO). If the RO is out of plumb or square by more than 1/8-inch over an 8-foot span, the sash will bind, the hardware will fail prematurely, and the weatherstripping will compromise.
Phase 1: Rough Opening Preparation and Continuous Insulation Bucks
Modern building codes, including the latest IECC updates pushing for higher R-value walls, frequently place windows in assemblies with 2 to 4 inches of exterior continuous insulation (CI). You cannot mount a fiberglass window directly to the outer face of rigid foam, nor should you rely solely on long screws through foam into the structural sheathing.
Constructing a Plywood Buck
For walls with exterior CI, construct a plywood buck (a box frame) that extends from the interior sheathing through the exterior insulation to the plane of the siding. Use 3/4-inch CDX plywood or structural LVL for the buck. Wrap the entire exterior-facing buck assembly in a fluid-applied flashing membrane (such as Prosoco FastFlash) before the window arrives on site. This creates a continuous, monolithic water-resistive barrier (WRB) that integrates seamlessly with the window's nailing fin or mounting flange.
Sill Pan Flashing Integration
Never rely solely on the window's factory sill to manage bulk water. Install a sloped sill pan flashing system with a minimum 2% slope toward the exterior. The back dam of the sill pan must be a minimum of 1/2-inch high and sealed to the WRB using a compatible liquid flashing or butyl tape. According to the Building Science Corporation Builders Guides, managing water at the sill is the single most critical defense against structural rot in modern high-performance wall assemblies.
Never use raw wood shims for fiberglass window installation. Wood compresses under the heavy dead load of triple-pane glass units and wicks moisture, leading to rot and frame shifting. Always use high-density composite shims, closed-cell foam shims, or engineered plastic shims rated for structural load-bearing.
Phase 2: Setting, Plumbing, and Shimming Protocols
Because fiberglass does not flex, the shimming process dictates the operational success of the window. Shims must support the dead load of the unit while maintaining a perfectly square frame.
- Dry Fit and Clearance Check: Place the window in the RO. Verify a uniform 1/4-inch to 3/8-inch gap around the entire perimeter. This gap is mandatory for the expansion joint and backer rod placement.
- Base Shimming: Place two structural shims at the sill, positioned exactly 6 inches inward from each corner. Do not place a shim dead-center under the sill unless the manufacturer explicitly requires it for wide spans (over 60 inches), as this can cause the sill to crown upward when the heavy glass is installed.
- Plumbing the Jambs: Using a high-accuracy laser level or a 6-foot spirit level, plumb the side jambs. Insert shims at every designated fastener location. Never place a shim between fastener points without a corresponding screw pulling the frame tight against it. Shimming without fastening creates a pivot point that will bow the frame over time.
- Squaring the Diagonals: Measure the diagonal distances from corner to corner. The difference between the two diagonal measurements must not exceed 1/16-inch. Adjust the corner shims incrementally until the frame is perfectly square.
Phase 3: Fastening and Sealant Compatibility
Fastening fiberglass requires specific hardware and torque management. Unlike vinyl, which can be pierced with self-tapping screws, pultruded fiberglass requires pre-drilling to prevent micro-fractures in the composite matrix.
Fastener Schedule and Torque Specs
Use #8 or #10 corrosion-resistant (stainless steel or heavily coated) pan-head or flat-head screws. Pre-drill the frame and the mounting fin (if applicable) with a 3/16-inch carbide-tipped bit. Drive the screws until they are snug, but do not over-torque. The target torque is 12 to 15 inch-pounds. Over-tightening will dimple the interior fiberglass finish, create stress fractures, and pull the frame out of plumb. For detailed hardware specifications, always cross-reference the Marvin Installation Guidelines or the specific manufacturer's technical data sheet for your window model.
The Sealant Joint: Geometry and Chemistry
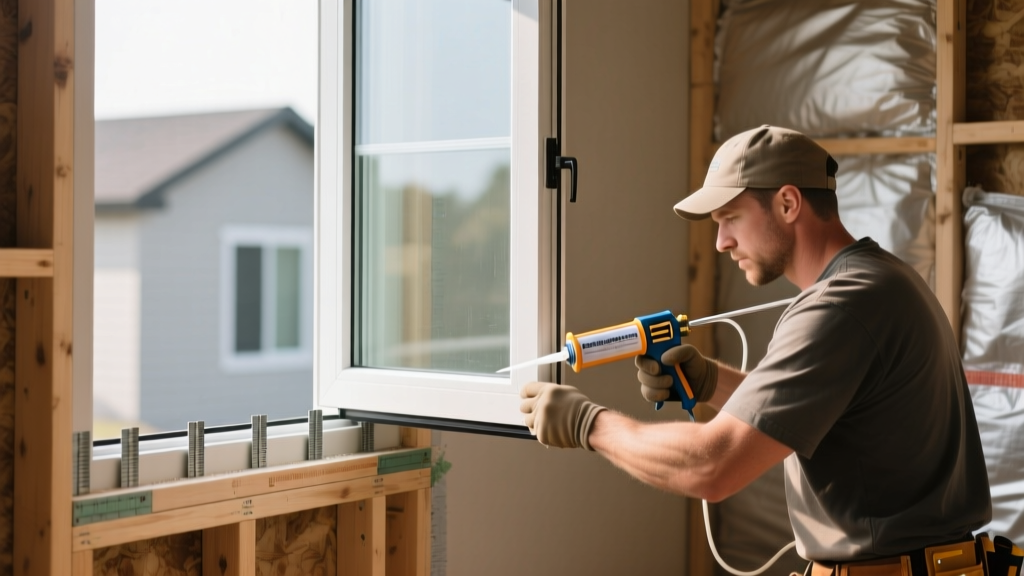
The perimeter sealant joint is your primary air and water barrier. Fiberglass is highly compatible with most high-grade sealants, but joint geometry is where most contractors fail.
- Backer Rod: Insert a closed-cell polyethylene backer rod into the 1/4-inch perimeter gap. The rod should be 25% larger than the gap to ensure a friction fit. This enforces a "two-sided adhesion" (bonding only to the window frame and the exterior sheathing/WRB, not the back of the gap).
- Sealant Selection: Use a high-quality, low-VOC polyurethane sealant (e.g., OSI Quad Max or Tremco Vulkem). Avoid acidic, acetoxy-cure silicones, as the acetic acid off-gassing during curing can degrade certain factory-applied fluoropolymer paints and anodized finishes on the fiberglass cladding.
- Tooling: Tool the sealant with a convex joint tool to create an hourglass profile, allowing the sealant to stretch and compress with seasonal structural movement without tearing.
Material Expansion & Installation Tolerances Matrix
Understanding how fiberglass compares to other common frame materials dictates your rough opening sizing and shimming strategy. The U.S. Department of Energy Window Efficiency Guidelines emphasizes that proper installation is just as critical as the window's NFRC thermal rating for achieving real-world energy performance.
| Frame Material | CTE (in/in/°F) | RO Gap Tolerance | Shim Type Required | Flexibility in Out-of-Square RO |
|---|---|---|---|---|
| Pultruded Fiberglass | ~1.6 x 10^-5 | 1/4" to 3/8" | Composite / Closed-Cell | None (Requires perfectly square RO) |
| Extruded Vinyl | ~4.0 x 10^-5 | 1/4" to 1/2" | Composite / Plastic | Moderate (Can flex slightly) |
| Wood / Wood-Clad | ~0.3 x 10^-5 | 1/4" to 1/2" | Composite / Treated Wood | Low (Rigid, but swells with moisture) |
| Aluminum (Thermal Break) | ~13.0 x 10^-5 | 3/8" to 1/2" | Neoprene / EPDM Pads | None (Highly rigid, high expansion) |
Post-Installation Verification and Sash Adjustment
Once the exterior sealant has skinned over and the interior insulation is prepped, perform a rigorous operational checklist. Fiberglass sashes are heavy, especially in triple-pane configurations, and hardware may require micro-adjustments after the building settles or the frame acclimates to interior humidity levels.
Operational Testing Checklist
- Sash Reveal Check: Close the primary sash and observe the reveal (the gap between the sash and the frame) on all four sides. It must be perfectly uniform. If the top corner drops, adjust the tilt-latches or the hinge arm tension screws according to the manufacturer's hardware manual.
- Weatherstripping Compression: Run a dollar bill test around the entire perimeter of the closed sash. Close the sash on the bill and pull. You should feel distinct, uniform resistance at every point. A lack of resistance indicates a gap in the weatherstripping compression, requiring frame re-shimming.
- Lock Engagement: Engage the multi-point locking system. The cam locks should pull the sash tightly into the compression bulb weatherstripping without requiring excessive physical force on the handle. If the handle is stiff, the frame is likely racked; loosen the perimeter screws slightly, re-check the diagonals, and re-torque.
- Weep Hole Clearance: Verify that the exterior weep holes at the bottom of the sill are completely clear of sealant, debris, or backer rod. Pour a small cup of water into the sill track to confirm it drains rapidly to the exterior without pooling inside the track.
By adhering to these strict framing tolerances, utilizing non-compressible shims, and respecting the chemical compatibility of modern polyurethane sealants, contractors can ensure that fiberglass windows perform flawlessly for decades, delivering the exact thermal and structural benefits they were engineered to provide.