Brick Molding Maintenance: Cleaning, Sealing, and Repair Guide
Learn how to clean, seal, and repair brick molding around windows and doors. Expert tips on removing efflorescence, treating rot, and caulking masonry joints.
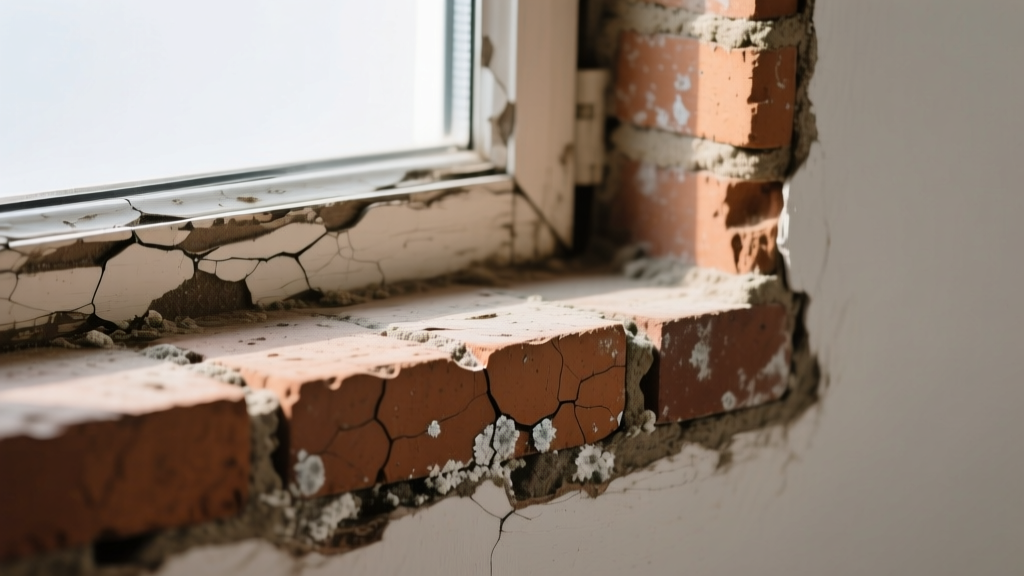
The Critical Masonry-to-Trim Transition
Brick molding (frequently referred to in the trades as brickmold) is the exterior casing trim that frames windows and doors where they intersect with brick masonry. Because it bridges two materials with vastly different thermal expansion rates and moisture absorption profiles, the joint between the brick veneer and the brick molding is one of the most common failure points in residential and commercial envelopes. Water intrusion here bypasses the weather-resistive barrier, leading to concealed framing rot, interior mold, and degraded insulation.
Phase 1: The Brick Molding Cleaning Playbook
Proper cleaning is not just about aesthetics; it is a diagnostic process. Removing biological growth and mineral deposits reveals the true condition of the caulk joint and the substrate beneath.
1. Eradicating Biological Growth (Mold, Mildew, and Algae)
The shaded, recessed joints around brick molding are prime real estate for biological growth. Avoid chlorine bleach, which degrades polyurethane sealants and damages adjacent landscaping. Instead, utilize a benzalkonium chloride-based cleaner (such as Wet & Forget or similar quaternary ammonium compounds).
- Application: Spray the solution onto the molding and the adjacent brick course until saturated.
- Dwell Time: Allow the solution to dwell for 15 to 20 minutes. Do not let it dry completely; mist with water if necessary.
- Agitation: Use a stiff nylon-bristle brush (never wire, which will leave rust stains on the brick and scratch PVC or aluminum molding) to scrub the joint line.
- Rinse: Flush with a standard garden hose. The dead biological matter will continue to wash away over the next two weeks with natural rainfall.
2. Clearing Efflorescence at the Trim Joint
Efflorescence—the white, powdery salt deposit that accumulates where the brick meets the molding—indicates that moisture is migrating through the masonry and evaporating at the trim line. According to the Brick Industry Association (BIA) Technical Notes on Cleaning, efflorescence must be addressed carefully to prevent damaging the trim material.
- Dry Brush: Always start with a dry, stiff nylon brush to remove loose salts. Water applied to dry efflorescence can drive the salts back into the masonry pores.
- Vinegar Solution: For stubborn deposits on the molding itself, apply a 50/50 mix of white vinegar and water.
- Avoid Muriatic Acid: Never use muriatic (hydrochloric) acid near PVC, fiberglass, or painted wood brick molding. The acid fumes and splashes will permanently pit, etch, and discolor non-masonry materials.
Material-Specific Maintenance Matrix
The maintenance protocol for brick molding depends entirely on the substrate material. Use the matrix below to identify your trim type and apply the correct care regimen.
| Material | Rot/Insect Resistance | Paintability | Cleaning Restrictions |
|---|---|---|---|
| Solid Wood (Pine/Fir) | Low (Requires prime/paint) | Excellent (Acrylic Latex) | Avoid prolonged water soaking; inspect for paint peeling annually. |
| Cellular PVC | High (Impervious to rot) | Good (Requires vinyl-safe dark paints) | Do not use solvent-based cleaners; will stain easily from dirt. |
| Extruded Aluminum | High (Will not rot) | Poor (Factory baked finish) | Strictly no acidic cleaners; will oxidize and chalk if exposed to masonry acid washes. |
| Fiberglass Composite | Very High | Excellent | Highly chemical resistant; standard masonry cleaners are safe. |
Phase 2: Sealing and Caulking Protocols
The joint between the brick molding and the brick veneer is an expansion joint. It must remain flexible while maintaining a watertight seal. Cheap acrylic latex caulks will fail within 18 months in this high-UV, high-moisture environment.
The 2026 Standard for Masonry-to-Trim Sealants
Modern building science dictates the use of advanced polymer or high-grade polyurethane sealants for brick molding perimeters. Products like OSI QUAD Max or Tremco Vulkem provide the necessary adhesion to both porous brick and slick PVC/aluminum molding without requiring a primer.
If the gap between the brick and the molding exceeds 1/2 inch, you must insert a 3/8-inch closed-cell polyethylene backer rod before caulking. This creates an 'hourglass' sealant profile, allowing the caulk to stretch and compress without losing adhesion to the substrate. Never tool caulk flat; use a concave spoon tool to create a slight fillet that sheds water outward.
Rot Repair vs. Full Replacement Decision Framework
When wood brick molding shows signs of degradation, contractors must decide between spot-repair and full replacement. Use this diagnostic framework to make the correct call.
Step 1: The Ice Pick Probe Test
Press a sharp awl or ice pick into the bottom rail of the brick molding, particularly at the miter joints and the sill interface. If the tool penetrates more than 1/8 inch with light pressure, the wood fibers have lost their structural integrity due to fungal decay.
Step 2: Evaluate the Damage Zone
- Localized Surface Rot (Less than 10% of the trim length): Cut away the soft, punky wood with a chisel. Treat the exposed sound wood with a liquid epoxy consolidant (e.g., Abatron LiquidWood). Once cured, fill the void with a two-part structural epoxy filler like Abatron WoodEpox. Sand smooth, prime with an oil-based masonry-blocking primer, and paint.
- Joint Failure or Deep Sill Rot: If the rot extends into the miter joints or the bottom sill plate, spot repair is a temporary bandage. Water has already compromised the internal joinery. Full replacement of the brick molding casing is required to restore the envelope's continuity.
Preventative Maintenance Schedule
To maximize the lifespan of brick molding and prevent costly envelope repairs, implement this bi-annual maintenance schedule:
- Spring (Post-Pollen): Wash the trim and adjacent brick with a mild, non-acidic detergent to remove pollen and biological spores. Inspect the caulk joint for micro-tears.
- Late Fall (Pre-Freeze): Check for gaps where the molding has pulled away from the brick due to summer thermal expansion. Re-tool or replace failed sealant before winter ice can wedge the joint open.
- Every 5 Years: If using wood molding, perform a full cross-hatch adhesion test on the paint film. Repaint with high-quality 100% acrylic exterior latex to maintain the moisture barrier.
Frequently Asked Questions
Can I install brick molding directly against the brick without a caulk joint?
No. Direct contact between the trim and the brick creates a capillary pathway that will wick rainwater directly into the trim and the wall cavity. A minimum 1/4-inch gap must be maintained and filled with a flexible, weather-resistant sealant to act as a capillary break.
Why is the paint peeling on my wood brick molding but not on the siding?
Brick is a highly porous material that absorbs and holds significant amounts of rainwater. As the sun heats the brick wall, moisture vapor drives outward. If the back side of the wood brick molding was not properly back-primed with an oil-based or vapor-retarding primer before installation, this vapor will become trapped behind the exterior paint film, causing it to blister and peel.
Is PVC brick molding better than wood for masonry transitions?
From a pure moisture-resistance standpoint, cellular PVC is vastly superior to wood because it will not rot or harbor mold. However, PVC expands and contracts at a much higher rate than wood (up to 1/8 inch per 18-foot run in extreme temperature swings). This requires wider caulk joints and high-quality elastomeric sealants to prevent the joint from tearing during seasonal shifts.