Brick or Vinyl Siding: Construction Methods and Installation Costs
Compare brick or vinyl siding construction methods. Explore installation steps, structural requirements, moisture management, and 2026 cost breakdowns.

The Structural Reality: Load-Bearing vs. Cladding
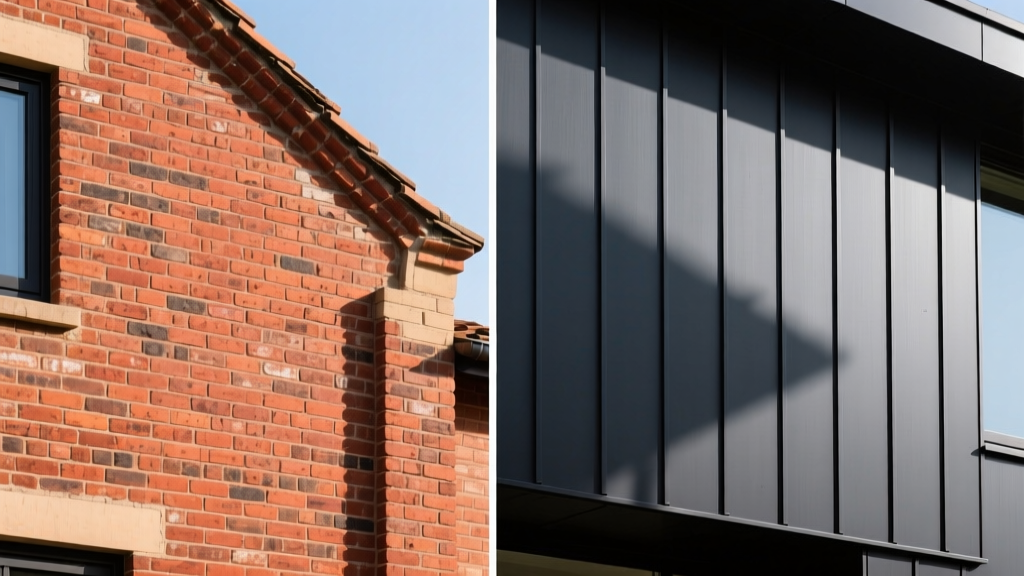
When evaluating brick or vinyl siding for a residential or light-commercial envelope, the primary distinction lies in how each material interfaces with the structural frame. Neither modern brick veneer nor vinyl siding is load-bearing; both act as exterior cladding. However, their dead loads and structural support requirements diverge drastically.
Brick veneer weighs approximately 40 to 45 pounds per square foot (psf). Because of this immense dead load, it cannot be hung directly from wall studs. Instead, it requires a continuous masonry shelf (minimum 4 inches wide) integrated into the concrete or CMU foundation wall. If you are retrofitting a home originally designed for lightweight cladding to support brick, contractors must bolt galvanized steel angle irons (typically L4x4x1/4) to the foundation using wedge anchors to create an artificial masonry ledge.
Vinyl siding, conversely, weighs between 0.4 and 0.8 psf. It relies entirely on the structural sheathing (OSB or plywood) and wall studs for support. No foundation modifications or heavy-duty ledgering is required, making it highly adaptable to wood-frame, steel-frame, and structural insulated panel (SIP) construction.
Moisture Management and Flashing Protocols
The most critical failure point in exterior cladding is trapped moisture. The construction methods for managing water infiltration are fundamentally opposed between these two materials.
Brick Veneer Drainage Plane
According to the National Institute of Building Sciences (NIBS), brick veneer construction mandates a drained and vented cavity. The workflow requires:
- Applying a fluid-applied or sheet WRB (like Tyvek or Blueskin) directly to the OSB sheathing.
- Maintaining a strict 1-inch to 2-inch air gap between the WRB and the back of the brick wythe.
- Installing through-wall flashing (typically a composite membrane like copper-asphalt or flexible TPO) at the base of the wall and above all fenestrations.
- Placing open-head plastic weep vents (e.g., MortarNet) every 24 inches along the base flashing to allow water to escape while blocking insects.
Vinyl Siding Water Shedding
Vinyl is inherently waterproof and non-absorptive. It functions as a rain screen that sheds the bulk of water via overlapping panels. The Vinyl Siding Institute (VSI) specifies that moisture management relies on a properly lapped house wrap beneath the panels. Flashing is required above windows and doors, but weep holes are not utilized because water is designed to run down the exterior face of the overlapping J-channels and panels rather than penetrating the cladding layer.
Step-by-Step Installation Workflows
Brick Veneer Construction Sequence
- Tie Placement: Corrugated 22-gauge galvanized wall ties are nailed to the studs at 16 inches vertically and 24 inches horizontally.
- Flashing & Weeps: Base flashing is laid over the foundation shelf, and weep vents are positioned at the lowest mortar joint.
- Mortar Application: Type N mortar (750 psi compressive strength) is preferred for veneer due to its higher flexibility and lower shrinkage compared to Type S.
- Laying the Wythe: Masons lay a single 4-inch nominal wythe of brick, ensuring mortar does not bridge the 1-inch air cavity.
- Tooled Joints: Concave or V-joints are tooled while thumbprint-hard to compress the mortar against the brick, maximizing weather resistance.
Vinyl Siding Construction Sequence
- Substrate Prep: Walls are checked for plumb. If deviations exceed 1/4 inch over 10 feet, vertical furring strips are installed and shimmed.
- Trim Installation: J-channels are nailed around windows, doors, and soffits. Corner posts are plumb-locked at building edges.
- Starter Strip: A continuous starter strip is leveled and nailed at the base of the wall, locking the bottom edge of the first course.
- Panel Locking: Panels are interlocked from bottom to top. Nails are driven in the exact center of the nailing slots, leaving a 1/32-inch gap between the nail head and the vinyl to allow for thermal expansion and contraction.
- Overlaps: Panel seams are overlapped by a minimum of 1 inch, with seams staggered vertically to prevent water channeling.
Labor, Timeline, and 2026 Cost Matrix
The financial and scheduling implications of choosing between brick or vinyl siding are substantial. Brick requires specialized masonry labor and extended curing times, whereas vinyl can be installed rapidly by general carpentry crews.
| Metric | Brick Veneer (4-inch Nominal) | Standard Vinyl Siding | Insulated Vinyl Siding |
|---|---|---|---|
| Material Cost (per sq. ft.) | $4.50 - $8.00 | $1.50 - $3.50 | $3.00 - $6.00 |
| Labor Cost (per sq. ft.) | $9.00 - $14.00 | $2.50 - $4.50 | $4.00 - $6.50 |
| Total Installed Cost | $13.50 - $22.00 | $4.00 - $8.00 | $7.00 - $12.50 |
| Installation Speed (2,000 sq. ft.) | 10 - 15 Days | 3 - 5 Days | 4 - 6 Days |
| Expected Lifespan | 100+ Years | 30 - 40 Years | 40 - 50 Years |
Thermal Performance and Insulation Integration
A common misconception is that brick provides high thermal resistance. Solid brick has an R-value of roughly 0.2 per inch, meaning a 4-inch wythe contributes less than R-1 to the wall assembly. The thermal benefit of brick lies in its thermal mass—its ability to absorb solar heat during the day and release it at night, which flattens HVAC load spikes in temperate climates.
Vinyl siding itself has zero insulating value. However, modern insulated vinyl siding features a contoured expanded polystyrene (EPS) foam backing laminated to the panel. This backing adds an R-value of R-2.0 to R-5.0 and eliminates the convective wind-washing that occurs in the hollow air gap behind standard vinyl panels. According to the U.S. Department of Energy, integrating continuous exterior insulation (like insulated vinyl or rigid foam under brick veneer) is critical for breaking thermal bridges through wood studs in modern energy codes.
Decision Framework: When to Specify Which Material
Use this practical framework to determine the optimal cladding based on site conditions, budget, and structural parameters.
Specify Brick Veneer If:
- Foundation supports it: The architectural plans include a 4-inch masonry ledge, or the budget allows for structural steel retrofitting.
- Acoustic buffering is required: The 4-inch mass and air cavity provide superior Sound Transmission Class (STC) ratings for homes near highways or airports.
- Impact resistance is paramount: The property is in a hail-prone region or requires high impact resistance (ASTM E1886) for wind-borne debris.
- Zero-maintenance lifecycle is the goal: The owner wants a 100-year facade that requires zero painting, sealing, or washing.
Specify Vinyl Siding If:
- Budget and timeline are constrained: You need to dry-in the structure rapidly and keep exterior cladding costs under $8.00 per square foot.
- Structural limitations exist: You are building on expansive soils where heavy foundation loads must be minimized, or doing a second-story addition where dead load limits apply.
- Complex geometries are present: The facade features multiple radii, tight dormers, and complex gables where cutting and laying masonry would be prohibitively expensive.
- Continuous insulation is mandated: You are utilizing insulated panels to meet strict IECC continuous exterior R-value requirements without adding rigid foam board layers.
Selecting between brick or vinyl siding is not merely an aesthetic choice; it dictates foundation engineering, moisture management strategies, and long-term thermal performance. By aligning the material's physical properties with the structural capacity of the building and the specific climatic demands of the site, builders can ensure a durable, code-compliant, and cost-effective envelope.
Written by
Sarah WhitfieldSarah Whitfield is a chartered quantity surveyor (MRICS) and construction cost analyst with 15 years of experience in material pricing, procurement strategy, and project budgeting. She earned her degree in Construction Management from the University of Reading (UK) and has worked on projects ranging from $2M custom homes to $180M mixed-use developments across North America and Europe. Sarah currently leads cost estimating for BuildMat Insight, maintaining a proprietary database of 4,000+ material price points updated quarterly. She is a frequent contributor to RSMeans cost data panels and has presented at the International Cost Engineering Council (ICEC) congress. Based in Denver, CO, Sarah is an avid trail runner and volunteer mentor for Women in Construction.
More from Sarah Whitfield
View all
Wood & Lumber
What Are the Different Types of Wood? A Builder's Guide
Compare structural softwoods, finish hardwoods, and engineered lumber. Analyze Janka ratings, MOE values, and 2026 pricing for construction.
Aug 4, 2026

Walls & Panels
Steel Framing vs Wood Framing: Corrosion and Moisture Defense
Compare steel framing vs wood framing for moisture resistance. Learn about galvanized coatings, condensation risks, and corrosion protection strategies.
Jul 21, 2026

Stone & Masonry
How to Cut Stone Veneer: Wet Saw vs Grinder Comparison
Compare the best tools for cutting stone veneer. We review wet saws, angle grinders, and chop saws to help you achieve clean, chip-free cuts.
Jul 21, 2026