How to Install Flagstone Stepping Stones on Uneven Terrain
Learn how to install flagstone stepping stones on uneven terrain. This guide covers base preparation, leveling techniques, and jointing for lasting pathways.
Material Specifications & Load Tolerances
Flagstone stepping stones provide a highly permeable, aesthetically natural alternative to poured concrete or pre-cast pavers. However, natural stone is subject to cleavage planes and point-load fractures. When sourcing material for foot traffic, thickness is the primary structural determinant. According to the Natural Stone Institute, sedimentary stones like sandstone and slate must meet minimum thickness requirements to prevent snapping under dynamic loads.
Never use flagstone thinner than 1.5 inches for ground-level stepping stones. For high-traffic zones or areas with heavy clay soils prone to frost heave, specify 2-inch thermal-cut bluestone or dense limestone. Thin veneer-grade stone (0.75 to 1 inch) will fracture under the concentrated heel-strike of a 200-pound pedestrian load.
As of 2026, premium 2-inch Pennsylvania Bluestone thermal flagstone averages $7.50 to $10.00 per square foot, while irregular Arizona Sandstone ranges from $4.50 to $6.50 per square foot. Always budget for a 12% overage to account for edge trimming and natural breakage during transit.
Subgrade Excavation and Base Engineering
The most common failure mode in flagstone installations is differential settlement caused by inadequate subgrade preparation. Uneven terrain exacerbates this issue, as water naturally pools in topographical depressions, softening the native soil. To counteract this, the excavation depth must account for the stone thickness, a leveling bed, and a structural aggregate base.
Calculating Excavation Depth
- Native Soil Subgrade: Excavate to a minimum of 8 inches below the desired finished grade.
- Structural Base: 4 to 5 inches of compacted Class II Road Base (3/4-inch minus crushed aggregate).
- Leveling Bed: 1.5 to 2 inches of coarse concrete sand (ASTM C33 specification).
- Flagstone: 1.5 to 2 inches.
Before laying the base, perform a simple percolation test on the exposed subgrade. Dig a 12-inch hole, fill it with water, and let it drain. If it takes longer than 24 hours to drain completely, your native soil is heavy clay. You must increase the Class II road base depth to 6 inches and consider integrating a perforated French drain pipe at the subgrade level to intercept lateral groundwater, aligning with EPA's Green Infrastructure guidelines for permeable surface management.
The 5-Step Installation Protocol
Installing on a slope or uneven ground requires maintaining a consistent cross-slope (1% to 2%) to shed water away from adjacent structures while keeping the individual stones level with one another.
Step 1: Subgrade Compaction
After excavating, run a vibratory plate compactor (minimum 3,000 lbs compaction force) directly over the exposed native soil. Make at least three overlapping passes. This prevents the subgrade from migrating into the aggregate base over time.
Step 2: Aggregate Base Placement
Spread the Class II road base in 2-inch lifts (layers). Moisten each layer lightly with a hose and compact it before adding the next. The final compacted base should be rock-hard and follow the desired 1% drainage slope. Do not attempt to lay the entire base at a 5-inch depth and compact it once; the bottom layers will remain loose and settle later.
Step 3: Screeding the Leveling Bed
Pour the ASTM C33 coarse concrete sand over the compacted base. Do not use masonry sand or play sand; the fine particles will wash out and retain too much moisture, leading to frost heave in freezing climates. Screed the sand to a uniform 1.5-inch depth using a straight 2x4 and temporary PVC pipe guides.
Step 4: Stone Placement and Leveling
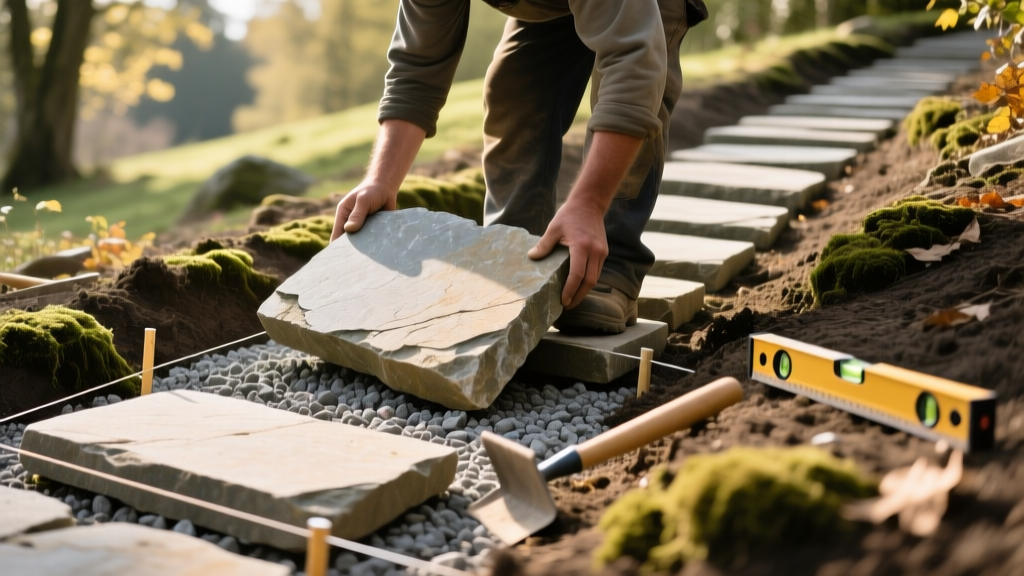
Place the flagstone stepping stones onto the sand bed, spacing them 12 to 18 inches apart (measured from the center of each stone to match average human stride length). Use a 4-foot spirit level and a dead-blow rubber mallet to tap the stones into the sand. Never use a mechanical plate compactor directly on natural flagstone, as the high-frequency vibrations will shatter the stone along its natural fault lines.
Step 5: Edge Restraint and Jointing
Because stepping stones are isolated islands rather than a continuous interlocking surface, edge restraints are unnecessary. However, the joints between the stone and the surrounding landscape must be stabilized to prevent the sand bed from washing out during heavy rain events.
Jointing Material Selection Matrix
The material used to fill the voids between the stepping stones dictates the pathway's permeability, maintenance requirements, and aesthetic profile. Below is a decision matrix for selecting the appropriate jointing medium based on site conditions.
| Jointing Material | Permeability | Maintenance Level | Best Application Scenario |
|---|---|---|---|
| Polymeric Sand | Low (Surface only) | Low | High-traffic areas where weed suppression is critical. Requires strict 1/8-inch to 1/4-inch joint widths. |
| Decomposed Granite (DG) | High | Medium | Rustic, naturalistic gardens. Requires periodic raking and topping up every 2-3 years as it migrates. |
| Crushed Gravel (3/8" minus) | Very High | Low | Wet climates and heavy clay soils. Locks together better than round pea gravel and resists displacement. |
| Creeping Thyme / Moss | Variable | High | Shaded, low-traffic courtyard gardens. Requires irrigation establishment and occasional trimming. |
Diagnosing and Correcting Settlement Failures
Even with meticulous base preparation, environmental factors can cause flagstone stepping stones to shift. Use the following troubleshooting framework to diagnose and repair failures without excavating the entire pathway.
| Symptom | Root Cause | Corrective Action |
|---|---|---|
| Stone rocks or teeters when stepped on. | Uneven sand bed or debris under the stone; high spot on the compacted base. | Lift the stone. Remove 1 inch of sand, check the base with a level, scrape down any high spots, replace sand, and re-seat the stone. |
| Stone has sunk 1+ inches below grade. | Subgrade failure (clay soil turning to mud) or insufficient base compaction. | Lift the stone. Excavate the soft subgrade, fill with 3/4-inch crushed stone, compact thoroughly, add fresh sand, and re-seat. |
| Water pools on top of the stone. | Stone was installed perfectly level instead of matching the 1% cross-slope of the base. | Lift the stone. Add a wedge of coarse sand to the low side to tilt the stone slightly, matching the pathway's overall drainage plane. |
| Stone cracked cleanly in half. | Point-load fracture due to a void in the sand bed beneath the center of the stone. | Replace the stone. Ensure the sand bed is 100% supported with no air gaps. Verify stone thickness is at least 1.5 inches. |
Proper installation of flagstone stepping stones relies entirely on the hidden structural layers beneath the surface. By adhering to strict aggregate specifications, utilizing the correct compaction methodology, and selecting a jointing material that matches the site's hydrological profile, the pathway will remain stable and visually striking for decades.