How to Install Rock Stone Veneer: Substrate Prep and Mortar Guide
Master rock stone veneer installation with our expert guide on substrate prep, Type S mortar selection, and back-buttering techniques for lasting adhesion.

The Hidden Failure Point: Substrate Preparation
The most critical phase of installing rock stone veneer occurs before a single stone is lifted. Manufactured and natural rock stone veneers impose a significant dead load on wall assemblies, typically ranging from 10 to 15 pounds per square foot. When installed over interior drywall or exterior wood sheathing without proper reinforcement, the sheer weight combined with the moisture introduced by the setting mortar inevitably leads to catastrophic delamination.
Standard 1/2-inch gypsum drywall has a paper face that absorbs moisture from the mortar, weakening the bond and causing the paper to separate from the gypsum core. To prevent this, the substrate must be upgraded to a cementitious backer board or a properly lathed and scratched masonry base.
Material Matrix: Mortar Selection and Compatibility
Selecting the correct mortar is non-negotiable. The Portland Cement Association outlines specific mortar types based on compressive strength and flexibility. For rock stone veneer, the mortar must possess high tensile bond strength to support the vertical load while accommodating minor thermal expansion.
| Mortar Type | Compressive Strength | Best Application | Cure Time to Set Stone |
|---|---|---|---|
| Type N | 750 psi | Above-grade exterior walls (non-veneer), soft masonry | Not recommended for heavy veneer |
| Type S | 1,800 psi | Standard rock stone veneer, scratch coats, interior/exterior | 24-48 hours for scratch coat |
| Polymer-Modified | 2,500+ psi | High-shear areas, non-porous substrates, freeze-thaw zones | Varies by manufacturer (often faster) |
For traditional installations, a pre-blended Type S masonry cement mixed with washed, graded masonry sand is the industry baseline. If mixing from scratch, use a ratio of 1 part Portland cement, 1/2 part hydrated lime, and 4.5 parts sand. For interior applications over cement board where a thinner setting bed is desired, high-performance polymer-modified mortars (such as MAPEI Ultraflex or Custom Building Products MegaLite) provide superior non-sag properties, preventing heavy stones from sliding down the wall before the mortar cures.
Step-by-Step Installation Protocol
Phase 1: Weather Barrier and Metal Lath
For exterior walls or interior wet areas (like showers), a weather-resistive barrier (WRB) such as Grade D paper or a fluid-applied membrane must be applied over the sheathing. Overlap horizontal seams by 2 inches and vertical seams by 6 inches. Next, attach self-furring galvanized metal lath (minimum 2.5 lbs per square yard) using corrosion-resistant staples or nails driven directly into the wall studs, not just the sheathing. Overlap all lath seams by a minimum of 1 inch to ensure a continuous structural mesh.
Phase 2: The Scratch Coat (The Anchor)
The scratch coat is a 3/4-inch layer of Type S mortar applied directly over the metal lath. This layer encapsulates the lath and provides a rigid, porous surface for the final setting mortar to grip.
- Application: Using a flat trowel, press the mortar firmly into the lath to eliminate air pockets, then build it out to a uniform 3/4-inch thickness.
- Scoring: While the mortar is still plastic but firm enough to hold a shape (usually 30-60 minutes after application), use a masonry rake or a coarse comb to score horizontal grooves into the surface. Space these grooves 1/4-inch deep and 2 inches apart. Horizontal scoring provides a mechanical shelf for the setting mortar to lock into.
- Curing: Allow the scratch coat to cure for a minimum of 24 to 48 hours. In hot, dry conditions, mist the scratch coat lightly with water twice a day to prevent rapid moisture loss and shrinkage cracking.
Phase 3: Setting the Rock Stone Veneer
Begin installation at the bottom of the wall, working upward. For exterior corners, install pre-formed corner pieces first, alternating the long and short legs to create a natural, interlocking wrap.
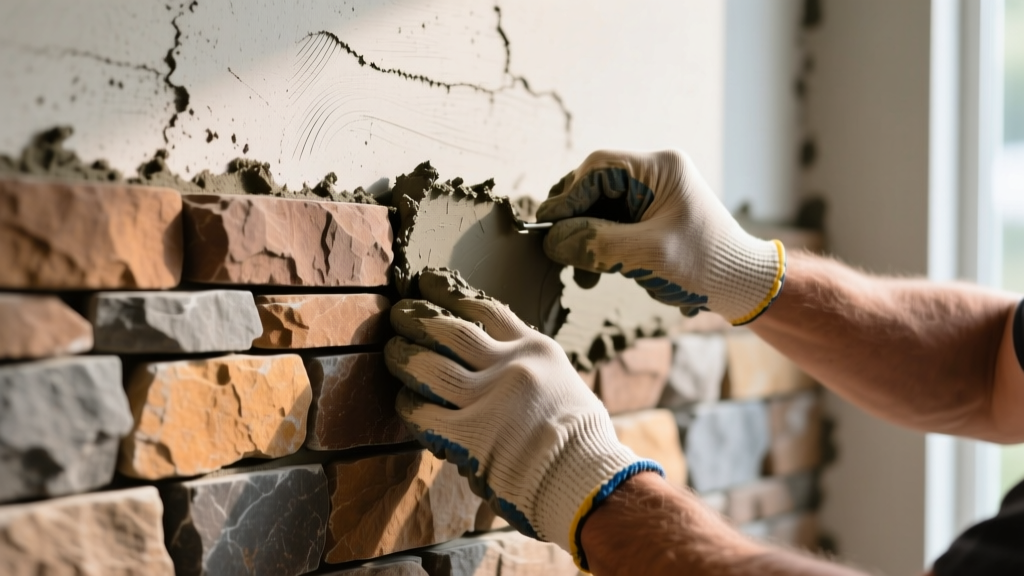
Never rely solely on mortar applied to the wall. You must 'back-butter' every single piece of rock stone veneer. Using a masonry trowel, apply a 1/2-inch layer of mortar to the entire back surface of the stone, scraping the edges to create a slight bevel. This ensures 100% mortar coverage, eliminating voids where water can pool and freeze, which is the primary cause of spalling and stone pop-offs.
Press the back-buttered stone firmly into the mortar bed on the wall. Apply enough pressure so that a small amount of mortar squeezes out around the edges, confirming full contact. Maintain a consistent joint width—typically 1/2-inch to 1-inch for standard rock profiles—using spacers or by eye, ensuring joints are staggered and avoid continuous vertical or horizontal lines.
Grouting, Jointing, and Moisture Management
Once the stones are set and the mortar has achieved initial thumbprint hardness (usually 30 to 60 minutes), tool the joints. Use a jointing tool or a stiff bristle brush to compress the mortar into the joints and texture it to match the desired aesthetic. Compressing the mortar is vital; it forces the paste against the stone edges, creating a watertight seal that prevents moisture infiltration behind the veneer.
Cleanup must be done carefully. According to installation guidelines from leading manufacturers like Eldorado Stone, you should never use muriatic acid or harsh chemical cleaners on manufactured rock stone veneer. The iron oxide pigments used to color the stone will react with acid, resulting in permanent bleaching or rust-colored staining. Instead, use a dry, stiff-bristle brush to remove excess mortar smears once they have crumbled, followed by a light misting of clean water.
Troubleshooting Edge Cases and Failure Modes
Even with meticulous preparation, environmental factors and material inconsistencies can introduce defects. Recognizing these early allows for immediate remediation.
- Efflorescence (White Powdery Deposits): This occurs when water-soluble salts migrate to the surface of the stone or mortar. The National Concrete Masonry Association (NCMA) notes that efflorescence is primarily a moisture management issue. To prevent it, ensure the scratch coat is fully cured before setting stone, use low-alkali Portland cement, and avoid adding excess water to the mortar mix. If it appears, remove it with a dry brush; do not wash it with water, which will drive the salts back into the masonry to re-emerge later.
- Mortar Shrinkage Cracking: Hairline cracks in the joints indicate the mortar mix was too wet or dried too quickly. Prevent this by strictly adhering to the manufacturer's water-to-mix ratio and protecting the wall from direct sunlight and wind during the curing process using damp burlap or polyethylene sheeting.
- Stone Delamination (Hollow Sounds): Tap the installed stones with a wooden mallet after 7 days. A hollow sound indicates a lack of back-buttering or a bond failure due to a dusty stone surface. Always rinse natural stone and brush manufactured stone to remove release agents and kiln dust before applying mortar.
- Slippage on Vertical Runs: If stones begin to slide before the mortar sets, your mix is too rich in water or lacks a non-sag additive. For heavy profiles exceeding 3 inches in thickness, use mechanical fasteners (such as masonry ties anchored into the studs) to support the stone until the Type S mortar achieves its 28-day compressive strength.
By treating rock stone veneer installation as a structural masonry project rather than a simple cosmetic overlay, you ensure an assembly that will withstand decades of thermal cycling, moisture exposure, and gravitational shear without compromise.
Written by
Priya KapoorPriya Kapoor is a real estate market analyst and construction economics researcher with expertise in housing affordability, development feasibility, and infrastructure investment. She holds a Master of Regional Planning from Cornell University and previously worked as a senior analyst at CBRE's Investment Properties group, where she modeled returns for $4B in mixed-use development pipelines. Priya now runs an independent research practice advising developers, municipalities, and REITs on construction cost forecasting and market timing. She publishes the quarterly "BuildMat Market Pulse" report tracking material price indices across 12 commodity categories. Based in Austin, TX, Priya serves on the board of Habitat for Humanity Austin and is a marathon runner.
More from Priya Kapoor
View all
Construction Cost
Cost to Build a 1600 Sq Ft Home in 2026: Full Breakdown
Accurate 2026 cost to build a 1600 sq ft home—material, labor, and regional pricing breakdowns included. Plan your budget with real-time estimates.
Aug 11, 2026

Wood & Lumber
Name the Types of Wood for Pressure Treatment and Preservation
Learn how to name the types of wood best suited for pressure treatment. Compare species treatability, chemical retention levels, and 2026 preservation costs.
Aug 4, 2026

Stone & Masonry
Stone Veneer Suppliers Lindenhurst: 2026 Cost Analysis
Analyze 2026 stone veneer costs in Lindenhurst, NY. Compare local supplier pricing, delivery fees, and Suffolk County installation labor rates.
Aug 4, 2026