Installing a Retaining Wall with Stone Veneer: Expert Guide
Learn how to build a retaining wall with stone veneer. This expert guide covers CMU structural cores, drainage, weep holes, and mortar specs.

The Core Philosophy: Structural Backing vs. Aesthetic Facing
Building a retaining wall with stone veneer is fundamentally an exercise in separating structural engineering from architectural aesthetics. Stone veneer—whether natural or manufactured—possesses zero lateral load-bearing capacity. It cannot hold back the thousands of pounds of hydrostatic pressure exerted by saturated soil. Therefore, the installation requires a two-tier approach: a reinforced concrete masonry unit (CMU) core to resist earth pressure, and a meticulously drained veneer cladding system applied to the exposed face.
Material Breakdown & 2026 Cost Matrix
Before breaking ground, accurate material estimation is vital. The costs below reflect current 2026 market rates for a standard 4-foot-high retaining wall, excluding specialized geogrid reinforcement for walls exceeding 4 feet.
| Component | Material Specification | Est. Cost per Sq. Ft. (Face) | Primary Function |
|---|---|---|---|
| Structural Core | 8-inch CMU Blocks, Type S Mortar | $6.00 - $9.00 | Resist lateral earth pressure |
| Footing & Base | 3,500 PSI Concrete, #4 Rebar | $4.00 - $7.00 | Prevent frost heave and settling |
| Drainage System | 4" PVC, Filter Fabric, Washed Stone | $2.50 - $4.50 | Relieve hydrostatic pressure |
| Veneer Cladding | Natural/Manufactured Stone Veneer | $9.00 - $16.00 | Aesthetic facing |
| Veneer Mortar | Type S Mortar, Metal Lath | $2.00 - $3.50 | Bond veneer to CMU core |
| Total Material Cost (Per Sq. Ft. of Face) | $23.50 - $40.00 | Excludes labor & equipment | |
Phase 1: Excavation and the Frost-Proof Footing
The longevity of your retaining wall with stone veneer is dictated entirely by its footing. A shifting base will crack the CMU core, which will subsequently delaminate the veneer facing.
- Determine Frost Depth: Consult local building codes. In northern climates, footings must extend 36 to 48 inches below grade to prevent frost heave. In warmer zones, a minimum 12-inch depth is standard.
- Trench and Compact: Excavate a trench twice the width of the CMU block (typically 16 inches wide for an 8-inch wall). Compact the subgrade using a mechanical plate compactor.
- Pour the Footing: Pour a continuous 3,500 PSI concrete footing. While wet, insert #4 (1/2-inch) vertical rebar dowels spaced 32 inches on center. These dowels will tie the footing to the hollow cells of the CMU core.
Phase 2: Building the CMU Structural Core
According to guidelines published by the National Concrete Masonry Association (NCMA), segmental and masonry retaining walls must be engineered to withstand active earth pressure. For a veneered wall, the CMU core acts as a cantilevered beam.
- Laying the Block: Use Type S mortar for all CMU joints. Type S provides a minimum compressive strength of 1,800 PSI, which is necessary for below-grade and load-bearing applications.
- Reinforcement: Drop vertical #4 rebar into every other CMU cell, aligning it with the footing dowels.
- Grouting: Fill the reinforced cells with high-slump masonry grout. This transforms the hollow blocks into a solid, reinforced concrete mass capable of resisting the sheer force of the retained soil.
Phase 3: Waterproofing and Hydrostatic Relief
Hydrostatic pressure is the primary cause of retaining wall failure. When soil behind the wall becomes saturated, water pressure builds exponentially. If this pressure is not relieved, it will push the CMU core forward and force water through the masonry, destroying the veneer bond.
The Drainage Assembly
Apply a fluid-applied waterproofing membrane (such as a rubberized asphalt foundation coating) to the back (soil-facing side) of the CMU core. This prevents moisture from migrating through the concrete and into the veneer mortar bed.
Next, install a 4-inch perforated PVC pipe wrapped in non-woven geotextile filter fabric at the base of the wall, behind the footing. Backfill the space between the CMU core and the native soil with 3/4-inch clean, washed drainage stone. The filter fabric prevents fine soil particles from migrating into the stone and clogging the drain pipe. Ensure the PVC pipe daylight (exits to the surface) at 10-foot intervals or ties into a solid stormwater outfall.
Phase 4: Installing the Stone Veneer
With the structural and drainage systems complete, you can transition to the architectural finish. Applying stone veneer to a retaining wall requires specific detailing to accommodate exterior moisture exposure.
Mortar Selection and Scratch Coat
Do not apply veneer directly to bare CMU. First, attach a corrosion-resistant diamond metal lath to the front face of the CMU using masonry nails or concrete screws spaced 6 inches apart. Apply a 1/2-inch scratch coat of Type S mortar over the lath. Scarify (scratch) the surface horizontally with a rake to create a mechanical key, and allow it to cure for 24 to 48 hours.
The Weep Hole Mandate
This is the most frequently skipped step in DIY veneer installations. Even with a waterproofed CMU back, moisture will penetrate the mortar joints of the stone veneer from the front (rain, irrigation). If this water is trapped behind the veneer, freeze-thaw cycles will pop the stone off the wall.
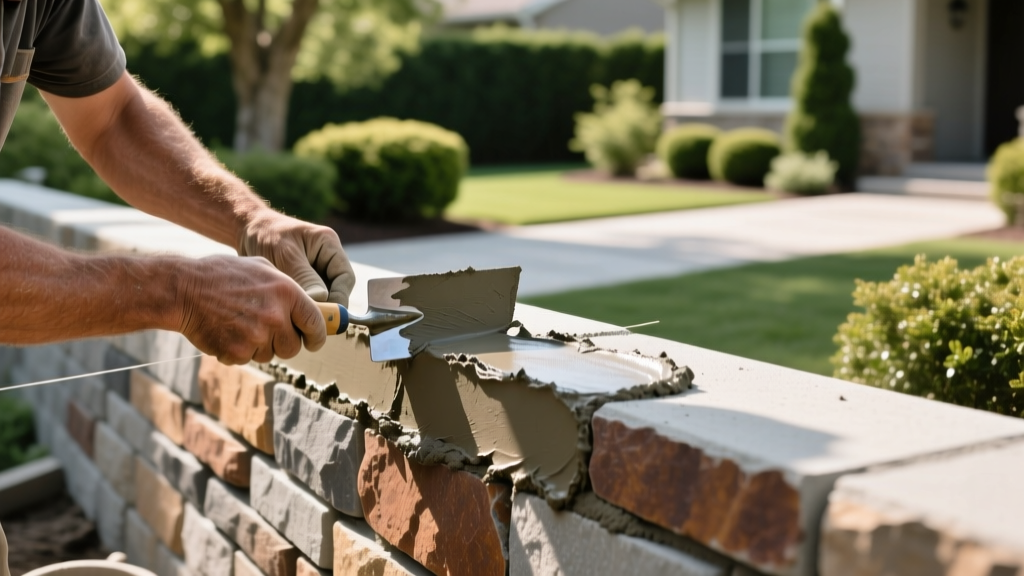
Apply the stone veneer using a thick bed of Type S mortar, buttering the back of each stone to ensure 100% coverage and eliminating air pockets where water could collect and freeze.
Troubleshooting: Why Veneer Fails on Retaining Walls
Even with proper installation, retaining walls with stone veneer can experience specific failure modes if edge cases are ignored.
- Spalling and Pop-Offs: If stones detach in sheets during late winter, the scratch coat lacked proper moisture relief. Fix: Ensure weep holes are clear of debris and consider applying a breathable, silane-siloxane masonry sealer to the veneer face to reduce water absorption.
- Severe Efflorescence: White, powdery stains bleeding through the veneer joints. This is caused by soluble salts in the CMU grout or Portland cement migrating to the surface. Fix: Use low-alkali Portland cement in your mortar mix, ensure the back of the CMU is fully waterproofed, and never use muriatic acid to clean natural stone veneer, as it drives salts deeper into the pores.
- Base Bulging: The bottom course of the veneer pushes outward. This indicates that the CMU core itself is failing due to inadequate drainage behind the wall, or the footing has washed out. Fix: This requires structural remediation, including excavating the backfill, clearing the French drain, and potentially installing tie-back anchors.
Constructing a retaining wall with stone veneer is a premium landscaping investment. By strictly adhering to the separation of structural load-bearing and aesthetic cladding, and by obsessing over hydrostatic relief, your installation will remain plumb, intact, and visually striking for decades.
Written by
Marcus ChenMarcus Chen is a licensed structural engineer (PE) and building materials analyst with over 12 years of experience across residential, commercial, and industrial construction. He holds a Master of Science in Civil Engineering from UC Berkeley and spent six years at Thornton Tomasetti before transitioning to independent consulting and technical writing. Marcus specializes in material selection for seismic-prone regions, concrete reinforcement strategies, and lifecycle cost analysis. His work has been cited by the American Concrete Institute (ACI) and the Structural Engineers Association of California (SEAOC). When he is not on a job site or at his desk, you will find him hiking the Sierra Nevada or restoring a 1920s craftsman bungalow in Oakland, CA.
More from Marcus Chen
View all
Construction Cost
How Much Did the Eiffel Tower Cost to Build?
How much did the Eiffel Tower cost to build in 1889? We adjust for inflation and compare its budget to modern skyscraper construction.
Aug 4, 2026

Fire Resistance
What Is a Fire Resistant Material? Testing & Certification Guide
Discover what is a fire resistant material through ASTM and UL testing. Learn how fire ratings, certifications, and assemblies work in construction.
Aug 4, 2026

Construction Cost
How Much Did the Burj Khalifa Cost to Build?
How much did the Burj Khalifa cost to build? We break down the $1.5B project and extract 5 money-saving strategies for your next build.
Jul 30, 2026