How to Apply Stone Veneer Glue for a Flawless Mortarless Install
Master mortarless stone veneer installation. Learn exact adhesive chemistries, trowel sizes, and step-by-step techniques for a permanent, flawless bond.

The Case for Mortarless: When to Use Stone Veneer Glue
Mortarless stone veneer installation has transformed interior masonry workflows, eliminating the need for metal lath, scratch coats, and wet mortar mixing. By utilizing high-performance construction adhesives, installers can adhere manufactured or lightweight natural stone directly to approved substrates. However, stone veneer glue is not a universal shortcut. It is strictly engineered for veneers weighing under 15 pounds per square foot and requires precise chemical selection, substrate preparation, and troweling techniques to prevent catastrophic delamination.
This guide details the exact adhesive chemistries, building code limitations, and step-by-step installation protocols required to execute a permanent mortarless stone veneer application in 2026.
Choosing the Right Adhesive Chemistry
Not all construction adhesives are formulated for the shear load and thermal movement of stone masonry. Standard acrylic or latex-based adhesives will fail under the dead load of stacked stone. You must select an adhesive specifically rated for masonry veneer. The Masonry Veneer Manufacturers Association (MVMA) strictly advises using adhesives that comply with ASTM C1384 or manufacturer-specific masonry testing protocols.
| Adhesive Chemistry | Top Product Examples | Open Time | Best Application | Cost per Sq Ft |
|---|---|---|---|---|
| Polyurethane (PU) | Loctite PL Premium 3X, SikaBond Construction | 10-15 mins | Interior heavy-load, high moisture areas | $0.85 - $1.10 |
| MS Polymer | OSI QUAD Max, Liquid Nails Fuze*It Max | 20-30 mins | Interior/exterior (if code approved), high movement | $1.00 - $1.35 |
| Acrylic/Latex | Standard Heavy Duty Construction Adhesives | 15-20 mins | NOT RECOMMENDED for stone veneer | $0.40 - $0.60 |
Polyurethane adhesives offer the highest initial grab and tensile strength, making them the industry standard for interior mortarless installs. They expand slightly as they cure, filling minor substrate voids. MS Polymers provide superior UV resistance and flexibility, making them the preferred choice for areas subject to high thermal expansion or minor structural deflection, provided the local building code permits adhesive-only exterior veneer.
Substrate Preparation and Code Restrictions
The most common cause of mortarless veneer failure is substrate telegraphing and inadequate shear strength. Stone veneer glue transfers the entire dead load of the stone to the substrate's paper face or core.
Interior Drywall vs. Cement Board
Never apply stone veneer glue directly to standard drywall (gypsum board). The paper face of drywall has a tensile strength far lower than the shear strength of polyurethane adhesive; the glue will simply rip the paper off the gypsum core, causing the stone to collapse. For interior applications, you must install a minimum 1/2" cement backer board (such as HardieBacker or Durock) or a specialized high-density gypsum board rated for masonry veneer (like USG Durock Brand Tile Membrane or certain fiber-reinforced panels). Secure the backer board to wall studs every 8 inches using corrosion-resistant screws.
Exterior Sheathing and the Freeze-Thaw Trap
Exterior mortarless installations are heavily restricted by the International Building Code (IBC) and International Residential Code (IRC). Most jurisdictions require exterior stone veneer to be anchored via mortar and metal lath to a weather-resistive barrier. Adhesive-only exterior installs are generally prohibited unless the specific adhesive and veneer system have passed rigorous freeze-thaw cycling tests (ASTM C666) and the manufacturer provides an engineered code-compliance report. Always consult your local building department before attempting an exterior glue-down.
If your jurisdiction allows exterior MS Polymer adhesive installs, you must incorporate a 1/4" expansion joint at every floor line and a 1/2" gap at rooflines. Stone and adhesive expand at different rates under direct solar loading; without relief joints, the veneer will buckle and pop off the wall.
Step-by-Step Installation Flow
Proper technique dictates the longevity of the bond. Follow this sequence to ensure maximum adhesive transfer and structural integrity.
Step 1: Layout and Dry Fitting
Unbox multiple cartons of stone and dry-fit the veneer on the floor. Mix stones from different boxes to distribute color variations and avoid clustering similar shapes. Mark horizontal reference lines on your cement board every 12 inches to keep your courses level, especially when working with stacked stone profiles that lack built-in leveling lips.
Step 2: Adhesive Application (The 3/8" V-Notch Rule)
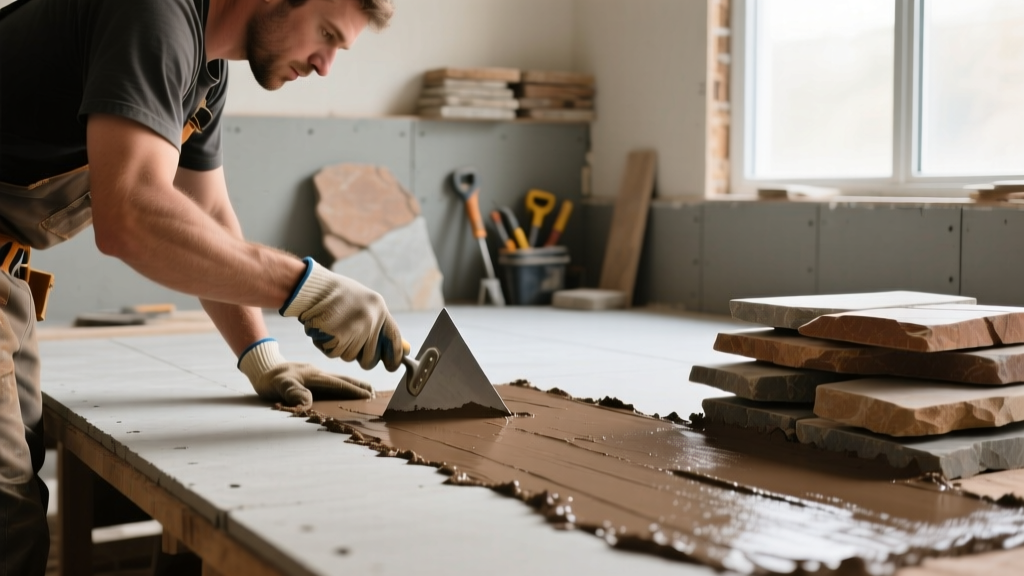
Do not use a caulk gun to apply squiggly lines of glue to the back of the stone. This creates voids where moisture can accumulate and freeze, and it fails to provide uniform support. Instead, use a 3/8" V-notched trowel to spread the adhesive directly onto the substrate.
- Hold the trowel at a strict 45-degree angle to ensure full 3/8" ridge height.
- Apply adhesive to a manageable area—no more than 4 to 6 square feet at a time.
- For stones larger than 12 inches in any dimension, back-butter the stone by applying a thin, flat layer of adhesive to its back using the flat edge of the trowel before pressing it into the notched substrate glue.
Step 3: Setting and Micro-Adjustments
Press the stone firmly into the ridged adhesive. Apply a slight twisting motion to collapse the V-notches and achieve a minimum 85% adhesive contact area. Polyurethane adhesives like Loctite PL Premium have an aggressive initial grab, but you typically have a 10-minute window to slide the stone laterally to close joints. Do not pull the stone away from the wall once it has been pressed; doing so breaks the adhesive skin and ruins the bond. If you must remove a piece, scrape the wall and stone completely clean and reapply fresh adhesive.
Step 4: Bracing and Support
While high-grab adhesives hold the stone immediately, gravity will cause heavy pieces to creep downward before the adhesive fully cross-links. Use blue painter's tape to secure stones to the wall or to adjacent stones. For the bottom course, install a temporary ledger board screwed into the studs to bear the dead load of the entire wall while the bottom row cures. Remove the ledger after 24 hours and fill the gap with cut stone.
Curing, Support, and Cleanup
Polyurethane and MS Polymer adhesives cure via moisture reaction. In extremely dry, climate-controlled interiors (under 30% relative humidity), curing can take up to 48 hours to reach full structural strength. Do not grout or point the joints with mortar or sanded caulk until the adhesive has cured for a minimum of 24 hours; introducing water from wet grout too early can disrupt the adhesive's chemical cross-linking process.
For cleanup, uncured polyurethane adhesive must be wiped immediately with mineral spirits or a dedicated PU adhesive remover. Once cured, PU adhesive is virtually indestructible and can only be removed mechanically with a chisel or oscillating multi-tool. MS Polymers are more forgiving and can often be scraped off with a putty knife while semi-cured.
Troubleshooting Common Glue Failures
Even experienced masons encounter issues when transitioning from mortar to adhesive. Review these failure modes to diagnose and prevent bond degradation.
- Adhesive Skinning Over: Polyurethane glues form a surface skin when exposed to air. If you trowel adhesive onto the wall and wait more than 15 minutes before setting the stone, the stone will stick to the skin but not the substrate. Fix: Work in smaller 4-square-foot zones and monitor the adhesive's tackiness.
- Substrate Dust Contamination: Cutting cement board generates fine silica dust that coats the wall. Adhesive will bond to the dust layer, which then peels away from the board. Fix: Vacuum and wipe the substrate with a damp sponge before troweling.
- Thermal Pop-Off: Stones installed near fireplaces or in direct exterior sunlight experience extreme temperature differentials between the front face and the substrate. Fix: Never use PU adhesive inside the firebox or on the immediate fireplace surround where surface temperatures exceed 140°F. Use high-heat refractory mortar in these zones. For exterior sun-baked walls, specify an MS Polymer with high thermal elasticity.
- Joint Starvation: Pushing stones too tightly together squeezes all the adhesive out of the joint, leaving a void where grout cannot anchor. Fix: Maintain a minimum 1/2" joint width for standard profiles to allow proper pointing material penetration.
For further technical specifications regarding mortarless masonry systems and regional code adaptations, consult the comprehensive resources available through Fine Homebuilding's masonry project guides and your local building authority's residential code amendments.
Written by
David NakamuraDavid Nakamura is a licensed architect (AIA) and construction technology writer focused on sustainable building methods, mass timber engineering, and high-performance building envelopes. He holds a Master of Architecture from the University of Washington and is a certified Passive House Consultant (CPHC). David spent eight years at the Seattle firm Mithun, where he led the design of three LEED Platinum projects, before founding his own practice specializing in net-zero residential design. He serves on the editorial advisory board of GreenBuilder Magazine and has authored peer-reviewed papers on cross-laminated timber (CLT) connections for the Journal of Structural Engineering. In his spare time, David teaches woodworking at Pratt Fine Arts Center and kayaks the Puget Sound.
More from David Nakamura
View all
Construction Cost
Labor Cost to Build a Deck Per Sq Ft: 2026 Installation Guide
Discover the exact labor cost to build a deck per sq ft in 2026. This installation guide breaks down contractor rates, complexity factors, and hidden fees.
Aug 4, 2026

Construction Cost
How Much Does It Cost to Build a 3 Bedroom House? Financing Guide
Learn exactly how much it costs to build a 3 bedroom house and explore 2026 financing options, construction loan types, and budget frameworks for your build.
Aug 4, 2026

Construction Cost
Cost to Build a Tennis Court: 2026 Guide
How much does it cost to build a tennis court in 2026? Breakdowns for asphalt, concrete, and synthetic surfaces plus fencing and lighting.
Jul 30, 2026