Natural Thin Veneer Stone Maintenance: Expert Care Guide
Learn expert maintenance routines for natural thin veneer stone. Discover cleaning protocols, sealer selection, and troubleshooting for efflorescence.

The Porosity Factor: Why Natural Stone Demands Specific Care
Natural thin veneer stone (NTVS) delivers the authentic geological aesthetics of full-bed masonry at a fraction of the structural load, typically weighing between 10 and 15 pounds per square foot with a thickness ranging from 3/4-inch to 1.5 inches. However, this reduced profile and the inherent micro-porosity of quarried rock require precise maintenance protocols. Unlike manufactured concrete veneers, which possess a uniform density, natural stone exhibits variable absorption rates governed by its mineral composition and the specific quarry bed it was harvested from.
Before applying any cleaning agent, identify your stone's geological class. Siliceous stones (granite, slate, quartzite, sandstone) are composed primarily of silica and tolerate mild acidic cleaners. Calcareous stones (limestone, marble, travertine) contain calcium carbonate and will permanently etch, pit, and dissolve if exposed to acids with a pH below 6.0.
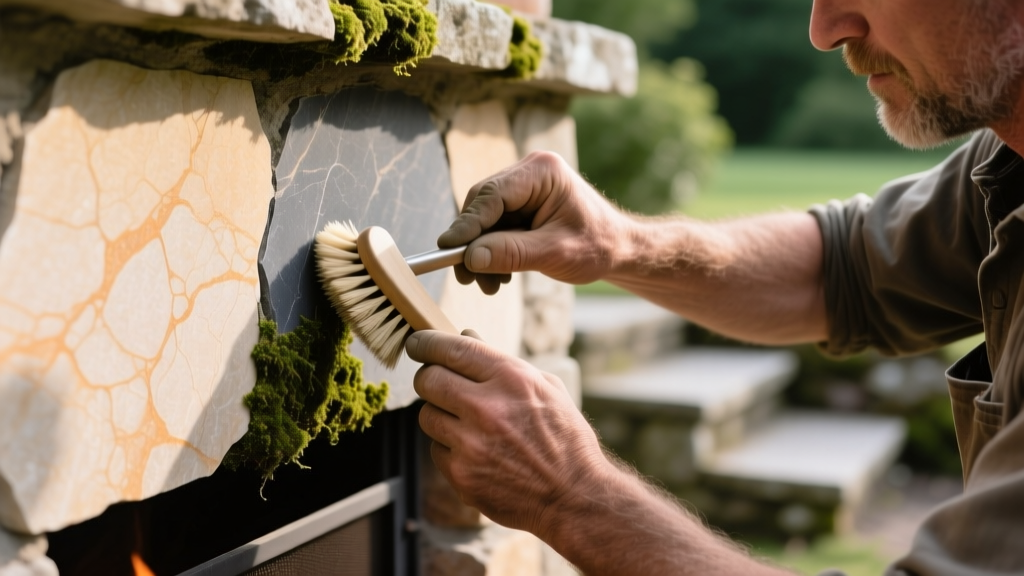
Routine Cleaning Protocols for Interior and Exterior Veneer
Maintenance begins with mechanical agitation before introducing moisture or chemicals. The goal is to remove surface particulates without driving dirt deeper into the stone's pore structure.
Interior Dusting and Spot Cleaning
Interior NTVS installations, such as fireplace surrounds and accent walls, primarily accumulate household dust, soot, and occasional cooking grease (in kitchen applications).
- Dusting: Use a vacuum with a soft brush attachment weekly. Avoid feather dusters, which merely redistribute particulates into the stone's natural fissures.
- Spot Cleaning: For soot or grease, mix a solution of neutral pH (7.0) stone soap and warm water. Apply with a microfiber cloth, agitate gently, and immediately blot dry. Never allow the soapy solution to air-dry on the surface, as this leaves a dulling film.
Exterior Washing and Biological Growth Removal
Exterior veneer faces environmental degradation, including UV exposure, acid rain, and biological growth (algae, lichen, moss). According to the National Park Service Preservation Briefs, aggressive cleaning methods can irreversibly damage the protective outer crust of natural masonry.
- Pressure Washing Limits: Never exceed 400 PSI when washing NTVS. High pressure can erode the soft mortar joints (which are often the weakest link in a veneer system) and spall the face of softer stones like sandstone. Maintain a minimum 12-inch distance between the nozzle and the wall, using a 40-degree wide fan tip.
- Biological Treatment: For algae and moss, apply a diluted solution of oxygen bleach (sodium percarbonate) mixed at 1 cup per gallon of warm water. Allow it to dwell for 15 minutes without drying, agitate with a natural bristle brush, and rinse thoroughly. Avoid chlorine bleach, which leaves behind salt residues that trigger efflorescence.
Chemical Compatibility Matrix: What to Use and What to Avoid
Selecting the wrong chemical cleaner is the most common cause of irreversible damage to natural thin veneer stone. Use the matrix below to cross-reference your stone type with the appropriate cleaning agent.
| Cleaner Type | pH Level | Safe for Siliceous? | Safe for Calcareous? | Specific Use Case |
|---|---|---|---|---|
| Neutral Stone Soap | 7.0 | Yes | Yes | Routine interior washing, light dust |
| Oxygen Bleach | 8.0 - 9.0 | Yes | Yes | Exterior algae, moss, organic stains |
| Phosphoric Acid | 2.0 - 3.0 | Yes (Diluted) | NO | Mortar smear removal on granite/slate |
| Muriatic Acid | < 1.0 | NO | NO | Never use on NTVS; destroys mortar |
| Alkaline Degreaser | 10.0 - 12.0 | Yes | Yes | Heavy grease, BBQ splatter outdoors |
Sealing Natural Thin Veneer Stone: Is It Necessary?
The Natural Stone Institute notes that not all stone requires sealing. The decision to seal NTVS should be based on the stone's absorption rate and the environmental exposure of the installation. To test if your stone needs a sealer, sprinkle a few drops of water on the surface. If it darkens the stone within 3 minutes, the stone is highly absorbent and requires protection.
The Danger of Film-Forming Sealers
Never apply acrylic, urethane, or epoxy film-forming sealers to exterior NTVS. These products create a non-breathable plastic barrier on the surface. When moisture inevitably enters the wall assembly from behind (via vapor drive or framing leaks), it becomes trapped. During freeze-thaw cycles, this trapped water expands, causing the face of the stone to spall or pop off the mortar bed.
Selecting a Penetrating Silane/Siloxane Sealer
For exterior applications and high-traffic interior zones, use a breathable, penetrating silane/siloxane sealer. These reactive sealers do not alter the natural matte texture of the stone and allow water vapor to escape while repelling liquid water. Expect a coverage rate of 150 to 250 square feet per gallon, depending on the stone's porosity. Apply two coats using a low-pressure pump sprayer, ensuring the second coat is applied while the first is still damp (wet-on-wet application) to achieve maximum depth penetration.
"Color-enhancing" sealers contain resin solids that amplify the stone's natural hues, giving it a permanent "wet look." While visually striking, these are notoriously difficult to remove once applied. Always test an enhancing sealer on an inconspicuous off-cut or bottom corner before committing to an entire facade.
Troubleshooting Common Failure Modes
Efflorescence (White Powdery Staining)
Efflorescence is not a stain; it is a symptom of moisture migrating through the masonry assembly, carrying water-soluble salts to the surface where they crystallize upon evaporation.
- Dry Brush: Remove 90% of surface efflorescence using a stiff, dry nylon brush. Do not use water, as it will simply dissolve the salts and pull them back into the pores.
- Identify the Source: Check for missing weep holes, failed flashing above the veneer, or saturated soil grading too high against the base of the wall.
- Chemical Treatment: Only if the moisture source is resolved and dry brushing fails, apply a specialized efflorescence remover (like PROSOCO Sure Klean Vana Trol) strictly following the manufacturer's dilution ratios for your specific stone type.
Mortar Smear and Haze
If the installer failed to wash the wall properly during the initial pointing process, dried mortar haze can ruin the stone's appearance. For siliceous stones, a diluted phosphoric acid masonry cleaner will dissolve the Portland cement haze. For calcareous stones, mechanical removal using a wooden scraper or a specialized non-acidic mortar dissolver is mandatory to prevent severe pitting of the stone face.
Annual Inspection Checklist
Conduct this inspection every spring to catch minor issues before they compromise the veneer's structural adhesion.
- Joint Integrity: Probe mortar joints with a flathead screwdriver. Any joint that yields or crumbles must be repointed with a Type N or Type S mortar matching the original mix.
- Clearance Verification: Ensure a minimum 4-inch clearance between the bottom of the NTVS and the final soil grade to prevent capillary moisture wicking and soil-borne staining.
- Flashing and Weep Holes: Verify that weep holes at the base of the veneer are unobstructed by mulch, dirt, or debris, allowing the drainage plane to function correctly.
- Sealer Bead Test: Splash water on south-facing and west-facing elevations. If the water absorbs rather than beading, schedule a reapplication of your silane/siloxane penetrating sealer.
Written by
James ThorntonJames Thornton is a construction industry veteran with 25 years of hands-on experience in wood framing, lumber grading, and residential building codes. He started as a framing carpenter in rural Oregon, earned his ICC Residential Building Inspector certification, and eventually became a senior plan reviewer for the City of Portland Bureau of Development Services. James holds a B.S. in Wood Science & Technology from Oregon State University and is a certified lumber grader through the West Coast Lumber Inspection Bureau (WCLIB). He has inspected over 3,000 residential construction sites and authored the city's internal guide on advanced framing techniques (2x6 at 24" O.C.). James lives in Bend, OR, where he builds custom timber-frame cabins and competes in lumberjack sports.
More from James Thornton
View all
Insulation
Best Home Insulation Materials: Complete 2026 Guide
Compare top home insulation materials for 2026. Find R-values, installed costs per square foot, and best uses for fiberglass, spray foam, and mineral wool.
Aug 4, 2026

Sustainable Building
Certify Your Green Building Material for LEED and WELL
Step-by-step guide to certifying a green building material for LEED v5 and WELL v2. Master EPDs, HPDs, and VOC limits for 2026 project specifications.
Aug 4, 2026

Stone & Masonry
Veneer Stacked Stone Panels: Interior Design & Style Showcase
Discover how veneer stacked stone panels transform interiors. Explore modern design profiles, material pairings, and technical installation specs.
Aug 4, 2026