Slate Lite Stone Veneer Maintenance: Cleaning and Repair Guide
Learn expert maintenance for slate lite stone veneer. Discover pH-safe cleaning protocols, sealer comparisons, and repair techniques for thin stone.

The Unique Anatomy of Slate Lite Veneer: Why Standard Stone Care Fails
Slate lite stone veneer represents a significant departure from traditional full-bed masonry. Manufactured by splitting natural slate into ultra-thin layers (typically 1.0mm to 1.5mm thick) and bonding them to a fiberglass mesh or polyester resin backing, this material offers unprecedented flexibility and lightweight performance. However, this exact anatomy dictates a strict, specialized maintenance protocol.
Standard natural stone care often involves aggressive buffing, honing, or the use of acidic masonry cleaners to remove efflorescence. Applying these methods to slate lite will instantly destroy the product. Because the wear layer is barely a millimeter thick, mechanical abrasion will cut straight through the natural stone and expose the fiberglass backing. Furthermore, the resin binders used in the backing layer are highly sensitive to harsh solvents, which can cause delamination and structural failure of the veneer panel.
Never use vinegar, lemon juice, bleach, or commercial bathroom tile cleaners containing hydrochloric or phosphoric acid on slate lite. While natural slate is relatively acid-resistant compared to marble, the micro-fissures in ultra-thin veneers allow acids to penetrate rapidly, degrading the resin backing and causing irreversible edge curling and delamination. Always maintain a cleaner pH between 7.0 and 9.0.
Routine Cleaning Protocols for Interior Applications
Maintaining the visual depth and natural cleft texture of slate lite requires a gentle, non-abrasive approach. Dust and particulate matter can become trapped in the natural fissures of the stone, leading to a dull appearance over time if not managed correctly.
Step-by-Step Interior Cleaning Procedure
- Dry Extraction: Begin with an electrostatic microfiber duster or a soft-bristle brush attachment on a vacuum cleaner. Avoid standard vacuum beater bars, which can scratch the stone's natural cleft surface.
- Solution Preparation: Mix a pH-neutral stone cleaner (such as those certified by the EPA Safer Choice program) with warm distilled water. Tap water in hard-water regions contains high calcium and magnesium levels that will leave mineral deposits on the porous stone surface.
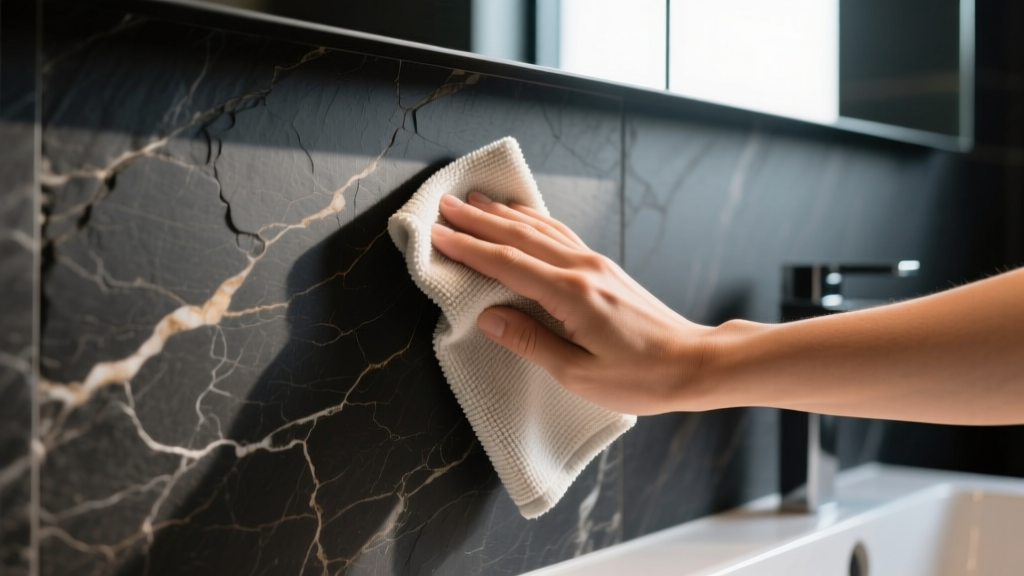
- Application: Lightly mist the solution onto a microfiber cloth rather than spraying the wall directly. Spraying directly risks excess moisture seeping behind the veneer edges, which can compromise the construction adhesive.
- Wiping Technique: Wipe in a circular motion to lift dirt from the natural stone grooves. For heavily textured slate variants, use a soft nylon grout brush to gently agitate the fissures.
- Drying: Immediately buff the surface dry with a clean, lint-free cotton towel to prevent water spotting.
Sealing Strategies: Impregnators vs. Topical Coatings
Because slate lite is highly porous, sealing is mandatory for high-moisture areas like bathrooms, kitchen backsplashes, and exterior applications. However, selecting the wrong sealer chemistry is the most common installation and maintenance error. According to guidelines from the Natural Stone Institute, matching the sealer to the environment's vapor transmission needs is critical.
| Sealer Type | Chemical Base | Best Application | Vapor Permeability |
|---|---|---|---|
| Penetrating (Impregnating) | Silane / Siloxane | Exterior walls, wet rooms, steam showers | High (Allows moisture vapor escape) |
| Topical Coating | Water-based Polyurethane | Furniture wraps, low-traffic interior accent walls | Low (Traps moisture) |
| Color Enhancer | Solvent-based Acrylic | Dry interior feature walls needing 'wet look' depth | Medium |
For exterior applications or interior wet areas, always use a siloxane-based penetrating sealer. Topical sealers create a plastic-like film on the surface. If applied to an exterior wall, this film traps moisture migrating from the building interior; when freeze-thaw cycles occur, the trapped water expands, causing the thin stone layer to blister and separate from the fiberglass backing.
Troubleshooting Common Slate Lite Failures
Despite its durability, the ultra-thin profile of slate lite makes it susceptible to specific physical and environmental damage. Below are expert repair frameworks for the most frequent issues encountered in the field.
1. Repairing Micro-Abrasions and Surface Scratches
Unlike 2cm granite countertops, you cannot use a diamond polishing pad to buff out scratches on a 1.5mm slate veneer. Doing so will expose the resin backing.
- For light scuffs: Apply a few drops of food-grade mineral oil or a specialized stone color-enhancing oil to a microfiber cloth and rub it into the scratch. This temporarily darkens the stone, effectively hiding the abrasion by matching the surrounding cleft color.
- For deeper gouges: Clean the gouge with isopropyl alcohol. Fill the defect with a color-matched, two-part stone epoxy (such as Tenax or Akemi brand). Overfill slightly, allow it to cure for 24 hours, and then carefully scrape it flush using a single-edge razor blade held at a 45-degree angle. Never use sandpaper, which will dull the surrounding natural finish.
2. Addressing Edge Delamination and Lifting
Edge lifting usually occurs when insufficient construction adhesive was applied during installation, or when harsh chemical cleaners degrade the perimeter bond. As noted in expert veneer maintenance guides, catching this early prevents panel replacement.
Do not attempt to pry the lifted edge back with a putty knife; the slate will snap. Instead, use a blunt-tip syringe to inject a low-viscosity cyanoacrylate adhesive or a flexible silicone-modified polymer sealant directly under the lifted fiberglass mesh. Apply painter's tape across the seam, press firmly, and place a weighted block against the wall for 4 hours to re-establish the bond while the adhesive cures.
3. Removing Hard Water Spots and Efflorescence
Because acidic descalers are banned from slate lite maintenance, removing calcium buildup requires mechanical and mild alkaline intervention. Create a poultice using baking soda and distilled water to form a thick paste. Apply it over the water spot, cover with plastic wrap, and tape the edges. Let it sit for 12 hours to draw the minerals out of the stone's pores. Remove the dried poultice with a wooden scraper, then wipe clean with a damp cloth.
Long-Term Maintenance Schedule & Cost Estimates
Proactive maintenance significantly extends the lifespan of thin stone veneers, particularly in commercial or high-traffic residential environments. Below is a standardized maintenance matrix based on 100 square feet of installed slate lite.
| Frequency | Task | Materials Required | Est. Cost (per 100 sq ft) |
|---|---|---|---|
| Weekly | Dry dusting and spot cleaning | Electrostatic duster, microfiber cloths | $0 - $5 |
| Bi-Annually | Deep wash and alkaline poultice | pH-neutral stone cleaner, baking soda | $15 - $25 |
| Every 2-3 Years | Penetrating sealer reapplication | Siloxane impregnator (approx. 1 quart) | $45 - $85 |
| As Needed | Edge delamination repair | Injection syringe, flexible polymer adhesive | $10 - $20 |
By adhering to these strict chemical boundaries and utilizing non-abrasive repair techniques, slate lite stone veneer can maintain its architectural integrity and natural aesthetic for decades, outperforming traditional stone in both versatility and long-term upkeep costs.
Written by
James ThorntonJames Thornton is a construction industry veteran with 25 years of hands-on experience in wood framing, lumber grading, and residential building codes. He started as a framing carpenter in rural Oregon, earned his ICC Residential Building Inspector certification, and eventually became a senior plan reviewer for the City of Portland Bureau of Development Services. James holds a B.S. in Wood Science & Technology from Oregon State University and is a certified lumber grader through the West Coast Lumber Inspection Bureau (WCLIB). He has inspected over 3,000 residential construction sites and authored the city's internal guide on advanced framing techniques (2x6 at 24" O.C.). James lives in Bend, OR, where he builds custom timber-frame cabins and competes in lumberjack sports.
More from James Thornton
View all
Insulation
Best Home Insulation Materials: Complete 2026 Guide
Compare top home insulation materials for 2026. Find R-values, installed costs per square foot, and best uses for fiberglass, spray foam, and mineral wool.
Aug 4, 2026

Sustainable Building
Certify Your Green Building Material for LEED and WELL
Step-by-step guide to certifying a green building material for LEED v5 and WELL v2. Master EPDs, HPDs, and VOC limits for 2026 project specifications.
Aug 4, 2026

Stone & Masonry
Veneer Stacked Stone Panels: Interior Design & Style Showcase
Discover how veneer stacked stone panels transform interiors. Explore modern design profiles, material pairings, and technical installation specs.
Aug 4, 2026