How to Install Thin Stone Veneer on Interior Drywall
Step-by-step guide to installing thin stone veneer on interior drywall. Covers substrate prep, mortar selection, and layout techniques for a flawless finish.

Substrate Assessment: Can Your Drywall Handle the Load?
The most critical failure point in interior thin stone veneer installation is substrate deflection. Standard 1/2-inch gypsum drywall is rated to hold approximately 15 pounds per square foot (psf) when anchored to studs spaced 16 inches on center. While thin stone veneer itself typically weighs between 10 and 13 psf, the combined weight of the metal lath, scratch coat, and setting mortar pushes the total dead load to 18–22 psf. Exceeding the drywall's shear capacity leads to sagging, fastener pull-through, and catastrophic delamination.
Total Wall Load = (Veneer Weight + Lath Weight + Mortar Weight) × Safety Factor (1.5).
If your total load exceeds 15 psf, standard drywall is insufficient. You must either strip the drywall and install structural sheathing, or overlay the existing drywall with 1/2-inch cement backer board (e.g., USG Durock Next Gen) screwed directly into the wall studs.
Essential Materials & Tool List
Procuring the correct materials prevents alkaline efflorescence and bond failure. As of 2026, material costs for a professional-grade interior installation average $14.50 to $19.00 per square foot, excluding the stone itself.
- Moisture Barrier: Grade D asphalt-impregnated building paper (two layers).
- Metal Lath: 2.5 lb/yd² galvanized self-furring diamond mesh (ASTM C847). Do not use non-galvanized lath for interior applications where moisture from the mortar can cause rust bleeding.
- Fasteners: 1-inch galvanized roofing nails or 1-1/4-inch corrosion-resistant lath screws.
- Scratch Coat Mortar: Type S masonry cement mixed with washed masonry sand (1:3 ratio), or a pre-blended polymer-modified veneer mortar like QUIKRETE Veneer Stone Mortar.
- Setting Mortar: Type S mortar or a high-bond polymer thinset (e.g., LATICRETE 255 MultiMax) for heavier profile stones.
- Tools: Notched trowel (1/2-inch x 1/2-inch), margin trowel, tile nippers, masonry brush, and a 4-foot level.
Step 1: Surface Preparation & Moisture Barriers
Even in climate-controlled interiors, the moisture from the scratch coat and setting mortar will migrate into the drywall or wood framing, causing swelling and mold. Staple two layers of Grade D building paper horizontally across the wall. Overlap horizontal seams by 2 inches and vertical seams by 6 inches. Ensure the bottom edge of the paper extends over the floor flashing or baseboard gap by at least 1 inch to direct any trapped moisture away from the framing.
Step 2: Installing Metal Lath
The lath provides the mechanical key for the mortar. Install the 2.5 lb/yd² galvanized diamond mesh horizontally. The self-furring dimples must face outward, away from the moisture barrier, to ensure the mortar encapsulates the wire completely.
Fastening Specifications
Secure the lath every 6 inches along the studs. At vertical joints, overlap the lath by 2 inches and wire-tie the edges together with 18-gauge galvanized tie wire. At horizontal joints, overlap by 1 inch. At inside and outside corners, bend the lath around the corner by at least 8 inches; never terminate a lath sheet exactly on a corner, as this creates a natural hinge point for cracking.
Step 3: Applying the Scratch Coat
Mix the Type S mortar to a consistency similar to thick peanut butter—it should hold its shape on a trowel held at a 90-degree angle. Using a flat trowel, force the mortar completely through the lath mesh to create a mechanical lock against the building paper. Then, apply a uniform layer to reach a total thickness of 1/2 inch.
While the mortar is still thumbprint-hard (typically 45 to 90 minutes depending on ambient humidity), use a scarifier or a notched trowel to score horizontal lines into the surface every 1/2 inch. This 'scratch' provides the mechanical grip for the final setting bed. Mist the scratch coat lightly with water and allow it to cure for a minimum of 24 hours, ideally 48 hours, before applying the veneer.
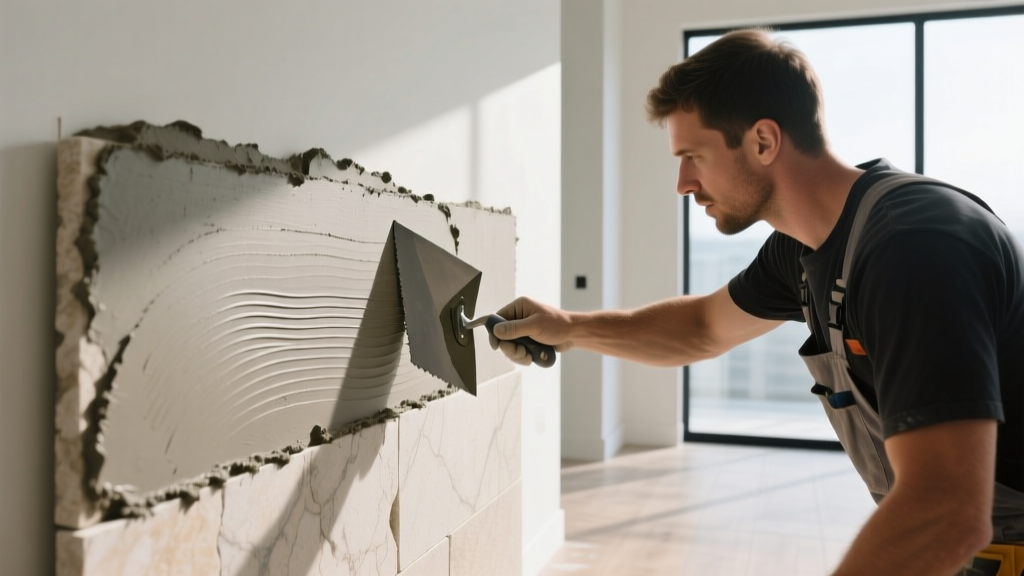
Step 4: Dry Layout & Mortar Application
Never pull stones directly from the box and apply them to the wall. Empty 4 to 5 boxes onto the floor and dry-fit the stones to blend color variations and balance stone sizes. Mix corner pieces with flat pieces to avoid clustering all thick edges in one area.
Always 'butter' the back of each stone with a 1/2-inch layer of mortar, ensuring the edges are slightly mounded. When you press the stone into the 1/2-inch mortar bed on the wall, the mounded edges will squeeze outward, guaranteeing 100% coverage and eliminating hollow voids where moisture could accumulate and freeze or expand.
Press the stone firmly into the wall mortar, twisting slightly to collapse the buttered mortar and expel air. Maintain a 1/2-inch to 1-inch joint width for dry-stack or standard profile veneers. Do not strike the joints immediately; wait until the mortar is thumbprint-hard (about 30–45 minutes), then use a pointing trowel and a stiff masonry brush to compact and texture the joints.
Mortar Selection Matrix
Choosing the wrong binder is the leading cause of interior veneer failure. Refer to this matrix based on your specific stone type and environmental conditions.
| Mortar Type | Best Application | Compressive Strength | Flexibility / Bond |
|---|---|---|---|
| Type S Masonry | Standard natural stone, heavy profiles, exterior-grade interior walls. | 1,800 psi | Moderate |
| Polymer-Modified Thinset (ANSI A118.4) | Manufactured veneer, lightweight stone, installations over existing tile or cement board. | 300+ psi (Tensile) | High (Excellent for vibration-prone areas) |
| Type N Masonry | Soft, porous stones (e.g., certain sandstones) where high-strength mortar could cause spalling. | 750 psi | Low |
Common Installation Failures & Troubleshooting
1. Efflorescence (White Powdery Staining)
Efflorescence occurs when water-soluble salts from Portland cement migrate to the stone surface. Prevention: Use low-alkali Portland cement or pre-blended polymer mortars. Never use unbuffered muriatic acid to clean natural stone, as the acid reaction drives salts deeper into the porous matrix. If efflorescence appears, dry-brush the area and apply a specialized efflorescence cleaner approved by the Portland Cement Association.
2. Delamination and Hollow Sounding Stones
If a stone sounds hollow when tapped with a coin, it has lost its bond. This is almost always caused by a 'skinned over' mortar bed. If the scratch coat or wall mortar sits exposed to air for more than 15 minutes before the stone is applied, a plastic skin forms that prevents chemical adhesion. Fix: Remove the affected stones, chip away the old mortar down to the lath, and reset using a polymer-modified thinset.
3. Corner Fractures
Cracks radiating from inside corners indicate structural movement or improper lath termination. As noted in step 2, lath must wrap around corners. Furthermore, ensure an expansion joint (filled with color-matched polyurethane sealant) is installed where the stone veneer meets the ceiling or adjacent rigid materials, as recommended in the Eldorado Stone installation guidelines.
Frequently Asked Questions
Can I install thin stone veneer directly over painted drywall?
No. Paint acts as a bond-breaker. Even if you score the paint, the moisture from the mortar will re-emulsify latex paints, causing the entire assembly to peel away from the gypsum core. You must either strip the paint, remove the drywall entirely, or install a new layer of cement backer board over the painted surface, screwing through into the studs.
Do I need to seal interior thin stone veneer?
In most climate-controlled interior applications (like a living room fireplace), sealing is optional. However, if the veneer is installed in a high-humidity area (like a bathroom) or behind a kitchen sink, apply a breathable, penetrating siloxane-based sealer. Avoid film-forming acrylic sealers, which trap moisture inside the stone and create an artificial, high-gloss plastic appearance.
Written by
Sarah WhitfieldSarah Whitfield is a chartered quantity surveyor (MRICS) and construction cost analyst with 15 years of experience in material pricing, procurement strategy, and project budgeting. She earned her degree in Construction Management from the University of Reading (UK) and has worked on projects ranging from $2M custom homes to $180M mixed-use developments across North America and Europe. Sarah currently leads cost estimating for BuildMat Insight, maintaining a proprietary database of 4,000+ material price points updated quarterly. She is a frequent contributor to RSMeans cost data panels and has presented at the International Cost Engineering Council (ICEC) congress. Based in Denver, CO, Sarah is an avid trail runner and volunteer mentor for Women in Construction.
More from Sarah Whitfield
View all
Wood & Lumber
What Are the Different Types of Wood? A Builder's Guide
Compare structural softwoods, finish hardwoods, and engineered lumber. Analyze Janka ratings, MOE values, and 2026 pricing for construction.
Aug 4, 2026

Walls & Panels
Steel Framing vs Wood Framing: Corrosion and Moisture Defense
Compare steel framing vs wood framing for moisture resistance. Learn about galvanized coatings, condensation risks, and corrosion protection strategies.
Jul 21, 2026

Stone & Masonry
How to Cut Stone Veneer: Wet Saw vs Grinder Comparison
Compare the best tools for cutting stone veneer. We review wet saws, angle grinders, and chop saws to help you achieve clean, chip-free cuts.
Jul 21, 2026