How to Install Stone Veneer Copper Flashing and Accents
Expert guide to installing stone veneer copper flashing and accents. Prevent alkaline corrosion, galvanic action, and runoff staining on porous masonry.

The Metallurgical Challenge: Why Copper and Masonry Clash
Integrating stone veneer copper flashing and architectural accents requires navigating two distinct chemical hazards: alkaline corrosion and metallic staining. Fresh Portland cement-based mortars are highly alkaline, typically registering a pH between 12.5 and 13.5. When this caustic mortar bed makes direct contact with bare copper, it rapidly breaks down the metal's protective patina, leading to pitting, galvanic corrosion, and eventual failure of the flashing.
Conversely, as copper weathers and oxidizes, it produces copper sulfate and copper carbonate (verdigris). When rainwater washes these ions across porous masonry, they leave permanent blue-green stains that penetrate deep into the stone's capillary network. According to the Copper Development Association (CDA), preventing direct contact and managing water runoff are the only reliable methods for protecting both materials in a unified wall assembly.
Material Compatibility and Staining Risk Matrix
Not all stone reacts to copper runoff equally. The porosity and mineral composition of your chosen veneer dictate the severity of potential staining. Use the matrix below to assess risk and select appropriate mitigation strategies before installation begins.
| Stone Veneer Type | Porosity Level | Copper Staining Risk | Required Mitigation Strategy |
|---|---|---|---|
| Limestone / Sandstone | High (15-25%) | Severe | Silane/Siloxane sealer + extended drip edge + guttering |
| Granite / Quartzite | Low (0.5-2%) | Minimal | Standard flashing overlap; periodic washing |
| Slate Veneer | Very Low (<1%) | Low | Ensure surface slope prevents pooling |
| Manufactured Concrete | Medium (10-15%) | Moderate | Integral water repellent mix + breathable topical sealer |
Step-by-Step Installation Protocol
To successfully install stone veneer copper flashing details, you must isolate the metals from the masonry while maintaining continuous water management. Follow this exact sequence to ensure long-term durability.
Step 1: Substrate and Flashing Isolation
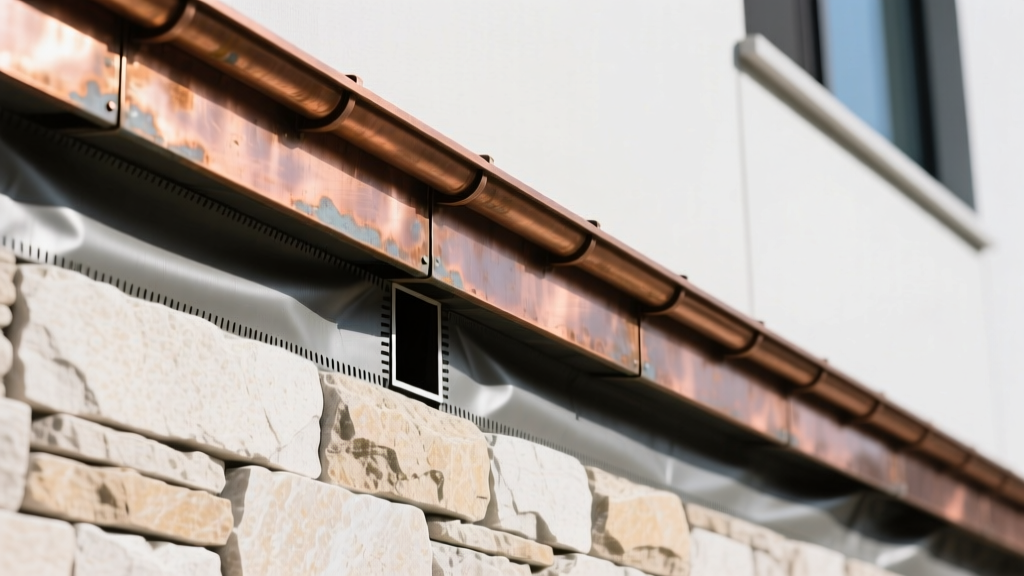
Begin by installing a minimum 16 oz (or preferably 20 oz) cold-rolled copper flashing. Before the masonry work begins, you must isolate the back and bottom edges of the copper that will eventually be buried in or touch the mortar bed. Apply two heavy coats of bituminous flashing paint, or adhere a high-performance peel-and-stick membrane (such as Grace Vycor Plus or Delta-Flashing) to the contact surfaces. This physical barrier neutralizes the alkaline attack from the Portland cement.
Step 2: Lath and Scratch Coat Clearances
When fastening self-furring 2.5 lb galvanized metal lath to the substrate, maintain a strict 1/4-inch clearance between the lath edges and the copper flashing. If the galvanized steel touches the copper, it creates a bimetallic couple. In the presence of moisture, the zinc will act as a sacrificial anode, accelerating corrosion. Apply your Type S mortar scratch coat, ensuring it does not bridge the gap onto the unprotected copper face.
Never use standard silicone caulks to seal copper flashing joints against masonry. Silicone can leach plasticizers that stain stone and often fails to adhere to alkaline masonry surfaces. Instead, use a high-modulus polyurethane sealant (like Sikaflex-1a or Tremco Dymeric) which accommodates thermal expansion without compromising the stone.
Step 3: Weep System and Mortar Bedding
Install a weep vent system (such as MortarNet WeepVents) directly above the copper flashing base. Space these weep holes every 16 to 24 inches along the wall. When setting the first course of stone veneer, maintain a strict 2-inch vertical clearance between the bottom of the stone and the horizontal leg of the copper flashing. This air gap prevents capillary draw and allows any incidental moisture behind the veneer to drain freely out of the weep holes without pooling against the copper.
Managing Copper Runoff and Staining
Even with perfect flashing isolation, water washing over exposed copper accents (such as a copper roof valley or decorative copper scuppers above the stone) will carry oxidized ions down the wall. The National Park Service Preservation Briefs emphasize that managing water trajectory is critical for porous masonry preservation.
Diverter and Gutter Strategies
Never allow copper runoff to free-fall directly onto limestone or sandstone veneer. Install copper splash blocks or extended drip edges that project at least 3 inches beyond the stone face. For concentrated water sources like downspouts or scuppers, route the water into internal PVC or copper piping concealed behind the stone veneer cavity, discharging it safely below grade.
Penetrating Sealers: The First Line of Defense
For high-risk stones, apply a breathable, penetrating silane/siloxane water repellent (such as Prosoco Siloxane PD or ChemProbe) after the mortar has fully cured (minimum 28 days). These sealers do not form a surface film; instead, they line the internal pores of the stone, dramatically reducing the capillary absorption of copper-laden rainwater while allowing internal wall moisture to evaporate. Reapplication is typically required every 5 to 7 years depending on UV exposure and driving rain.
If you are installing new copper accents above stone veneer, consider specifying pre-patinated copper from the manufacturer. Factory-applied patinas are chemically stabilized and sealed, significantly reducing the amount of soluble copper ions available to wash out and stain the masonry below during the first critical years of exposure.
Troubleshooting Existing Copper Stains on Stone Veneer
If you are repairing an existing installation where stone veneer copper runoff has already caused blue-green staining, standard pressure washing will not remove the metallic deposits. The copper ions have chemically bonded with the stone's minerals.
For manufactured concrete veneer or dense granite, a specialized metallic stain remover containing ammonium bifluoride can be applied as a poultice. The poultice draws the metallic salts out of the pores as it dries. However, never use acidic cleaners, muriatic acid, or ammonium bifluoride on limestone, marble, or sandstone. The acid will violently etch the calcium carbonate matrix, destroying the stone's face and exposing fresh, unsealed pores to future staining. For calcareous stones, mechanical poultices using diatomaceous earth mixed with a neutral pH chelating agent are required, often necessitating the expertise of a professional masonry restoration specialist.
By respecting the chemical boundaries between alkaline mortars, reactive metals, and porous stone, installers can achieve the striking aesthetic contrast of stone veneer copper details without compromising the structural integrity or visual permanence of the facade.
Written by
James ThorntonJames Thornton is a construction industry veteran with 25 years of hands-on experience in wood framing, lumber grading, and residential building codes. He started as a framing carpenter in rural Oregon, earned his ICC Residential Building Inspector certification, and eventually became a senior plan reviewer for the City of Portland Bureau of Development Services. James holds a B.S. in Wood Science & Technology from Oregon State University and is a certified lumber grader through the West Coast Lumber Inspection Bureau (WCLIB). He has inspected over 3,000 residential construction sites and authored the city's internal guide on advanced framing techniques (2x6 at 24" O.C.). James lives in Bend, OR, where he builds custom timber-frame cabins and competes in lumberjack sports.
More from James Thornton
View all
Insulation
Best Home Insulation Materials: Complete 2026 Guide
Compare top home insulation materials for 2026. Find R-values, installed costs per square foot, and best uses for fiberglass, spray foam, and mineral wool.
Aug 4, 2026

Sustainable Building
Certify Your Green Building Material for LEED and WELL
Step-by-step guide to certifying a green building material for LEED v5 and WELL v2. Master EPDs, HPDs, and VOC limits for 2026 project specifications.
Aug 4, 2026

Stone & Masonry
Veneer Stacked Stone Panels: Interior Design & Style Showcase
Discover how veneer stacked stone panels transform interiors. Explore modern design profiles, material pairings, and technical installation specs.
Aug 4, 2026