Master the Drywall Patch Kit: Pro Steps for Invisible Repairs
Learn professional installation procedures for using a drywall patch kit. Avoid flashing, bulging, and cracking with exact compound specs and sizing guides.
The Anatomy of a Drywall Patch Kit: What You Are Actually Buying
A standard drywall patch kit typically includes three components: a self-adhesive fiberglass mesh patch, a tub of lightweight spackling paste, and a flexible plastic spreader. While these kits are marketed as all-in-one solutions for homeowners, professional drywall finishers rarely use the included spackle for the final coats. The lightweight vinyl spackle provided in most commercial kits is a drying-type compound. As the water evaporates, it shrinks, requiring multiple applications to fill the void left by the mesh weave. Furthermore, lightweight spackle lacks the structural rigidity of setting-type compounds, making it prone to micro-cracking if the wall experiences slight deflection.
Sizing the Damage: Which Patch Method Applies?
Selecting the correct repair methodology depends entirely on the diameter of the breach. Using a peel-and-stick mesh kit on a 6-inch hole guarantees failure, while using a full backing-strip method on a 1-inch nail pop is a waste of labor. Reference the matrix below to determine the correct protocol.
| Hole Diameter | Recommended Method | Primary Material | Compound Type Required |
|---|---|---|---|
| Under 1/2 inch | Dimple Fill | Lightweight Spackle | Drying-type (Vinyl) |
| 1/2 inch to 3 inches | Peel-and-Stick Mesh Kit | Fiberglass Mesh + Kit Spackle | Setting-type for base, Drying for skim |
| 3 inches to 6 inches | California Patch (Paper Plug) | Scrap Drywall + Paper Face | Setting-type (20 or 45 min) |
| 6 inches to 12 inches | Backing Strip / Furring | Wood furring + Drywall scrap | Setting-type with paper tape |
| Over 12 inches | Stud-to-Stud Cutout | New drywall panel section | Setting-type with paper tape |
Step-by-Step Installation: The 3-Inch Mesh Kit Method
For the 1-inch to 3-inch range, the drywall patch kit is highly effective if you override the manufacturer's instructions regarding the compound. Follow this professional sequence to eliminate joint banding and shrinkage cracks.
- Prepare the Substrate: Use a 100-grit sanding sponge to scuff the paint around the hole in a 4-inch radius. This removes the glossy sheen and provides a mechanical tooth for the adhesive. Wipe away dust with a damp microfiber cloth.
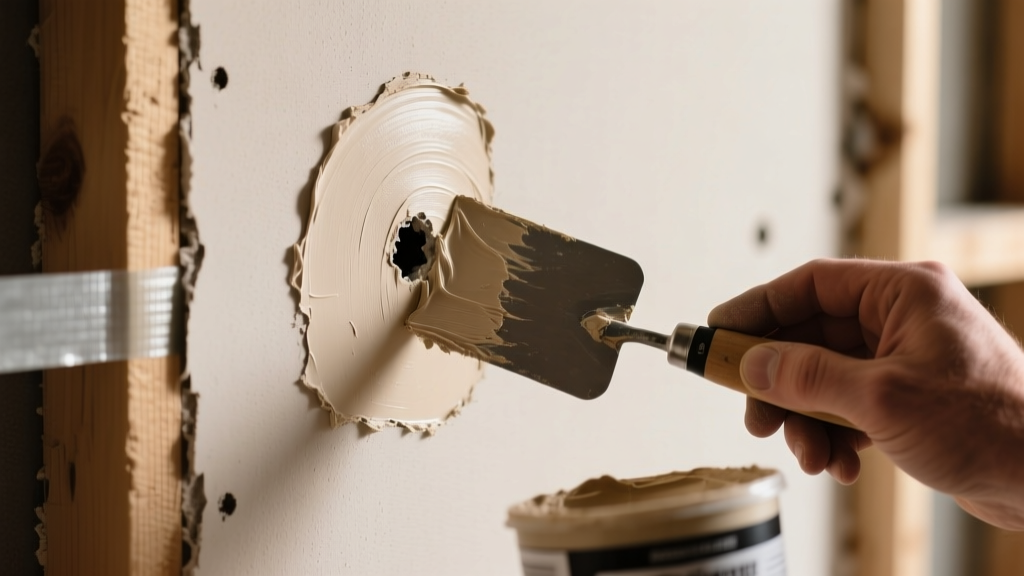
- Apply the Mesh: Peel the backing off the fiberglass mesh patch. Center it over the hole, pressing firmly from the center outward to expel trapped air. Do not stretch the mesh; stretching creates tension that will pull the patch away from the wall as the compound cures.
- The Base Coat (Setting Compound): Discard the included tub spackle for this step. Mix a small batch of USG Easy Sand 20 setting-type compound. Using a 6-inch drywall knife, press the compound through the mesh at a 30-degree angle. The chemical cure of the setting compound prevents shrinkage and locks the mesh permanently to the wall.
- Knock Down Ridges: Once the setting compound has fully hardened (approximately 25 minutes), use a 6-inch knife to scrape off any high spots or ridges. Do not sand yet; scraping is faster and prevents gouging the fiberglass mesh.
- The Skim Coat (Drying Compound): Apply a thin layer of standard drying-type joint compound or the kit's included spackle over the hardened base coat. Feather the edges out to a 10-inch radius. Hold the knife at a shallow 15-degree angle to ensure the center remains slightly proud of the surrounding wall.
- Final Sanding: After the skim coat dries completely, sand using a 120-grit sanding screen attached to a pole sander. Sand in a circular motion, checking your progress with a raking light source placed parallel to the wall.
The Skim Coat Secret to Preventing Flashing
Flashing occurs when the repaired area absorbs paint at a different rate than the surrounding factory-paper-faced gypsum, resulting in a visible dull spot under natural light. To prevent this, the final skim coat must extend beyond the immediate patch area to blend the porosity. According to the Gypsum Association's finishing manual, achieving a Level 4 or Level 5 finish requires a continuous skim coat. For localized repairs, applying a dedicated PVA (Polyvinyl Acetate) drywall primer specifically over the patched area before painting the entire wall is mandatory to equalize surface suction.
Troubleshooting Common Patch Failures
Even with a high-quality drywall patch kit, improper application leads to distinct visual defects. Identify the failure mode and apply the correct remediation.
- Symptom: Halo Cracking (Circular cracks around the patch edge)
Cause: The mesh patch was applied over an uneven surface, or the wall flexes when doors are closed.
Fix: Cut out the cracked compound. Apply a layer of paper drywall tape over the mesh edge using setting compound. Paper tape has higher tensile strength across its width than fiberglass mesh and will bridge the flex point. - Symptom: Bulging (The patch is visibly raised above the wall plane)
Cause: Applying compound too thickly in a single coat, or failing to scrape ridges before the skim coat.
Fix: Sand the bulge down aggressively with 80-grit paper until it is flush, then re-skim with a wide (12-inch) knife to feather the transition over a broader area. - Symptom: Mesh Show-Through (Fiberglass grid visible under paint)
Cause: Insufficient compound thickness over the mesh, or sanding through the top layer of compound.
Fix: Apply two additional micro-thin coats of topping compound, feathering out to 14 inches. Never use coarse sandpaper (under 100-grit) on the final coat.
Pro Upgrades: Ditching the Kit for Large Repairs
When a doorknob punch creates a 5-inch hole, the drywall patch kit is structurally inadequate. Professional contractors rely on the 'California Patch' technique, which utilizes the gypsum board's own paper face to create an integrated flange.
Executing the California Patch
Cut a piece of scrap drywall 2 inches larger than the hole on all sides. Score the back paper and gypsum core, leaving the front paper face intact. Snap the core and peel the gypsum away, leaving a 2-inch border of bare front paper. Apply setting compound to the wall edges and the back of the gypsum plug. Press the plug into the hole, embedding the paper flange into the compound on the wall surface. This creates a seamless, monolithic repair that behaves identically to the surrounding factory-tapered edges. As noted by restoration experts at This Old House, this method eliminates the need for buying separate metal backing plates or furring strips for mid-sized breaches.
Sanding and Priming: The Final 10% That Dictates the Result
The physical installation of the drywall patch kit is only half the battle. The transition from raw compound to painted surface requires strict adherence to dust management and porosity control. Dry sanding joint compound generates microscopic silica and calcium carbonate dust that settles into the pores of the surrounding paint, ruining adhesion. Whenever possible, utilize a damp-sponge wiping technique for the final skim coat. A slightly damp cellulose sponge will melt the surface of the drying compound, creating a glass-smooth finish without generating airborne dust.
'A drywall repair is only as good as its primer. If you spot-prime a patch with standard wall paint, the polyvinyl binders in the paint will be absorbed by the raw gypsum, leaving a flat, chalky scar that no amount of topcoat will hide.' — Professional Painters Association Finishing Guidelines.
Always seal the repaired area with a high-solids PVA drywall sealer or a high-build surfacing primer. Once the primer is dry, inspect the wall with a 500-lumen LED work light held flush against the surface. Any shadow cast by a ridge or depression must be corrected with additional compound before the final color coat is applied. By respecting the material science of setting compounds and the optical physics of paint porosity, a basic drywall patch kit can yield repairs that are entirely invisible to the naked eye.