The Ultimate Cement Board Siding Maintenance and Cleaning Playbook
Master cement board siding maintenance with our expert cleaning playbook. Learn exact PSI limits, chemical ratios, and efflorescence removal techniques.
The Material Science of Fiber Cement: Porosity and Vulnerability
Cement board siding—often referred to generically as fiber cement—is an engineered composite of Portland cement, cellulose fibers, and silica sand. While brands like James Hardie, Allura, and Nichiha manufacture highly durable panels that resist rot and fire, the material remains inherently micro-porous. This porosity is the primary driver of its maintenance requirements. When the factory-applied acrylic or polyurethane coating degrades, or when field-applied paint fails, the cementitious matrix begins to wick moisture via capillary action. This wicking leads to the three most common failure modes in fiber cement siding: biological growth (mold and algae), efflorescence (salt migration), and freeze-thaw delamination. Understanding these mechanisms is the prerequisite for executing a proper maintenance playbook.
Routine Cleaning Protocol: The 90-Day Playbook
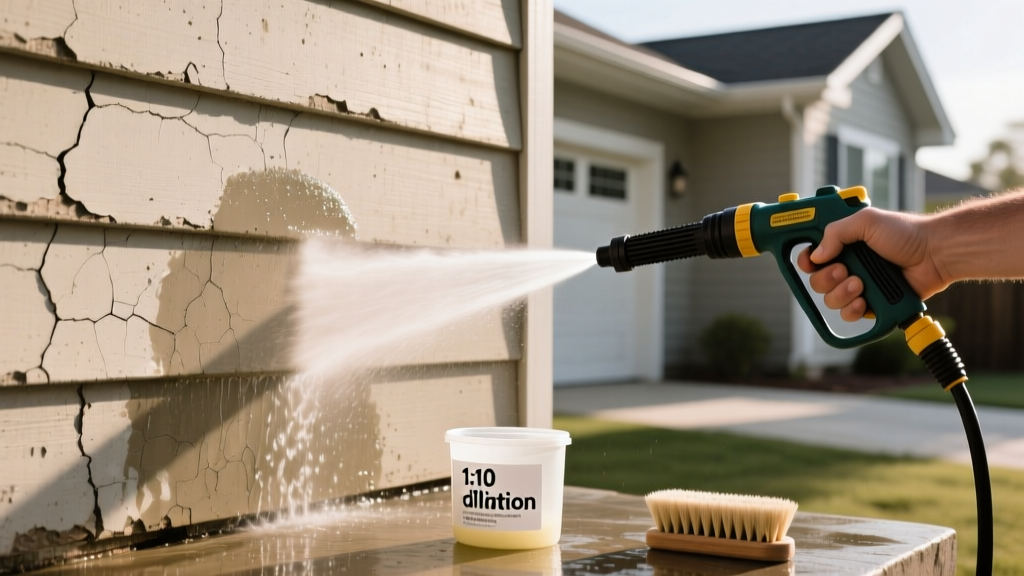
Routine cleaning prevents the accumulation of atmospheric pollutants, pollen, and organic debris that trap moisture against the siding face. For most climates, a thorough wash every 90 to 120 days is sufficient. The critical variable in this process is water pressure; excessive force will erode the cement binder and instantly void manufacturer warranties.
Equipment and Chemical Matrix
| Target Soil | Recommended Agent | Mix Ratio | Dwell Time | Agitation Tool |
|---|---|---|---|---|
| General Dust / Pollen | Mild Dish Soap (e.g., Dawn) | 1/4 cup per 2 gallons water | 5-10 minutes | Soft nylon bristle brush |
| Stubborn Grime / Soot | TSP Substitute (e.g., Savogran) | 1/2 cup per 2 gallons water | 10-15 minutes | Medium nylon bristle brush |
| Hard Water Stains | White Vinegar (5% Acetic Acid) | 50/50 mix with distilled water | 5 minutes max | Microfiber cloth |
According to James Hardie Care and Cleaning Guidelines, pressure washing must never exceed 1,500 PSI. You must use a wide 40-degree fan tip nozzle and keep the wand at least 12 to 18 inches from the surface. Never use a zero-degree rotary tip, as it will core the cement and cause irreversible pitting.
The Pro-Washing Technique: Pre-Wet and Top-Down
Amateur cleaners often spray from the bottom up, which drives dirty water into the horizontal lap joints and Z-flashings. The correct professional protocol requires pre-wetting the wall from the bottom up to saturate the pores, preventing dry cement from instantly absorbing dirty runoff. Once pre-wet, apply your cleaning solution and agitate. Finally, rinse strictly from the top down, allowing gravity to carry the suds off the wall without streaking the dry lower sections.
Targeted Troubleshooting: Biological Growth
In humid climates or on north-facing elevations, cement board siding is highly susceptible to algae (green, slimy) and mildew (black, powdery). The instinct for many homeowners is to reach for chlorine bleach (sodium hypochlorite). This is a critical error.
The Chlorine Bleach Failure Mode
Chlorine bleach only treats the surface of porous materials. It bleaches the visible melanin in mold spores but fails to penetrate the cement matrix to kill the hyphae (roots). Furthermore, chlorine bleach breaks down the acrylic resins in factory-applied finishes like Hardie's ColorPlus Technology, leading to premature chalking and UV degradation. For comprehensive biological remediation, the EPA Mold Cleanup Guidelines recommend detergent-based or oxygenated solutions for porous building materials.
The Oxygen Bleach Protocol
Sodium percarbonate (oxygen bleach) is the industry standard for fiber cement. When mixed with water, it releases hydrogen peroxide, which penetrates the micro-pores, oxidizes the biological matter at the root level, and breaks down into harmless oxygen and soda ash.
- Mix: 1 cup of powdered oxygen bleach (e.g., OxiClean or a commercial sodium percarbonate powder) per 1 gallon of warm water (90°F - 100°F).
- Application: Apply via garden sprayer. Do not let the solution dry on the surface.
- Dwell: Allow 15 to 20 minutes of dwell time, misting lightly if it begins to dry.
- Agitation: Scrub stubborn colonies with a stiff nylon brush in a circular motion.
- Rinse: Flush thoroughly with low-pressure water.
Efflorescence Removal: The White Powder Problem
Efflorescence appears as a chalky, white crystalline deposit on the surface of the siding. It occurs when water-soluble salts (primarily calcium hydroxide) within the Portland cement matrix are dissolved by migrating moisture. As the water reaches the surface and evaporates, it leaves the salts behind, which then react with atmospheric carbon dioxide to form calcium carbonate. The Portland Cement Association notes that while efflorescence is primarily an aesthetic issue, it indicates active moisture movement through the panel.
Step-by-Step Efflorescence Eradication
- Dry Brushing: Always start with a stiff, non-metallic dry brush to remove loose surface crystals. Do not use water initially, as it will simply re-dissolve the salts and push them back into the pores.
- Acidic Wash: For bonded deposits, use a 50/50 solution of white household vinegar and water. Apply to the affected area, let it dwell for 3 to 5 minutes, and scrub.
- Neutralize and Rinse: Rinse the area heavily with clean water to neutralize the acid and flush the dissolved salts away from the wall base.
Contractors sometimes use muriatic (hydrochloric) acid to clean masonry. Never apply muriatic acid to fiber cement siding. It is highly aggressive and will chemically etch the Portland cement binder, destroying the structural integrity of the panel face and leaving it permanently rough and vulnerable to moisture intrusion.
Hardware, Fasteners, and Caulk Inspection Framework
Maintenance is not limited to the panel face; the integration points are where catastrophic water intrusion occurs. Incorporate this inspection framework into your annual spring maintenance routine.
Fastener Corrosion and Rust Streaking
If you notice vertical rust streaks originating from nail heads, the installer likely used electro-galvanized fasteners instead of hot-dipped galvanized or stainless steel. Fiber cement requires a minimum of 1.5-inch hot-dipped galvanized nails. If rust streaking is present, the fastener must be extracted using a cat's paw pry bar, the cavity treated with a rust-inhibiting primer, and replaced with a 304 or 316 stainless steel siding screw. The resulting hole must be filled with an exterior-grade, paintable acrylic caulk and spot-primed.
The Caulking Matrix: Where to Seal and Where to Weep
Improper caulking is a leading cause of trapped moisture and rot in the underlying sheathing. Follow these strict parameters:
- Horizontal Lap Joints: NEVER caulk horizontal lap joints. These are designed as overlapping shingles; water must be able to drain out the bottom edge. Sealing them traps water inside the wall cavity.
- Vertical Trim Intersections: CAULK where the siding meets vertical corner boards or window casings. Use a high-quality polyurethane sealant that meets ASTM C920 Grade NS (Non-Sag) specifications. Silicone is not recommended as it cannot be painted.
- Bottom Edge Clearances: Ensure there is a minimum 2-inch clearance between the bottom course of siding and any roofline, deck, or grade. Do not fill this gap with caulk or expanding foam; it must remain open for capillary drainage and airflow.
Paint Adhesion and Recoating Timelines
Factory-applied finishes (such as James Hardie's ColorPlus Technology) utilize baked-on acrylic primers and topcoats that typically maintain colorfastness and adhesion for 15 years. Field-painted cement board (painted on-site after installation) generally requires recoating every 7 to 10 years due to the lack of a controlled factory curing environment.
When it is time to repaint, do not simply apply a new topcoat. Fiber cement requires a thorough wash, followed by a light scuff-sanding with 80-grit aluminum oxide sandpaper to break the gloss of the existing coating. Because the material is highly alkaline (pH 11-13), you must use a 100% acrylic exterior masonry primer before applying two coats of high-quality 100% acrylic latex exterior paint. Oil-based alkyd paints should be avoided, as they become brittle over time and will micro-crack as the cement board expands and contracts with thermal cycling.