Concrete Float vs Trowel: Tool Selection and Finish Profiles
Master the concrete float vs trowel decision. Compare tool materials, timing, CSP profiles, and power alternatives for flawless slab finishes.

The Core Distinction: Surface Consolidation vs. Paste Refinement
The debate between a concrete float vs trowel is fundamentally a misunderstanding of concrete finishing phases. These tools are not interchangeable alternatives; they are sequential instruments designed for distinct mechanical actions. A float consolidates the surface, embedding large aggregate and pushing excess bleed water to the top. A trowel refines the cement paste, densifying the surface and sealing the capillaries. Using a trowel before a float, or substituting one for the other, guarantees surface failure, typically manifesting as delamination, scaling, or severe craze cracking.
Concrete Float vs Trowel: Material and Profile Matrix
The material of your finishing tool dictates the Concrete Surface Profile (CSP) and the final friction coefficient. Below is a technical breakdown of standard hand tools used in modern flatwork.
| Tool Type | Material | Primary Mechanical Action | Resulting CSP / Texture | Best Application |
|---|---|---|---|---|
| Bull Float | Magnesium / Aluminum | Levels ridges, fills voids, embeds aggregate | CSP 1 (Smooth but open) | Initial leveling of large slabs post-screeding |
| Hand Float | Wood (Pine/Spruce) | Pulls cement paste to surface, creates friction | CSP 3-4 (Gritty, high friction) | Exterior flatwork, driveways requiring broom finish |
| Hand Float | Magnesium / EVA Foam | Smooths without pulling excessive paste | CSP 2 (Uniform, semi-smooth) | Interior slabs, warehouse floors pre-troweling |
| Finish Trowel | Tempered Steel | Burnishes paste, seals capillaries, densifies | CSP 1 or less (Glass-smooth, sealed) | Interior floors, decorative overlays, warehouses |
| Resin Trowel | High-Density Plastic | Intermediate smoothing, prevents rust stains | CSP 2 (Satin finish) | White cement, architectural concrete, pools |
When to Deploy the Float: Aggregate Control and Leveling
Floating occurs immediately after screeding and initial bleed water evaporation. The goal is to create a uniform, level surface that is ready for either a broom finish or subsequent troweling. In 2026, extruded magnesium floats (such as the Marshalltown 14x4 Mag Float, typically retailing around $38) are the industry standard for interior flatwork. Magnesium is lighter than aluminum and does not tear the surface paste if the concrete begins to set prematurely.
Wood vs. Magnesium Floats
Wood floats remain essential for exterior applications. The porous nature of wood pulls a rich layer of cement paste (fines) to the surface. This paste layer is necessary for a subsequent broom finish to grip. If you attempt to broom a magnesium-floated surface, the broom bristles will slide over the dense paste, failing to create adequate slip resistance. Conversely, using a wood float on an interior warehouse slab will bring too many fines to the surface, resulting in a weak, dusty top layer that will spall under forklift traffic.
When to Deploy the Trowel: Burnished Finishes and Sealing
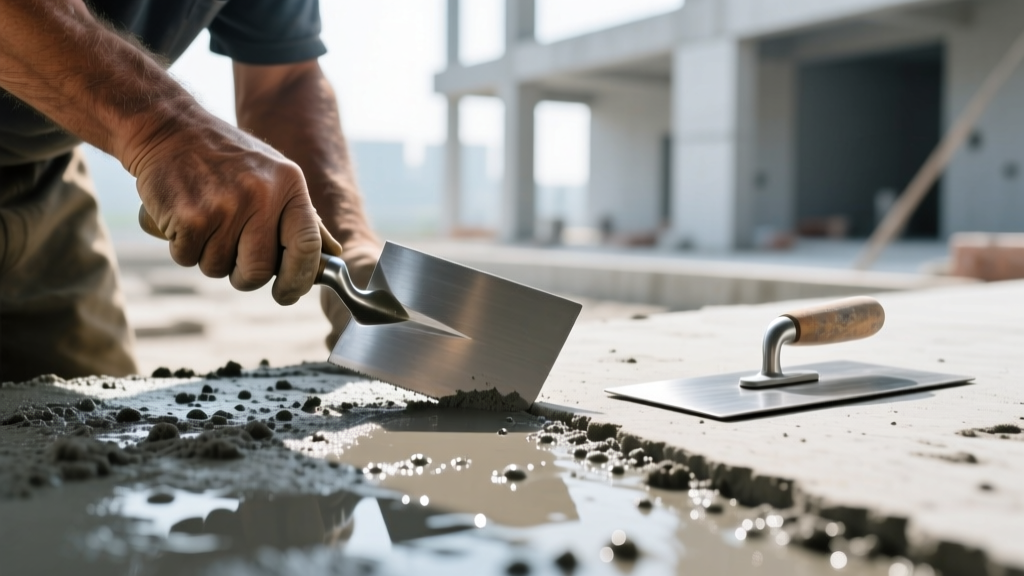
Troweling is the final step for interior or hard-troweled exterior slabs. A steel trowel applies high localized pressure, effectively ironing the cement paste and collapsing the microscopic capillary networks left by evaporating water. According to the Portland Cement Association, hard steel troweling should only commence when the surface has stiffened sufficiently to produce a ringing sound when the steel blade is dragged across it.
- First Pass (Floating Trowel): Hold the steel trowel nearly flat (5 to 10-degree pitch). This knocks down minor ridges left by the hand float without digging into the semi-plastic concrete.
- Second Pass (Burnishing): Increase the pitch to 15 to 30 degrees. Apply firm downward pressure. This pass densifies the top 1/8 inch of the slab, dramatically increasing surface abrasion resistance.
- Blade Selection: Use a flexible, thin-gauge steel blade (0.032 to 0.040 inches) for final burnishing. Thicker blades (0.050 inches) are too rigid and will leave trowel marks on the hardened surface.
Beyond Hand Tools: Power Trowels and Fresno Alternatives
For slabs exceeding 1,000 square feet, hand floating and troweling are economically and physically unviable. This is where mechanized alternatives enter the workflow.
The Fresno: The Hybrid Alternative
A Fresno is a long-handled tool featuring a thin, flexible steel blade (essentially a steel trowel mounted on a bull float pole). It bridges the gap between floating and troweling. Finishing crews use a Fresno to achieve a smooth, semi-burnished finish on large exterior slabs (like parking lots) without the labor cost of crawling on the slab with hand trowels. However, a Fresno cannot replicate the extreme densification of a walk-behind power trowel.
Walk-Behind Power Trowels
Power trowels (renting for approximately $95 to $130 per day in 2026) utilize rotating spider arms equipped with either float pans or finish blades.
- Pan Floating: 36-inch steel pans are attached during the initial setting phase. The pan's large surface area prevents the machine from sinking into the plastic concrete while effectively leveling the slab.
- Blade Troweling: Once the concrete supports the machine's weight without deep tracking, pans are removed. Finish blades are set to a flat pitch for the first pass, then progressively pitched upward (up to 45 degrees) for the final burnish. Modern variable-speed models allow operators to adjust RPMs from 70 (floating) up to 150 (high-speed burnishing).
- Is the slab exterior and exposed to rain? Yes -> Stop at Wood Float + Broom. No -> Proceed to step 2.
- Is the slab interior and subject to heavy wheeled traffic (forklifts)? Yes -> Power Trowel with steel blades to a hard burnish. No -> Proceed to step 3.
- Is the slab a residential garage or basement? Yes -> Hand float or walk-behind power trowel with resin blades for a satin, non-marking finish.
Common Failure Modes and Tool-Specific Fixes
Misapplication of floats and trowels leads to specific, diagnosable failure modes. The National Ready Mixed Concrete Association (NRMCA) outlines several surface defects directly tied to finishing tool misuse.
Delamination and Blisters
Cause: Premature steel troweling or using a power trowel with float pans while bleed water is still rising. The tool seals the surface, trapping water and air voids directly beneath the crust.
Fix: There is no chemical fix for delamination. The hollow-sounding surface must be mechanically scarified or ground down to sound concrete, followed by a polymer-modified micro-topping application.
Surface Dusting (Chalking)
Cause: Troweling over a surface that has been dusted with dry cement to absorb bleed water, or floating the surface while it is too wet, bringing excessive water and fines to the top.
Fix: Apply a sodium or lithium silicate concrete densifier. These chemicals react with the free lime in the weak surface paste to form calcium silicate hydrate (C-S-H), permanently binding the dusting layer.
Craze Cracking
Cause: Overworking the surface with a wood float or adding water to the trowel blade to ease friction. This creates a high water-to-cement ratio at the extreme surface, leading to high shrinkage and a network of fine, shallow cracks.
Fix: While structurally harmless, craze cracking is aesthetically unacceptable for decorative work. It must be prevented by strictly prohibiting the addition of water to the surface during the troweling phase. For existing floors, penetrating sealers can mask the visual contrast of the cracks.
When operating power trowels for extended dry-burnishing passes, the mechanical friction can generate respirable crystalline silica dust. Compliance with the OSHA silica dust standard requires either integrated water-delivery systems on the trowel or the use of HEPA-filtered vacuum shrouds attached to the machine's guard to maintain operator exposure below the 50 µg/m³ permissible exposure limit.
Written by
James ThorntonJames Thornton is a construction industry veteran with 25 years of hands-on experience in wood framing, lumber grading, and residential building codes. He started as a framing carpenter in rural Oregon, earned his ICC Residential Building Inspector certification, and eventually became a senior plan reviewer for the City of Portland Bureau of Development Services. James holds a B.S. in Wood Science & Technology from Oregon State University and is a certified lumber grader through the West Coast Lumber Inspection Bureau (WCLIB). He has inspected over 3,000 residential construction sites and authored the city's internal guide on advanced framing techniques (2x6 at 24" O.C.). James lives in Bend, OR, where he builds custom timber-frame cabins and competes in lumberjack sports.
More from James Thornton
View all
Insulation
Best Home Insulation Materials: Complete 2026 Guide
Compare top home insulation materials for 2026. Find R-values, installed costs per square foot, and best uses for fiberglass, spray foam, and mineral wool.
Aug 4, 2026

Sustainable Building
Certify Your Green Building Material for LEED and WELL
Step-by-step guide to certifying a green building material for LEED v5 and WELL v2. Master EPDs, HPDs, and VOC limits for 2026 project specifications.
Aug 4, 2026

Stone & Masonry
Veneer Stacked Stone Panels: Interior Design & Style Showcase
Discover how veneer stacked stone panels transform interiors. Explore modern design profiles, material pairings, and technical installation specs.
Aug 4, 2026