Concrete Patio Repair Guide: Match the Right Fix to Specific Damage
Diagnose your cracked or spalling slab. This concrete patio repair guide matches specific damage scenarios to the exact materials and methods needed.
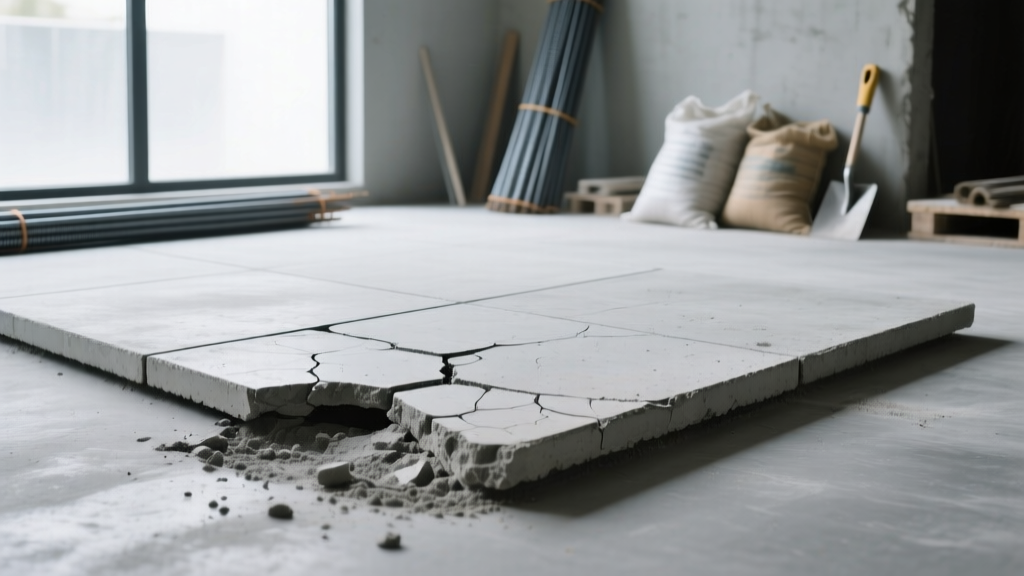
The Diagnostic Approach to Concrete Patio Repair
Concrete patios fail in distinct, predictable patterns driven by subgrade movement, freeze-thaw cycles, or finishing errors. Attempting a cosmetic patch on a structural settlement crack guarantees failure within one season. Effective concrete patio repair requires matching the specific failure mode to the correct chemical and mechanical intervention. According to the Portland Cement Association, identifying whether a crack is active (still moving) or dormant (fully cured and stable) dictates whether you need a flexible elastomeric sealant or a rigid structural epoxy.
- Is the crack width under 1/8 inch? (Points to plastic shrinkage or surface crazing).
- Is the surface flaking while the core remains solid? (Points to freeze-thaw spalling or scaling).
- Is there a vertical displacement (lip) between slab sections? (Points to subgrade washout or tree root heaving).
Scenario A: Hairline and Shrinkage Cracks (Under 1/8 Inch)
Hairline cracks occur when the surface of the concrete cures faster than the underlying material, creating tension. These are primarily cosmetic but allow water ingress that accelerates rebar corrosion or subgrade erosion.
Material Match: Self-Leveling Polyurethane Sealant
Do not use standard silicone or acrylic caulk; they lack the tensile strength to withstand concrete's thermal expansion. A high-modulus polyurethane sealant, such as Sikaflex Self-Leveling Sealant or Loctite PL Concrete Non-Sag, is required. Polyurethane bonds chemically to the masonry and remains flexible across temperature swings from -40°F to 180°F.
Application Protocol
- Route the Crack: Use an angle grinder with a 1/8-inch diamond crack-chasing blade to widen the hairline fissure into a uniform V-groove. This removes debris and creates a mechanical key for the sealant.
- Purge Dust: Blow out the groove with compressed air (minimum 90 PSI). Do not use water, as moisture trapped in the pore structure will cause the polyurethane to bubble during curing.
- Insert Backer Rod: If the routed crack is deeper than 1/2 inch, press a closed-cell foam backer rod into the groove to maintain a 2:1 width-to-depth ratio for the sealant.
- Dispense and Level: Apply the polyurethane. Self-leveling variants will flow and flatten automatically, curing to a traffic-ready state in 3 to 5 days.
2026 Cost Estimate: $9 to $14 per 10.1 oz tube, covering approximately 12 linear feet per tube at 1/4" x 1/4" dimensions.
Scenario B: Surface Spalling and Scaling (Flaking Top Layer)
Spalling occurs when water penetrates the concrete matrix, freezes, and expands, popping the top 1/8 to 1/4 inch of the surface off. This is often exacerbated by de-icing salts or improper troweling during the original pour, which traps excess water at the surface.
Material Match: Polymer-Modified Cementitious Overlay
Standard concrete mix will not bond to an existing cured slab in thin layers. You need a polymer-modified resurfacer, such as Quikrete Concrete Resurfacer or Ardex CD Fine. These products contain acrylic polymers that act as a liquid bonding agent, allowing the material to adhere in layers as thin as 1/16 inch without delaminating.
Application Protocol
- Aggressive Cleaning: Rent a pressure washer capable of 3,000 PSI with a 15-degree yellow nozzle. Strip all loose material, dirt, and biological growth.
- Acid Etching: If the patio is heavily sealed or smooth, etch the surface with a 10% muriatic acid solution to open the pores. Neutralize and rinse thoroughly.
- Slurry Bond Coat: Mix the resurfacer to a thick, paint-like consistency. Scrub this slurry into the damp concrete using a stiff-bristle push broom to force the polymer into the substrate pores.
- Main Application: Mix a second batch to a "pancake batter" consistency. Pour it in manageable 4x4 foot sections, spread with a concrete squeegee, and finish with a fine-bristle broom for slip resistance.
Polymer-modified overlays flash-set rapidly in direct sunlight or wind. The American Concrete Institute (ACI) Committee 546 guidelines emphasize maintaining a wet edge. Never mix more material than you can trowel in 15 minutes, and schedule the pour for early morning when ambient temperatures are between 50°F and 70°F.
2026 Cost Estimate: $28 to $35 per 40 lb bag, yielding roughly 90 square feet of coverage at a 1/8-inch thickness.
Scenario C: Wide Fissures and Structural Settlement (Over 1/2 Inch)
When a patio slab drops, tilts, or develops a vertical lip (faulting), the issue is not the concrete itself, but the subgrade beneath it. Washouts from poor drainage or expansive clay soils cause voids. Filling these wide gaps with surface patching compounds is a temporary bandage; the slab will continue to sink.
Material Match: High-Density Polyurethane Foam (Polyjacking)
Historically, mudjacking (pumping a cementitious slurry under the slab) was the standard. However, the slurry weighs up to 120 lbs per cubic foot, adding massive dead load to an already failing subgrade. Modern concrete patio repair relies on polyjacking—injecting two-part high-density polyurethane foam. The foam expands to 30 times its liquid volume, weighs only 2 to 3 lbs per cubic foot, and is completely impervious to water washouts.
Application Protocol (Professional Required)
- Drill Injection Ports: A technician drills 5/8-inch holes through the slab in a precise grid pattern targeting the voided areas.
- Inject Resin: Liquid polyurethane is pumped through the ports. It reacts upon mixing, expanding and generating up to 4,000 lbs of lifting pressure per square foot.
- Laser Leveling: The technician monitors the slab elevation with a laser transit, stopping the injection the millisecond the slab reaches the target grade.
- Patch Ports: The injection holes are plugged with foam and capped with a rapid-set hydraulic cement.
2026 Cost Estimate: $150 to $300 per sunken slab section (typically 10x10 feet), significantly cheaper than the $1,500+ cost of full demolition and repouring.
Material Comparison Matrix: Sealants vs. Overlays vs. Epoxies
Selecting the wrong chemistry for your specific damage scenario is the primary cause of repair failure. Use this matrix to verify your material choice before purchasing.
| Material Type | Best Scenario | Flexibility | 2026 Cost Estimate | Traffic Ready |
|---|---|---|---|---|
| Polyurethane Sealant | Active hairline cracks (1/8" to 1/2") | High (Elastomeric) | $0.80 / linear ft | 3-5 Days |
| Polymer Overlay | Surface spalling, scaling, crazing | Low (Rigid) | $2.50 / sq ft | 24-48 Hours |
| Structural Epoxy | Dormant structural cracks (>1/2") | None (Welds slab) | $15.00 / linear ft | 12-24 Hours |
| HD Polyurethane Foam | Subgrade settlement, slab faulting | N/A (Sub-slab) | $150+ / slab section | 15 Minutes |
Edge Cases: When to Abandon Repair and Replace
Not every patio can be saved. Pouring money into a structurally compromised slab yields diminishing returns. Evaluate your patio against these critical failure metrics; if two or more are present, full demolition and replacement is the only financially sound option.
- D-Cracking (Alkali-Silica Reaction): If you see a series of parallel cracks running adjacent to the joints and edges, the aggregate inside the concrete is reacting with alkaline moisture. This causes internal expansion that destroys the slab from the inside out. No surface repair will stop this chemical reaction.
- Severe Frost Heave with Rebar Corrosion: If the concrete is lifting unevenly and you see rust stains bleeding through the cracks, the internal steel reinforcement is oxidizing and expanding (spalling from within). The structural integrity is permanently compromised.
- Multiple Intersecting Fault Lines: If a single 10x10 foot slab is broken into four or more distinct, uneven pieces (alligator cracking), the subgrade has entirely failed. Polyjacking cannot stabilize a shattered slab.
Accurate concrete patio repair is an exercise in material science and diagnostic observation. By correctly identifying the root cause of the degradation and applying the specifically engineered chemical or mechanical fix, you can extend the lifespan of your existing slab by 15 to 20 years without the massive expense and disruption of a full tear-out.