Concrete Road vs Asphalt Road: Troubleshooting Pavement Failures
Compare concrete road vs asphalt road repair methods. Diagnose spalling, alligator cracking, and joint faults with 2026 cost data and engineering fixes.

Pavement Mechanics: Rigid vs. Flexible Load Distribution
When evaluating a concrete road vs asphalt road for maintenance and repair, the fundamental divergence lies in structural mechanics. Concrete operates as a rigid pavement system, utilizing the high flexural strength of the slab to bridge over minor subgrade weaknesses and distribute traffic loads across a wide area. Asphalt functions as a flexible pavement system, relying on a layered aggregate base and bituminous binder to transfer loads directly downward into the subgrade through grain-to-grain contact.
This mechanical distinction dictates entirely different failure modes and troubleshooting protocols. A localized subgrade failure beneath a concrete slab may go unnoticed for years until the slab snaps under heavy axle loads. The same subgrade failure beneath asphalt will immediately manifest as surface depression and fatigue cracking. According to the Federal Highway Administration (FHWA), selecting the correct rehabilitation strategy requires accurate diagnosis of whether the distress is surface-level or structurally rooted in the base layers.
| Metric | Concrete (Rigid Pavement) | Asphalt (Flexible Pavement) |
|---|---|---|
| Load Transfer Mechanism | Slab flexural strength & dowel bars | Layered aggregate grain-to-grain contact |
| Primary Failure Trigger | Joint deterioration, thermal curling, heavy axle fatigue | Base moisture intrusion, binder oxidation, rutting |
| Design Lifespan (Before Major Rehab) | 25 to 40 years | 15 to 20 years |
| Temperature Sensitivity | Expansion/contraction at transverse joints | Softening (rutting) in heat; brittle cracking in cold |
Troubleshooting Concrete Road Failures
Concrete pavement distress is typically localized to joints, edges, or specific slab panels. Because the material is brittle and rigid, repairs must restore structural continuity and load transfer efficiency. The National Concrete Pavement Technology Center (CP Tech Center) emphasizes that surface-level patches on structural concrete failures will inevitably reflect through and fail within 12 to 18 months.
Joint Faulting and Dowel Bar Retrofit (DBR)
Joint faulting occurs when the load transfer efficiency (LTE) at transverse joints degrades, causing one slab edge to drop relative to the adjacent slab. This is diagnosed by a straightedge test showing a step-off greater than 0.125 inches. If the concrete panels themselves are structurally sound (no corner breaks or mid-slab cracking), Dowel Bar Retrofit (DBR) is the engineered solution.
- Diagnostic Check: Perform deflection testing using a Falling Weight Deflectometer (FWD). If LTE is below 60% but slab integrity is intact, proceed with DBR.
- Execution: Saw-cut slots precisely 1.25 inches wide, 1.5 inches deep, and 15 inches long across the joint in the wheel paths.
- Material Spec: Insert epoxy-coated, 1.25-inch diameter steel dowel bars. Backfill the slots with a high-early-strength, non-shrink cementitious grout or a specialized structural epoxy formulated for horizontal paving applications.
- Curing: Allow 2 to 4 hours of cure time before diamond grinding the joint smooth to restore ride quality.
Spalling, Corner Breaks, and Full-Depth Repair (FDR)
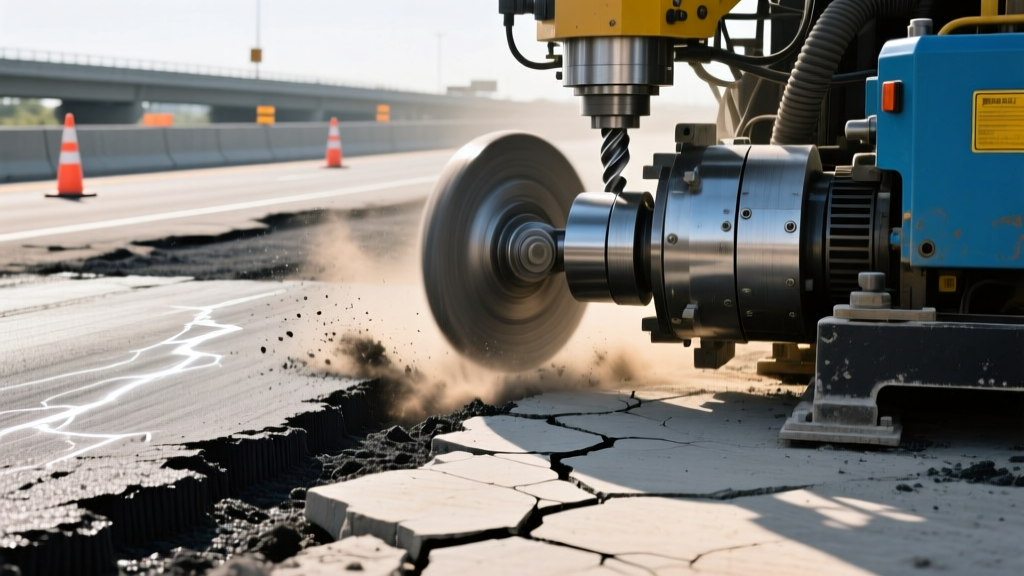
When distress extends beyond the joint line—manifesting as deep spalling, corner breaks, or intersecting diagonal cracks—the slab has lost structural capacity. Surface routing and caulking are insufficient. Full-Depth Repair (FDR) is required to remove and replace the compromised concrete.
- Perimeter Sawing: Saw-cut the repair area to a minimum depth of 6 inches or the full slab thickness, ensuring cuts are at least 1 foot away from any existing joint to prevent creating a "short panel" prone to rapid cracking.
- Removal & Base Prep: Break out the concrete using a drop-hammer (avoid hydraulic hammers, which micro-fracture the surrounding slab). Clean the exposed base with high-pressure air and apply a bond-breaker to the vertical faces of the existing slab.
- Pouring: Use a rapid-setting calcium sulfoaluminate cement mix or an ASTM C150 Type III concrete designed to achieve 3,000 psi compressive strength within 4 hours, minimizing lane closure times.
Troubleshooting Asphalt Road Failures
Asphalt pavement distress is often systemic, spreading across large sections as the bituminous binder oxidizes or the underlying aggregate base becomes saturated. The Asphalt Institute categorizes asphalt failures into surface defects (which can be sealed or overlaid) and structural defects (which require deep reconstruction).
Alligator (Fatigue) Cracking and Base Failure
Alligator cracking presents as a series of interconnected longitudinal and transverse cracks resembling reptile skin. Do not attempt to crack-seal or overlay this distress. Alligator cracking is a definitive indicator that the underlying base or subgrade has failed, usually due to moisture intrusion and pumping. Overlaying will result in rapid reflective cracking.
- Diagnostic Check: Extract a core sample. If the asphalt base layer is saturated, stripped of binder, or the aggregate base is turning to mud, structural failure is confirmed.
- Execution (Deep Patching): Saw-cut the perimeter of the alligator-cracked zone. Excavate the asphalt and compromised base material down to stable subgrade.
- Reconstruction: Replace the aggregate base, compact to 95% modified Proctor density, and apply a CSS-1h or SS-1h tack coat at a rate of 0.05 to 0.10 gallons per square yard before placing hot-mix asphalt (HMA) in 2-inch structural lifts.
Rutting and Mill-and-Overlay Rehabilitation
Rutting appears as longitudinal depressions in the wheel paths. If the rutting is confined to the top 1.5 inches of the asphalt surface (indicating mix instability or binder softening under high heat), a mill-and-overlay is the correct rehabilitation strategy. If the rutting extends into the base layers, full-depth reclamation is necessary.
- Milling: Use a cold planer to remove 1.5 to 2 inches of the oxidized, rutted surface course. This restores the proper cross-slope for drainage and removes the weakened binder.
- Tack Coat Application: Apply a polymer-modified trackless tack coat. Proper adhesion is the most critical failure point in overlays; insufficient tack coat leads to slippage cracking and delamination.
- Overlay: Place a Performance Grade (PG) binder mix (e.g., PG 76-22 for high-traffic, high-temperature corridors) to resist future rutting. Compact using a vibratory steel-wheel roller followed by a pneumatic-tired roller to seal the surface matrix.
2026 Repair Cost & Lifecycle Comparison
Budgeting for pavement rehabilitation requires understanding the cost-per-square-foot and the expected lifecycle extension of each repair modality. The following matrix reflects 2026 prevailing contractor rates for municipal and state highway projects.
| Repair Methodology | Pavement Type | Estimated Cost (2026) | Lifecycle Extension |
|---|---|---|---|
| Dowel Bar Retrofit (DBR) + Grinding | Concrete | $8.00 - $14.00 / sq ft | 10 - 15 years |
| Full-Depth Repair (FDR) | Concrete | $18.00 - $26.00 / sq ft | 15 - 20 years |
| Infrared Thermal Patching | Asphalt | $3.50 - $6.00 / sq ft | 3 - 5 years |
| Mill and Overlay (2-inch depth) | Asphalt | $4.50 - $7.50 / sq ft | 8 - 12 years |
| Full-Depth Reclamation (FDR) | Asphalt | $12.00 - $18.00 / sq ft | 15 - 20 years |
Diagnostic Decision Framework: Patch vs. Reconstruct
Pavement Triage Flowchart
Step 1: Isolate the Distress Type. Is the damage localized (potholes, single joint fault, isolated spall) or systemic (network cracking, widespread rutting, multiple adjacent slab breaks)?
Step 2: Test the Base. For localized asphalt potholes or concrete spalls, probe the base. If the base is dry and compacted, proceed with localized patching (Cold-patch/Hot-mix for asphalt; partial-depth epoxy mortar for concrete).
Step 3: Evaluate Structural Capacity. If the base is saturated, or if >20% of concrete slabs in a given section exhibit corner breaks, localized repairs are a misallocation of funds. The structural matrix has failed.
Step 4: Execute Systemic Rehab. Shift budget to Mill-and-Overlay with base stabilization for asphalt, or slab stabilization (polyurethane foam undersealing) combined with DBR for concrete.
Successfully managing the lifecycle of municipal and highway infrastructure hinges on matching the repair technique to the material's mechanical reality. Treating a flexible asphalt base failure with a rigid concrete patching compound, or attempting to seal structural concrete joint faults with liquid asphalt crack filler, guarantees premature secondary failure. By utilizing precise diagnostic tools like FWD testing and core sampling, engineers can deploy targeted, cost-effective rehabilitation strategies that maximize the service life of both rigid and flexible pavement networks.
Written by
James ThorntonJames Thornton is a construction industry veteran with 25 years of hands-on experience in wood framing, lumber grading, and residential building codes. He started as a framing carpenter in rural Oregon, earned his ICC Residential Building Inspector certification, and eventually became a senior plan reviewer for the City of Portland Bureau of Development Services. James holds a B.S. in Wood Science & Technology from Oregon State University and is a certified lumber grader through the West Coast Lumber Inspection Bureau (WCLIB). He has inspected over 3,000 residential construction sites and authored the city's internal guide on advanced framing techniques (2x6 at 24" O.C.). James lives in Bend, OR, where he builds custom timber-frame cabins and competes in lumberjack sports.
More from James Thornton
View all
Insulation
Best Home Insulation Materials: Complete 2026 Guide
Compare top home insulation materials for 2026. Find R-values, installed costs per square foot, and best uses for fiberglass, spray foam, and mineral wool.
Aug 4, 2026

Sustainable Building
Certify Your Green Building Material for LEED and WELL
Step-by-step guide to certifying a green building material for LEED v5 and WELL v2. Master EPDs, HPDs, and VOC limits for 2026 project specifications.
Aug 4, 2026

Stone & Masonry
Veneer Stacked Stone Panels: Interior Design & Style Showcase
Discover how veneer stacked stone panels transform interiors. Explore modern design profiles, material pairings, and technical installation specs.
Aug 4, 2026