Slurry vs Concrete: Troubleshooting Repair Failures & Fixes
Diagnose and fix concrete repair failures. Learn the critical differences in slurry vs concrete applications, bond coats, and structural patching.

The Core Distinction: Why Material Misapplication Causes Failure
In concrete repair, the terms 'slurry' and 'concrete' are frequently conflated by DIYers and occasionally misapplied by general contractors, leading to catastrophic repair failures. To troubleshoot a failing patch, overlay, or crack fill, you must first understand the fundamental rheological and structural differences between the two materials.
Cement Slurry is a fluid mixture of Portland cement and water (typically a water-cement ratio of 0.40 to 0.60), sometimes modified with fine silica sand or polymer admixtures like Styrene Butadiene Rubber (SBR) latex. It contains zero coarse aggregate. Its primary function in repair is as a bonding agent, a micro-crack injection medium, or a grout for anchoring.
Concrete, conversely, is a composite matrix of cement, water, fine aggregate (sand), and coarse aggregate (gravel or crushed stone). According to the Portland Cement Association, the inclusion of coarse aggregate provides the necessary skeletal structure to resist volumetric shrinkage and deliver high compressive and flexural strength.
The Diagnostic Matrix: Slurry vs Concrete Repair Failures
When a repair fails, the physical symptoms almost always point back to a misunderstanding of slurry vs concrete properties. Use this diagnostic matrix to identify the root cause of your failing repair.
| Symptom Observed | Material Misapplied | Root Cause Mechanism | Correct Material Protocol |
|---|---|---|---|
| Hollow sound when tapped; patch lifts cleanly | Concrete placed without slurry bond coat | Old substrate absorbed water from new mix, halting hydration at the interface | Polymer-modified cement slurry scrub coat |
| Deep map-cracking; material pulls away from edges | Slurry used for deep structural voids | Lack of aggregate skeleton resulted in massive volumetric shrinkage during curing | Shrinkage-compensated concrete with 3/8" aggregate |
| Surface dusting, scaling, or chalky residue | Bleed water (weak slurry) troweled into surface | Excess water created a high w/c ratio slurry layer on top with zero structural integrity | Proper finishing timing; micro-topping overlay if damaged |
| Feather-edge crumbling at patch perimeters | Concrete used for thin (<1/2") edge transitions | Coarse aggregate prevents thin tapering; material fractures under shear stress | Polymer-modified slurry or fine sand-mortar mix |
Deep Dive: Troubleshooting the Top 3 Failure Modes
Mode 1: Interface Delamination (The Missing Bond)
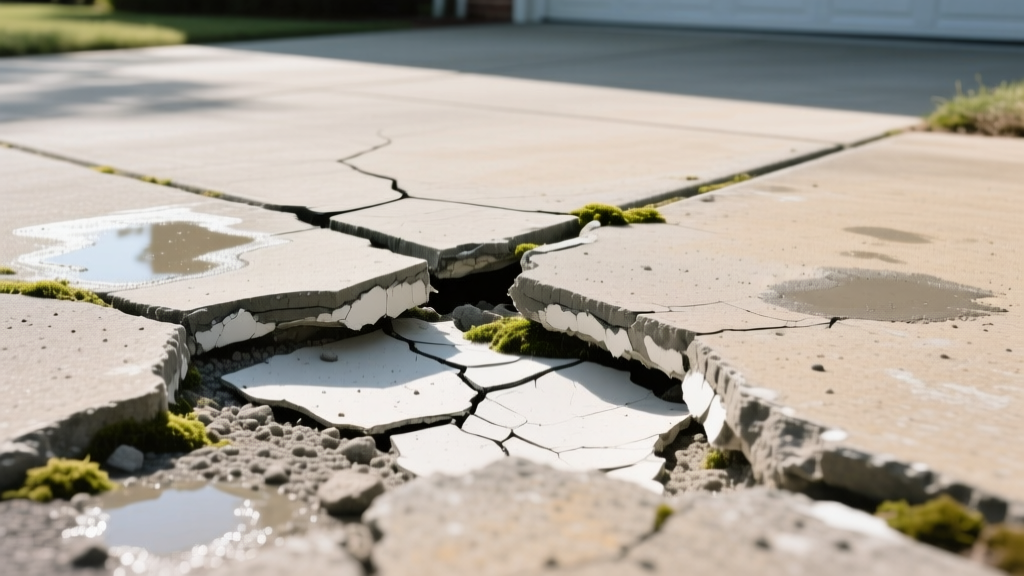
The most common failure in driveway patches, foundation repairs, and overlay installations is delamination. This occurs when fresh concrete is poured directly onto cured concrete. The existing, dry substrate acts like a sponge, rapidly drawing water out of the bottom layer of the new concrete mix. This localized dehydration starves the cement of the moisture required for hydration, resulting in a powdery, unbonded interface.
The Fix: You must introduce a cement slurry bonding coat. The American Concrete Institute (ACI) guidelines for structural repair emphasize the necessity of a bonding agent for composite action. Mix a slurry using 1 part Portland cement, 1 part fine masonry sand, and an SBR latex admixture (such as SikaLatex or Quikrete Concrete Bonding Adhesive) instead of plain water. Scrub this slurry aggressively into the dampened substrate using a stiff bristle brush. Critical timing: You must place the structural concrete over the slurry while it is still wet or tacky. If the slurry dries out before the concrete is placed, it becomes a bond-breaker rather than a bond-maker.
Mode 2: Volumetric Shrinkage in Deep Voids
When repairing deep spalls, potholes, or structural honeycombing (voids deeper than 1 inch), some applicators attempt to use a flowable cement slurry or a high-slump grout to easily fill the cavity. Because slurry lacks coarse aggregate, it relies entirely on the cement paste for its volume. As the cement hydrates and cures, it undergoes significant chemical and autogenous shrinkage. In a deep, unrestrained void, this shrinkage manifests as severe map-cracking and pulling away from the sidewalls.
The Fix: Remove the cracked slurry fill. For voids exceeding 1 inch in depth, you must use a structural repair concrete containing 3/8" or 1/2" coarse aggregate. The aggregate acts as a micro-restraint network, physically locking the matrix together and minimizing shrinkage. For optimal results in 2026, specify a shrinkage-compensated concrete mix (utilizing calcium sulfoaluminate or magnesium oxide expansive admixtures) which slightly expands during early curing to lock tightly against the existing substrate walls.
Mode 3: Surface Dusting and the 'Bleed Water' Slurry Mistake
Surface dusting on a new concrete slab or patch is often misdiagnosed as a bad cement batch. In reality, it is usually a finishing error that inadvertently creates a weak slurry layer. When concrete is placed, bleed water (water pushed to the surface as heavier aggregates settle) will pool on top. If an applicator trowels this bleed water back into the surface to achieve a smooth finish, they are effectively creating a localized, high water-cement ratio slurry on the surface. This weak layer lacks aggregate and cures into a soft, chalky crust that quickly turns to dust under foot traffic.
The Fix: Prevention is key: never trowel bleed water. Allow it to evaporate naturally before final finishing. If the surface is already dusting and failing, the weak slurry layer must be removed. Mechanically scarify the top 1/16" to 1/8" using a diamond cup wheel, then apply a polymer-modified cementitious micro-topping or a penetrating silicate densifier to harden the remaining matrix.
Material Selection Decision Tree
Use this framework to select the correct material based on the geometry of your repair:
- Depth < 1/4 inch (Surface blemishes, hairline cracks): Use a polymer-modified cement slurry or epoxy injection. Concrete aggregate will not fit or bond in this micro-profile.
- Depth 1/4 inch to 1 inch (Spalls, scaling, exposed rebar): Use a polymer-modified mortar (cement, water, fine sand, SBR latex). No coarse aggregate, but lower shrinkage than pure slurry.
- Depth > 1 inch (Potholes, structural voids, full-depth patches): Use structural repair concrete with 3/8" aggregate. Always precede with a slurry bond coat.
- Feather-edges (Tapering to zero): Concrete will crumble. Saw-cut the perimeter to a minimum 1/2 inch depth to create a butt-joint, allowing the use of concrete without feather-edging.
Step-by-Step Protocol for a Bulletproof Bonded Patch
To guarantee a permanent repair when transitioning from an existing substrate to new concrete, follow this exact sequence:
- Perimeter Isolation: Use a concrete saw with a diamond blade to cut a clean, straight perimeter around the repair area. Cut to a minimum depth of 1/2 inch to eliminate feather-edges.
- Substrate Removal: Chip out the damaged concrete using a pneumatic chipping hammer angled at 45 degrees to avoid micro-fracturing the sound concrete below.
- Surface Preparation: Pressure wash the cavity to remove dust and debris. The Federal Highway Administration notes that proper surface preparation accounts for over 70% of repair longevity.
- Pre-Soaking (SSD Condition): Flood the repair area with clean water and let it soak for 2-4 hours. Before applying the bond coat, remove all standing water. The substrate must be Saturate Surface Dry (SSD)—damp to the touch, but with no puddles.
- Slurry Bond Coat Application: Mix your SBR latex-modified cement slurry. Scrub it into the SSD substrate with a stiff brush, ensuring it is forced into all pores and micro-cracks.
- Concrete Placement: While the slurry is still wet and tacky, place your low-slump structural repair concrete. Consolidate thoroughly with a margin trowel or vibrator to eliminate air pockets at the bond line.
- Curing: Immediately after finishing, cover the patch with wet burlap and a polyethylene sheet, or apply a high-quality acrylic curing compound to prevent moisture loss during the critical 7-day hydration window.
Summary
Troubleshooting concrete repairs requires abandoning the assumption that 'cement is cement.' Slurry and concrete serve vastly different mechanical purposes. Slurry is your interface—the chemical bridge that ensures adhesion. Concrete is your volume—the aggregate-reinforced mass that provides structural integrity and resists shrinkage. By correctly diagnosing whether a failure stems from a missing slurry bond, an improper slurry fill, or a bleed-water slurry surface, you can select the exact material and protocol required to execute a permanent, long-lasting repair.
Written by
Sarah WhitfieldSarah Whitfield is a chartered quantity surveyor (MRICS) and construction cost analyst with 15 years of experience in material pricing, procurement strategy, and project budgeting. She earned her degree in Construction Management from the University of Reading (UK) and has worked on projects ranging from $2M custom homes to $180M mixed-use developments across North America and Europe. Sarah currently leads cost estimating for BuildMat Insight, maintaining a proprietary database of 4,000+ material price points updated quarterly. She is a frequent contributor to RSMeans cost data panels and has presented at the International Cost Engineering Council (ICEC) congress. Based in Denver, CO, Sarah is an avid trail runner and volunteer mentor for Women in Construction.
More from Sarah Whitfield
View all
Wood & Lumber
What Are the Different Types of Wood? A Builder's Guide
Compare structural softwoods, finish hardwoods, and engineered lumber. Analyze Janka ratings, MOE values, and 2026 pricing for construction.
Aug 4, 2026

Walls & Panels
Steel Framing vs Wood Framing: Corrosion and Moisture Defense
Compare steel framing vs wood framing for moisture resistance. Learn about galvanized coatings, condensation risks, and corrosion protection strategies.
Jul 21, 2026

Stone & Masonry
How to Cut Stone Veneer: Wet Saw vs Grinder Comparison
Compare the best tools for cutting stone veneer. We review wet saws, angle grinders, and chop saws to help you achieve clean, chip-free cuts.
Jul 21, 2026