The Ultimate Concrete Splash Block Cleaning & Repair Guide
Protect your foundation with our concrete splash block maintenance playbook. Learn exact cleaning methods, crack repair steps, and slope adjustment tips.
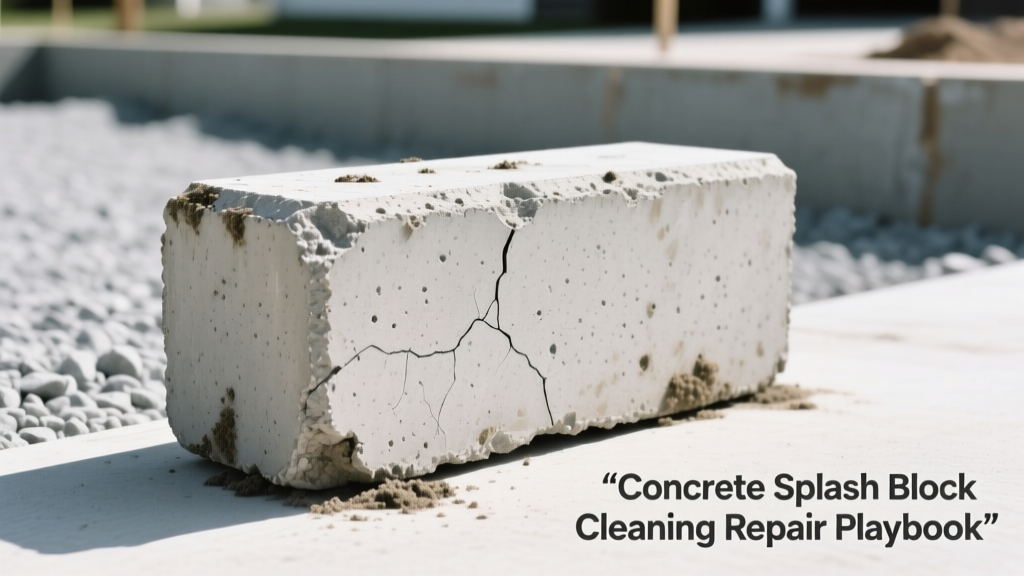
The Hidden Foundation Threat: Why Splash Blocks Fail
A standard 24-inch precast concrete splash block costs less than $15 at a home center, yet its failure can trigger tens of thousands of dollars in foundation settlement, basement flooding, and soil erosion. Despite their critical role in directing rooftop runoff away from the foundation envelope, splash blocks are frequently ignored until they crack, settle, or become slick with biological growth.
Concrete is inherently porous. When exposed to constant moisture from downspout discharge, the freeze-thaw cycle forces trapped water to expand by 9%, causing micro-fractures that rapidly propagate into structural failures. Furthermore, the soil beneath the block often washes away, creating negative pitch that directs water straight back toward the foundation wall. According to drainage guidelines published by Penn State Extension, improper management of rooftop runoff is a leading cause of residential moisture intrusion. This maintenance playbook provides the exact technical procedures to clean, repair, and re-grade concrete splash blocks to extend their service life by decades.
Phase 1: Deep Cleaning & Biological Growth Removal
Algae, moss, and mildew do not just make splash blocks unsightly; they retain moisture against the concrete surface, accelerating freeze-thaw spalling and creating slip hazards. Avoid chlorine bleach (sodium hypochlorite). Chlorine bleach degrades the calcium silicate hydrate bonds in concrete and harms surrounding landscaping.
The Sodium Percarbonate Protocol
- Dry Preparation: Sweep the block with a stiff-bristle push broom to remove loose debris, silt, and leaf litter.
- Chemical Mixing: Dissolve 1/2 cup of powdered Sodium Percarbonate (oxygen bleach) per gallon of warm water (100°F - 110°F). Oxygen bleach breaks down into hydrogen peroxide and sodium carbonate, which safely lifts organic stains without attacking the concrete matrix.
- Dwell Time: Apply the solution generously using a pump sprayer. Allow it to dwell for 15 to 20 minutes. Do not let the solution dry on the surface; mist with clean water if necessary.
- Pressure Washing: Use a gas or electric pressure washer rated between 2,000 and 2,800 PSI. Equip it with a 15-degree yellow nozzle tip. Maintain a strict 12-inch distance from the surface to avoid etching the concrete paste.
Holding a pressure washer nozzle closer than 8 inches or using a 0-degree red tip will strip the cement paste, exposing the aggregate. This creates a rough, pitted surface that traps more dirt and accelerates future degradation.
Phase 2: Structural Triage & Crack Repair
Not all cracks require the same intervention. Assessing the width and movement of the crack dictates the correct repair material. Using a rigid epoxy on an active, moving joint will result in immediate failure, while using a flexible sealant on a wide, static spall will leave an unlevel surface.
| Crack Width | Crack Type / Behavior | Recommended Material | Application Method |
|---|---|---|---|
| Hairline (<1/16') | Static, surface shrinkage | Penetrating Silane/Siloxane Sealer | Low-pressure spray application; no routing required. |
| 1/16' to 1/4' | Active, thermal expansion | Polyurethane Sealant (e.g., Sikaflex-11 FC) | Route with angle grinder, clean with compressed air, apply with caulking gun. |
| 1/4' to 1/2' | Static, structural settling | Vinyl Concrete Patcher (e.g., Quikrete) | Undercut edges, dampen surface, trowel flush, and cure under plastic sheeting. |
| >1/2' or Spalling | Severe freeze-thaw failure | Replacement Required | Repair is not cost-effective; structural integrity is compromised. |
Routing and Sealing Active Joints
For cracks in the 1/16-inch to 1/4-inch range, the crack must be widened to create a reservoir for the sealant. Use an angle grinder equipped with a 1/8-inch diamond crack-chasing blade to route the crack into a V-shape. Blow out the dust with compressed air or a leaf blower. Apply a self-leveling polyurethane sealant. Polyurethane adheres tenaciously to concrete and remains flexible across temperature swings from -40°F to 180°F, accommodating the natural thermal expansion of the splash block.
Phase 3: Slope Correction & Settling Fixes
The primary function of a splash block is kinetic energy dissipation and water diversion. If the block settles and pitches toward the house, it becomes a liability. The International Residential Code (IRC) and general drainage best practices mandate a minimum 6-inch fall over the first 10 feet of grading. For a standard 24-inch splash block, this translates to a minimum 1/2-inch drop from the downspout end to the discharge end.
Place a 24-inch torpedo level on the splash block. The bubble should be offset by at least one full line toward the discharge end to verify the 1/4-inch per foot slope requirement.
Re-Basing with Angular Aggregate
When a block settles, do not simply shim it with sand or topsoil. Sand retains moisture and washes away during heavy storms. Instead, lift the block and excavate 2 inches of the underlying soil. Fill the void with 3/4-inch crushed angular gravel (not rounded pea gravel). The angular faces of crushed stone interlock when tamped, creating a stable, free-draining base that prevents frost heave and soil erosion. Compact the gravel with a hand tamper before resetting the concrete block.
Phase 4: Winterization & Penetrating Sealers
Water management authorities, including the Environmental Protection Agency (EPA), emphasize that controlling runoff volume and velocity is critical to preventing soil saturation near foundations. A sealed splash block sheds water faster, reducing the time moisture spends in contact with the concrete.
Apply a penetrating silane/siloxane water repellent every 3 to 5 years. Unlike acrylic film-forming sealers that sit on the surface, peel, and trap subsurface moisture, silane molecules are small enough to penetrate deep into the concrete capillaries. They react with the free lime in the concrete to form a hydrophobic resin barrier below the surface. This allows the concrete to breathe and release vapor while repelling liquid water, drastically reducing freeze-thaw damage.
Application Specifications
- Surface Prep: Concrete must be completely dry (minimum 48 hours after rain or cleaning) and above 50°F.
- Application Rate: Apply using a low-pressure pump sprayer at a rate of approximately 150 to 200 square feet per gallon.
- Wet-on-Wet Method: Apply the first coat and immediately follow with a second coat before the first penetrates fully. This ensures deep saturation without leaving surface residue.
Seasonal Maintenance Schedule
Routine maintenance prevents catastrophic failure. Adhere to this bi-annual schedule to ensure continuous foundation protection.
| Season | Task | Specific Action Required |
|---|---|---|
| Early Spring | Post-Winter Inspection | Check for new freeze-thaw cracks. Clear discharge end of accumulated mulch, soil, or ice dams that block water flow. |
| Early Spring | Slope Verification | Use a torpedo level to confirm the 1/2-inch drop. Re-tamp the gravel base if settling has occurred. |
| Late Autumn | Debris Clearing | Remove all fallen leaves from the downspout elbow and splash block channel to prevent winter ice damming. |
| Late Autumn | Sealer Check | Splash water on the block. If it darkens and absorbs rather than beading up, schedule a silane/siloxane application for the next dry, warm spell. |
When to Abandon Repair: Replacement Thresholds
Concrete splash blocks are consumable infrastructure. Recognizing when to replace them saves time and money. Replace the unit immediately if you observe any of the following failure modes:
- Deep Structural Fractures: A crack that runs completely through the thickness of the block and separates it into two distinct pieces that shift when stepped on.
- Severe Rebar Rust Staining: If the precast block contains internal wire mesh or rebar and you see deep rust stains bleeding through the concrete, the internal steel is oxidizing and expanding, which will inevitably shatter the block from the inside out.
- Channel Erosion: If the center discharge channel has eroded more than 1/4 inch deep due to high-velocity water flow from an undersized downspout, the block will pool water. Upgrade to a high-density polyethylene (HDPE) splash block or extend the downspout with a buried PVC drain line to bypass the splash block entirely.
By treating the concrete splash block as a critical component of your building's moisture management system rather than an afterthought, you preserve the structural integrity of the foundation and prevent costly below-grade waterproofing failures.