Stone Veneer on Cement Board: Application Showcase & Install Guide
Discover expert techniques for installing stone veneer on cement board. This application showcase covers substrate prep, mortar selection, and costs.

The Anatomy of a Flawless Stone Veneer Application
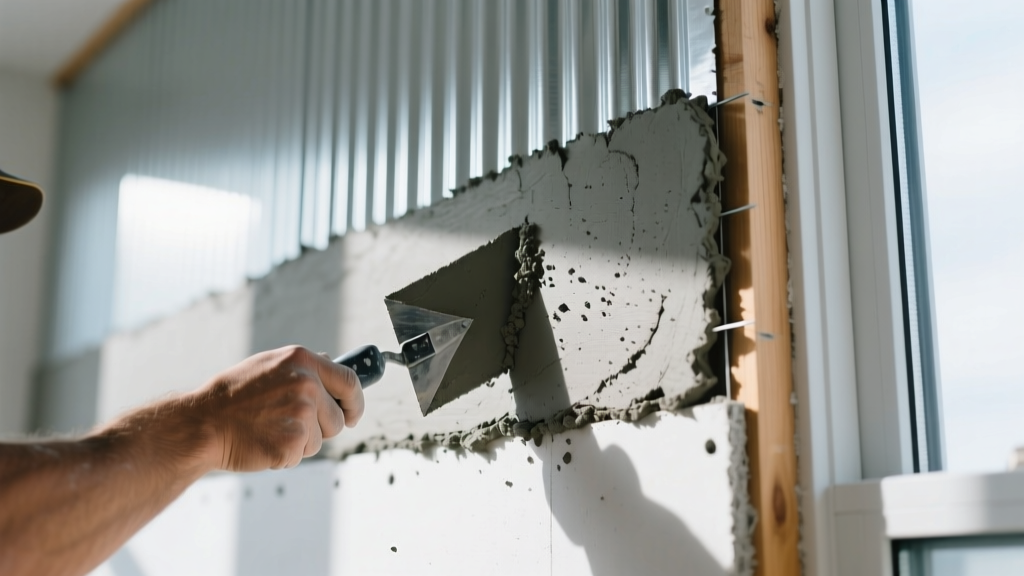
Applying stone veneer on cement board represents the gold standard for interior accent walls, fireplace surrounds, and exterior cladding. Unlike drywall or plywood, cementitious backer units (CBUs) offer unmatched dimensional stability and moisture resistance, preventing the substrate degradation that causes veneer delamination. However, the success of this application hinges on strict adherence to moisture management, mechanical fastening, and mortar chemistry. This showcase dissects a high-end interior fireplace surround build, detailing the exact materials, measurements, and techniques required to achieve a structural bond that lasts decades.
Substrate Selection Matrix: Choosing the Right Cement Board
Not all cement boards are engineered equally. For stone veneer applications, the board must withstand the high moisture content of the mortar scratch coat without warping, while supporting the immense dead load of the stone (which can exceed 15 lbs per square foot). Below is a comparison of the top-tier substrates used by professional masons.
| Product | Thickness | Core Composition | Best Application |
|---|---|---|---|
| USG Durock Next Gen | 1/2" | Portland cement with glass fiber mesh | High-load interior/exterior walls |
| James Hardie HardieBacker | 1/2" | Fiber-cement (cellulose reinforced) | Interior fireplace surrounds & wet areas |
| National Gypsum PermaBase | 1/2" | Portland cement with polymer edge | Commercial cladding & curved walls |
Step-by-Step Application Showcase: Interior Fireplace Surround
This section outlines the precise workflow for installing a 45-square-foot manufactured stone veneer surround over a framed wall using 1/2" HardieBacker as the substrate.
Phase 1: Substrate Prep and Lath Installation
- Board Fastening: Secure the 1/2" cement board to 16-inch on-center wood studs using 1-5/8" corrosion-resistant cement board screws. Space screws every 8 inches along the edges and 12 inches in the field.
- Gap Management: Leave a 1/8" gap between all board edges. Fill these gaps with an alkaline-resistant fiberglass mesh tape embedded in a polymer-modified mortar.
- Lath Attachment: Drape 2.5 lb/yd² minimum galvanized expanded metal lath over the board. Wrap the lath around corners by at least 6 inches. Fasten the lath using 1-1/2" galvanized roofing nails or staples, penetrating the studs every 6 inches vertically and horizontally. Ensure the lath is pulled taut; loose lath causes mortar cracking.
Phase 2: The Scratch Coat
Mix a Type S masonry mortar (such as Sakrete Scratch and Brown) to a thick, peanut-butter consistency. Using a 3/4" notched trowel, apply a 1/2" thick layer of mortar over the metal lath, pressing firmly to force the mortar through the mesh. Before the mortar sets, use a scarifier or coarse broom to score horizontal grooves into the surface. This scratch coat must cure for a minimum of 24 to 48 hours, kept lightly misted with water to prevent rapid drying and shrinkage cracks.
"The scratch coat is not optional. It encapsulates the metal lath, creating a unified, monolithic masonry substrate. Skipping this step and applying stone directly to bare lath is the number one cause of catastrophic veneer failure in residential builds."
Phase 3: Stone Setting and Pointing
For the setting bed, utilize a high-performance polymer-modified mortar like LATICRETE 254 Platinum or a dedicated veneer mortar. Butter the back of each stone with a 1/2" layer of mortar and press it firmly into the scratch coat, ensuring a slight squeeze-out at the joints. Maintain a 1/2" to 1" joint width. Once the mortar is thumb-print hard, tool the joints with a convex jointer and brush away excess material with a stiff bristle brush. Never use acid washes or wire brushes on manufactured stone, as this will strip the pigment.
Critical Failure Modes and How to Avoid Them
Even with premium materials, specific environmental and mechanical errors can compromise the installation. Review these common failure modes before beginning your project.
- Delamination from Efflorescence: Water migrating through the wall cavity carries soluble salts to the surface, crystallizing behind the stone and pushing it off the wall. Solution: On exterior applications, always install a weather-resistive barrier (WRB) and a weep screed at the base. For interior walls, ensure the ambient humidity is controlled and the scratch coat is fully cured before setting stone.
- Mortar Shrinkage Cracking: Using a mortar mix with too high a water-to-cement ratio causes severe shrinkage as it cures, cracking the joints. Solution: Mix mortar to the lowest workable water content and mist the scratch coat before applying the setting bed to prevent the dry substrate from sucking moisture out of the fresh mortar.
- Thermal Expansion Spalling: Cement board and stone veneer expand at different rates when exposed to heat (common on fireplace surrounds). Solution: Incorporate a soft, high-temperature silicone expansion joint where the stone meets the mantel or hearth to absorb thermal movement.
2026 Cost Breakdown: Stone Veneer on Cement Board
Costs vary significantly based on whether you choose natural thin stone or manufactured concrete veneer, as well as regional labor rates. The table below reflects national averages for a professional-grade interior installation.
| Material / Labor Component | Cost per Sq. Ft. (USD) | Notes |
|---|---|---|
| 1/2" Cement Board & Fasteners | $1.75 - $2.50 | Includes mesh tape and screws |
| Galvanized Metal Lath | $0.80 - $1.20 | 2.5 lb/yd² minimum weight |
| Mortar (Scratch & Setting Bed) | $1.50 - $2.25 | Polymer-modified veneer mortar |
| Manufactured Stone Veneer | $6.00 - $12.00 | Varies by profile (Ledgestone vs. Fieldstone) |
| Professional Masonry Labor | $14.00 - $24.00 | Highly dependent on complexity and corners |
| Total Estimated Installed Cost | $24.05 - $41.95 | Per square foot of wall area |
Frequently Asked Questions
Can I install stone veneer on cement board without metal lath?
No. While cement board is a stable, moisture-resistant substrate, its surface lacks the mechanical profile required to hold the heavy sheer weight of stone veneer long-term. The metal lath provides the structural reinforcement, and the scratch coat encapsulates the lath to create a unified masonry base. Skipping the lath violates MVMA guidelines and will void most stone manufacturer warranties.
Is thinset mortar acceptable for setting the stone?
Standard ceramic tile thinset is not formulated for the thickness and weight of stone veneer. You must use a polymer-modified mortar specifically rated for masonry veneer, or a high-quality Type S masonry cement mix. Products like LATICRETE 254 Platinum offer the non-sag properties and bond strength required for vertical stone applications.
How do I handle outside corners when using cement board?
Never end two pieces of cement board flush at an outside corner. Overlap the boards or use a pre-formed metal corner bead designed for cementitious systems. More importantly, the metal lath must wrap around the corner continuously by at least 6 inches, and you should utilize pre-cast manufactured stone corner pieces to wrap the veneer seamlessly, avoiding a visible seam where two flat stones meet at a 90-degree angle.
Written by
David NakamuraDavid Nakamura is a licensed architect (AIA) and construction technology writer focused on sustainable building methods, mass timber engineering, and high-performance building envelopes. He holds a Master of Architecture from the University of Washington and is a certified Passive House Consultant (CPHC). David spent eight years at the Seattle firm Mithun, where he led the design of three LEED Platinum projects, before founding his own practice specializing in net-zero residential design. He serves on the editorial advisory board of GreenBuilder Magazine and has authored peer-reviewed papers on cross-laminated timber (CLT) connections for the Journal of Structural Engineering. In his spare time, David teaches woodworking at Pratt Fine Arts Center and kayaks the Puget Sound.
More from David Nakamura
View all
Construction Cost
Labor Cost to Build a Deck Per Sq Ft: 2026 Installation Guide
Discover the exact labor cost to build a deck per sq ft in 2026. This installation guide breaks down contractor rates, complexity factors, and hidden fees.
Aug 4, 2026

Construction Cost
How Much Does It Cost to Build a 3 Bedroom House? Financing Guide
Learn exactly how much it costs to build a 3 bedroom house and explore 2026 financing options, construction loan types, and budget frameworks for your build.
Aug 4, 2026

Construction Cost
Cost to Build a Tennis Court: 2026 Guide
How much does it cost to build a tennis court in 2026? Breakdowns for asphalt, concrete, and synthetic surfaces plus fencing and lighting.
Jul 30, 2026