Pouring Concrete Patios: Pro Installation and Finishing Steps
Master the installation of concrete patios with this pro-level guide. Learn site prep, forming, pouring, and finishing techniques for durable results.
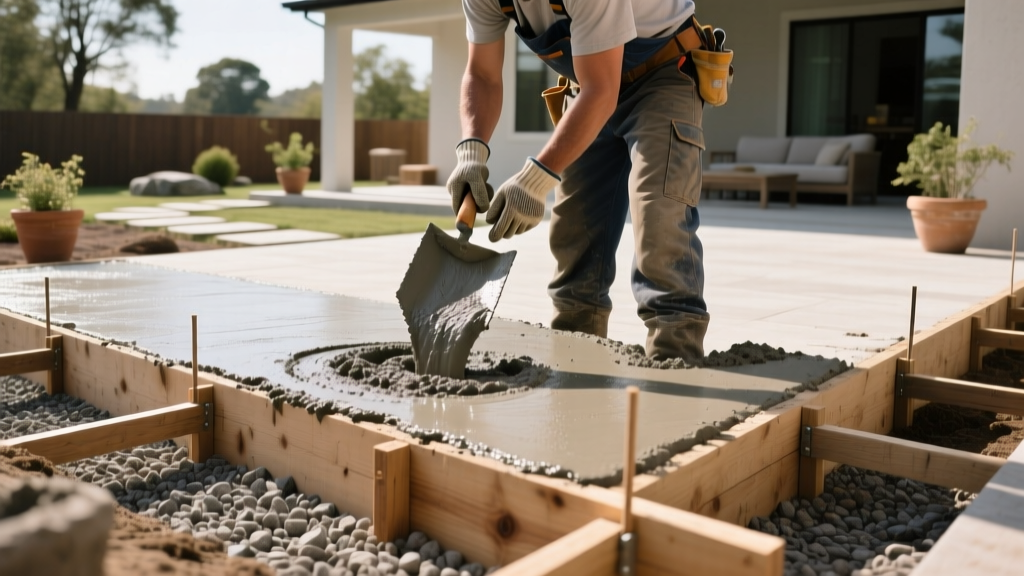
Pre-Pour Planning and Mix Design Specifications
The longevity of exterior flatwork is determined before the first truck arrives. For residential concrete patios exposed to weather and foot traffic, standard 2,500 PSI bagged mixes are insufficient. Professional installation requires a engineered mix design tailored to local climate conditions and structural loads.
Optimal Mix Parameters for Exterior Patios
- Compressive Strength: Minimum 4,000 PSI at 28 days to resist surface abrasion and freeze-thaw degradation.
- Aggregate Size: 3/4-inch maximum coarse aggregate. This size provides the best balance of workability and structural integrity for standard 4-inch slabs.
- Air Entrainment: 4% to 6% microscopic air bubbles are mandatory in climates with freezing temperatures. This allows water to expand upon freezing without spalling the surface.
- Water-Cement Ratio: Keep below 0.45. Lower water content increases surface density and reduces permeability.
Site Preparation and Subgrade Compaction
Concrete is only as strong as the ground beneath it. A poorly compacted subgrade is the leading cause of differential settlement and structural cracking in patio slabs. According to guidelines from the National Ready Mixed Concrete Association (NRMCA), the subgrade must be uniform, properly drained, and densely compacted.
Excavation and Base Installation Steps
- Excavate: Dig 8 to 10 inches below the finished patio elevation. Ensure a minimum slope of 1/4 inch per foot away from the house foundation for drainage.
- Geotextile Fabric (Optional but Recommended): Lay a non-woven geotextile fabric over native clay or silt soils to prevent the base material from migrating into the subgrade.
- Base Material: Spread 4 to 6 inches of Aggregate Base Course (ABC) or crushed angular gravel. Avoid rounded river rock, which does not lock together.
- Compaction: Use a vibratory plate compactor to achieve 95% Standard Proctor density. Compact in 2-inch lifts, lightly misting with water to achieve optimal moisture content.
Formwork and Reinforcement Setup
Precise formwork dictates the final elevation and slope, while reinforcement controls crack width once the concrete inevitably shrinks during curing.
Building the Forms
Use straight, kiln-dried 2x4 or 2x6 dimensional lumber for forms. Drive 2x2 wooden stakes or 1/2-inch rebar stakes every 3 feet along the outside of the forms. Secure the lumber to the stakes with duplex (double-headed) nails for easy removal. Run a mason's string line across the top of the forms to verify the 1/4-inch-per-foot slope.
Reinforcement Selection
For standard 4-inch residential patios, 6x6 W1.4xW1.4 Welded Wire Mesh (WWM) is the industry standard. For patios supporting heavy loads (like hot tubs or large outdoor kitchens), upgrade to #3 (3/8-inch) rebar tied in an 18-inch on-center grid.
Placement Rule: Reinforcement must be located in the upper third of the slab to resist tensile forces. Use plastic bar chairs to elevate the WWM or rebar 2 inches above the compacted base. Step on the mesh during the pour to keep it elevated; if it sinks to the bottom, it provides zero structural benefit.
The Pour: Placement and Consolidation
Coordinate the truck arrival so you have a clear path to the site. Begin placing concrete in the farthest corner and work backward toward the access point.
Screeding and Vibrating
Strike off the concrete using a straight 2x4 or a magnesium screed, moving it back and forth in a sawing motion while pulling it forward. This fills voids and removes excess material. For slabs deeper than 5 inches, use an internal pencil vibrator along the forms to eliminate honeycombing and air pockets. Do not over-vibrate, as this forces heavy aggregate to the bottom and brings weak cement paste to the surface.
| Slump Measurement | Workability Profile | Best Application |
|---|---|---|
| 2 - 3 inches | Stiff, difficult to screed | Steep slopes, heavy-duty industrial floors |
| 4 - 5 inches | Plastic, ideal for finishing | Standard residential concrete patios and driveways |
| 6 - 7 inches | Highly fluid, prone to segregation | Pump trucks, heavily congested rebar areas |
Finishing Techniques: Timing is Everything
Finishing concrete is an exercise in moisture management. Rushing the process traps bleed water beneath the surface, causing the top layer to flake off (scaling) within a few winters. The Portland Cement Association (PCA) emphasizes that timing finishing operations to the evaporation of bleed water is critical for surface durability.
The Four-Step Finishing Sequence
- Bull Floating: Immediately after screeding, use a bull float on an extended pole to push down large aggregate and level the surface. Do this while the concrete is still highly plastic.
- Edging: Once the concrete has stiffened enough to support your weight on knee boards (usually 1 to 3 hours depending on temperature), run an edger along all forms. This creates a smooth, rounded edge that is less prone to chipping.
- Jointing (Grooving): Use a hand groover to create control joints. Space joints at 1.5 to 2 times the slab thickness in feet (e.g., an 8-foot grid for a 4-inch slab). The joint must be at least 1 inch deep (1/4 of the slab depth) to effectively induce cracking in a straight line.
- Broom Finishing: Drag a stiff-bristled concrete broom across the surface to create a non-slip texture. Wait until the bleed water has completely evaporated and the surface has a dull, matte appearance. If water pools in the broom grooves, you are finishing too early.
Curing: The Most Overlooked Step
Concrete does not "dry"; it cures through a chemical reaction called hydration. If moisture escapes too quickly, the reaction stops, resulting in a weak, dusty surface. Proper curing increases surface abrasion resistance by up to 50%.
Curing Methods for Patios
- Wet Curing: Cover the patio with wet burlap and seal it with 4-mil polyethylene sheeting. Keep it continuously wet for a minimum of 7 days. This is the most effective method but requires daily maintenance.
- Membrane-Forming Compounds: Spray a wax- or acrylic-based curing compound (meeting ASTM C309 standards) immediately after finishing. This seals the moisture inside. Apply at a rate of 200 square feet per gallon using a pump sprayer.
Common Failure Modes and Troubleshooting
Even with perfect preparation, environmental factors can compromise the slab. Understanding these failure modes allows for immediate corrective action.
Plastic Shrinkage Cracking
Symptoms: Short, parallel cracks appearing on the surface within hours of placement.
Cause: Surface moisture evaporates faster than bleed water rises, typically due to high winds, low humidity, or hot sun.
Fix: Erect temporary windbreaks. Apply an evaporation retardant (like Confilm) immediately after screeding. If cracks appear while the concrete is still plastic, re-vibrate and re-trowel the surface to close them.
Surface Dusting
Symptoms: A fine, powdery layer of cement that rubs off under foot traffic after curing.
Cause: Troweling bleed water back into the surface, or carbonation from exhaust fumes (if using gas-powered heaters in enclosed areas).
Fix: Never sprinkle dry cement on the surface to absorb bleed water. Wait for natural evaporation. If dusting occurs post-cure, apply a chemical concrete densifier (silicate-based) to harden the surface.
2026 Cost Breakdown for Professional Installation
Budgeting for concrete patios requires accounting for both material volatility and specialized labor. The following table outlines current market rates for a standard 400-square-foot patio installation.
| Project Phase | Unit Cost Estimate | Notes |
|---|---|---|
| Excavation & Subgrade Prep | $2.50 - $4.50 / sq ft | Includes hauling away spoils and importing ABC gravel. |
| Formwork & Reinforcement | $3.00 - $5.00 / sq ft | Lumber, stakes, WWM, and plastic chairs. |
| Concrete Material (4,000 PSI) | $145 - $185 / cubic yard | Prices vary by region; includes short-load fees for small pours. |
| Placement & Finishing Labor | $4.50 - $8.00 / sq ft | Highly dependent on site access and finish complexity. |
| Sawcutting & Sealing Joints | $1.50 - $2.50 / linear ft | Professional sawcutting yields cleaner lines than hand grooving. |
For advanced insights on flatwork tolerances and finishing techniques, contractors should consult the technical resources available through Concrete Construction Magazine. Proper execution of these installation procedures ensures a patio that remains structurally sound and aesthetically pleasing for decades.