Concrete Stain vs Paint: DIY Installation & Prep Guide
Deciding between concrete stain vs paint? This installation guide covers surface prep, application steps, costs, and durability for both finishes.

The Core Installation Divergence: Penetration vs. Film
When evaluating concrete stain vs paint for flooring, patios, or driveways, the fundamental difference lies in the installation mechanics. Stains are reactive or penetrating treatments that alter the concrete from within, leaving the pores open. Paints and coatings (like epoxies and acrylics) form a continuous, impermeable film on the surface. This distinction dictates entirely different surface preparation protocols, application tools, and failure modes. Understanding these mechanical differences is critical before unsealing a single can of product.
Pre-Installation Decision Matrix
Use this matrix to align your project constraints with the correct chemical system. Material costs reflect average 2026 retail pricing for professional-grade DIY products.
| Metric | Acid Stain | Water-Based Stain | 2-Part Epoxy Paint | Acrylic Latex Paint |
|---|---|---|---|---|
| Mechanism | Chemical reaction | Pore penetration | Surface film (10-12 mils) | Surface film (3-5 mils) |
| Required CSP Profile | CSP 1 (Light etch) | CSP 1-2 (Light grind) | CSP 2-3 (Aggressive grind) | CSP 1-2 (Etch or grind) |
| Material Cost / Sq Ft | $0.20 - $0.35 | $0.30 - $0.50 | $0.90 - $1.60 | $0.25 - $0.45 |
| Pot Life / Dwell | 2-4 hr dwell time | N/A (Dries in 1 hr) | 45-60 min pot life | N/A (Dries in 2 hr) |
| Primary Failure Mode | Splotchy/muddy reaction | Uneven absorption | Hot tire pick-up / peeling | Blistering from moisture |
Phase 1: Universal Surface Preparation
Neither stain nor paint will adhere or react properly to contaminated, sealed, or overly smooth concrete. According to the Concrete Network's surface preparation guidelines, up to 80% of coating failures are directly attributed to inadequate prep.
Moisture Testing (ASTM D4263)
Before applying any film-forming paint or water-based stain, conduct a plastic sheet moisture test. Tape a 16x16 inch square of clear, 4-mil polyethylene sheeting to the concrete. Seal all edges with duct tape and leave for 72 hours. If condensation forms under the plastic or the concrete darkens, the slab is emitting excessive moisture vapor. Epoxy paints will blister and delaminate under these conditions; you must install a vapor barrier primer or switch to a breathable acid stain.
Profiling the Concrete (CSP Standards)
The Concrete Surface Profile (CSP) dictates the roughness of the slab.
- For Stains: A CSP 1 is ideal. The surface should feel like 120-grit sandpaper. Avoid heavy mechanical grinding, which opens pores too aggressively and causes stains to pool and dry too dark.
- For Epoxy Paints: A CSP 2 or 3 is mandatory. Rent a planetary diamond grinder with 30-grit metal bond diamonds to remove laitance and expose the aggregate slightly, providing mechanical teeth for the epoxy to lock into.
Phase 2: Concrete Stain Installation Protocols
Acid Stain Application & Neutralization
Acid stains contain metallic salts (iron, copper, chromium) suspended in a mild hydrochloric or phosphoric acid solution. They react with the calcium hydroxide in the concrete to create permanent, variegated color.
- Application: Pour the stain into an acid-resistant pump sprayer. Apply in overlapping circular motions to avoid harsh spray lines. Work in manageable 10x10 foot grids.
- Dwell Time: Allow the stain to react for 2 to 4 hours. You will see a mild fizzing action; this indicates the acid is etching the surface and the metallic salts are reacting.
- Neutralization (Critical Step): Once the desired color depth is reached, you must stop the chemical reaction. Mix 1 cup of baking soda per gallon of water and flood the floor. Scrub vigorously with a stiff-bristle broom.
- Extraction: Use a wet/dry vacuum to remove the neutralized slurry. Rinse twice with clean water and vacuum again. Any residual acid will destroy the sealer in Phase 4.
If you skip the baking soda neutralization and simply rinse with water, dormant acid remains trapped in the concrete pores. When you apply a solvent-based acrylic or polyurethane sealer later, the trapped acid will react with the sealer's resins, causing it to turn white, chalky, and eventually flake off.
Water-Based Penetrating Stain
Water-based stains do not rely on chemical reactions; they use nano-sized pigments to penetrate the pores. Installation is simpler but requires a perfectly clean, unsealed surface. Apply using a microfiber mop or HVLP sprayer in thin, even coats. Because they dry rapidly (often within 45 minutes), you must maintain a wet edge to prevent lap marks. For exterior installations, consult expert stain application resources to ensure you are not applying during high UV exposure, which can cause flash-drying and uneven pigment deposition.
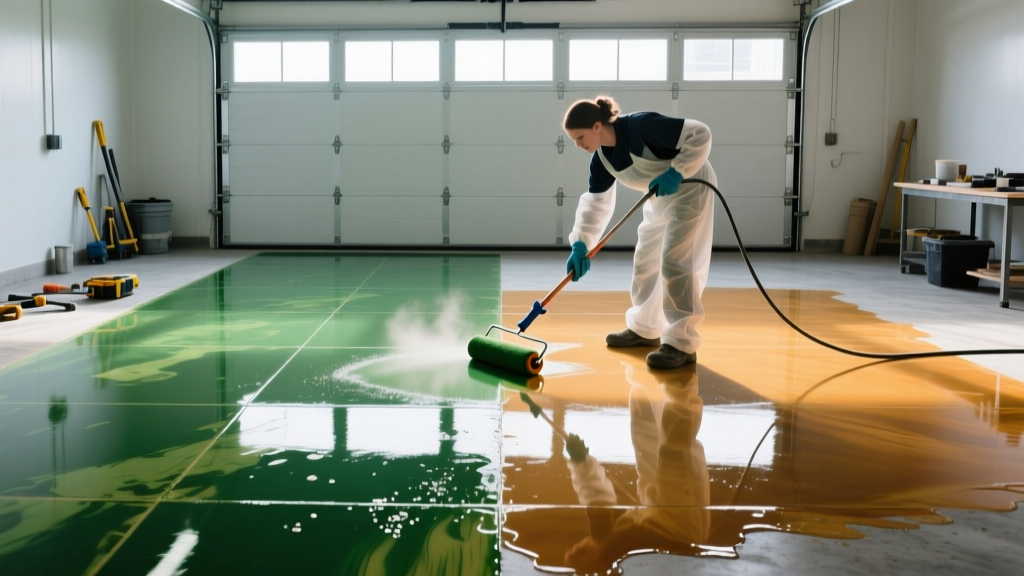
Phase 3: Concrete Paint & Coating Installation
Two-Part Epoxy Systems
True 100% solids epoxy provides a thick, chemical-resistant, and highly durable film. It is the standard for interior garage floors and commercial spaces.
- Priming: If the concrete is highly porous, apply an epoxy primer first to prevent outgassing (air bubbles escaping the concrete and popping through the topcoat).
- Mixing & Induction: Mix Part A (resin) and Part B (hardener) using a low-speed drill and a jiffy mixer. Scrape the sides and bottom of the bucket. Allow the mixture to sit for the manufacturer's specified 'induction time' (usually 15-20 minutes) so the chemical cross-linking can begin.
- Application: Pour the epoxy in a continuous ribbon across the floor. Spread with a notched squeegee to gauge the thickness, then immediately back-roll with a 3/8-inch mohair roller to ensure an even film and release trapped air.
A standard 100% solids epoxy has a pot life of roughly 45 minutes at 75°F (24°C). If the ambient temperature rises to 85°F, that pot life drops to under 25 minutes. Never mix more than 1.5 gallons at a time in hot conditions, and never return mixed epoxy to the original container, as the exothermic reaction can cause the plastic bucket to melt or smoke.
Acrylic Latex Paints
Acrylic concrete paints are best suited for exterior porches, patios, and walkways where moisture vapor transmission is high. Unlike epoxy, acrylics are breathable, allowing trapped moisture to escape without blistering. Apply using a 3/4-inch nap roller. You must apply two coats, waiting 4 to 6 hours between coats. Do not apply if rain is forecast within 24 hours or if surface temperatures exceed 90°F, as the binder will coagulate before it can level out.
Phase 4: Sealer Selection and Curing Timelines
The installation is not complete without the correct topcoat. Stains require sealers; epoxies often serve as their own finish but may need a UV-stable topcoat.
- For Acid & Water-Based Stains: Apply a solvent-based acrylic sealer (e.g., 20-25% solids content) using a pump sprayer. Apply two thin, cross-hatched coats. Solvent-based sealers penetrate deeply and enhance the stain's color variance. Allow 24 hours before foot traffic and 72 hours for furniture.
- For Epoxy Paints: If installed in a garage with exterior door access, UV exposure will cause standard epoxy to amber and chalk over time. Install an aliphatic polyurethane or polyaspartic topcoat. These require a light 120-grit screen sanding of the epoxy surface 12-24 hours after the epoxy is applied to ensure chemical adhesion.
Choosing between concrete stain vs paint ultimately depends on your willingness to manage surface moisture and your desired maintenance cycle. Stains offer a low-maintenance, mottled aesthetic that wears gracefully, while paints and epoxies provide a high-build, uniform shield that demands rigorous preparation but delivers superior chemical and abrasion resistance.
Written by
James ThorntonJames Thornton is a construction industry veteran with 25 years of hands-on experience in wood framing, lumber grading, and residential building codes. He started as a framing carpenter in rural Oregon, earned his ICC Residential Building Inspector certification, and eventually became a senior plan reviewer for the City of Portland Bureau of Development Services. James holds a B.S. in Wood Science & Technology from Oregon State University and is a certified lumber grader through the West Coast Lumber Inspection Bureau (WCLIB). He has inspected over 3,000 residential construction sites and authored the city's internal guide on advanced framing techniques (2x6 at 24" O.C.). James lives in Bend, OR, where he builds custom timber-frame cabins and competes in lumberjack sports.
More from James Thornton
View all
Insulation
Best Home Insulation Materials: Complete 2026 Guide
Compare top home insulation materials for 2026. Find R-values, installed costs per square foot, and best uses for fiberglass, spray foam, and mineral wool.
Aug 4, 2026

Sustainable Building
Certify Your Green Building Material for LEED and WELL
Step-by-step guide to certifying a green building material for LEED v5 and WELL v2. Master EPDs, HPDs, and VOC limits for 2026 project specifications.
Aug 4, 2026

Stone & Masonry
Veneer Stacked Stone Panels: Interior Design & Style Showcase
Discover how veneer stacked stone panels transform interiors. Explore modern design profiles, material pairings, and technical installation specs.
Aug 4, 2026