How Much Does It Cost to Build a Go Kart? Complete DIY Breakdown
Learn exactly how much it costs to build a go kart. We break down DIY frame, engine, and parts pricing to help you budget your backyard build.

Building a custom go kart from scratch is one of the most rewarding DIY fabrication projects you can undertake. But before you strike an arc or order parts, you need an accurate budget. So, how much does it cost to build a go kart? In 2026, a complete DIY go kart build typically costs between $650 and $2,800, depending entirely on your performance goals, material sourcing, and whether you are fabricating the chassis from raw steel or using a pre-welded kit.
This complete cost guide breaks down every nut, bolt, and steel tube required to get you on the track, providing exact pricing and technical specifications to help you engineer your build without blowing your budget.
The Three Go Kart Build Tiers
Your total expenditure will fall into one of three distinct categories based on your fabrication skills and performance requirements.
Tier 1: The Scavenger / Budget Build ($450 - $800)
This tier relies heavily on salvaged components. You might source a used engine from a broken pressure washer, repurpose a live axle from an old riding mower, and use mismatched wheels. The chassis is welded from scrap square tubing or cheap ERW (Electric Resistance Welded) round tube. While functional, these karts often suffer from poor steering geometry, heavy weight, and unreliable braking.
Tier 2: The Standard DIY Scratch Build ($850 - $1,500)
This is the sweet spot for most hobbyists. You purchase a brand-new 6.5HP clone engine, new pneumatic tires, a dedicated go kart torque converter, and purpose-built steering components. The frame is MIG-welded from new 1-inch OD mild steel tubing. This tier yields a reliable, safe, and highly capable backyard kart.
Tier 3: The High-Performance Racer ($1,800 - $3,000+)
Built for competitive track use or extreme dune riding. This tier utilizes a purpose-built chromoly or DOM (Drawn Over Mandrel) steel chassis, a blueprint-built race engine (like a Tillotson 225RS), hydraulic disc brakes, and CIK-FIA approved safety seating.
Component-by-Component Cost Breakdown
The following table outlines the expected costs for a Tier 2 Standard DIY Build, which represents the most common approach for fabricators learning how much it costs to build a go kart from raw materials.
| Component Category | Specific Part / Spec | Estimated Cost |
|---|---|---|
| Chassis Tubing | 1' OD x 0.065' Wall ERW Steel (approx. 40 feet) | $90 - $130 |
| Engine | 212cc 6.5HP OHV Horizontal Shaft (e.g., Predator) | $140 - $180 |
| Drivetrain | 40-Series Torque Converter & #40/#41 Roller Chain | $110 - $160 |
| Live Axle & Bearings | 1' Solid Axle, Pillow Block Bearings, 12' Drive Sprocket | $85 - $120 |
| Braking System | Mechanical Disc Brake Kit (10' Rotor & Caliper) | $45 - $75 |
| Steering Assembly | Pitman Arm, Tie Rods, Heim Joints, 11' Steering Wheel | $70 - $110 |
| Wheels & Tires | Two 10x4.50-5 Rear, Two 10x3.00-4 Front (Turf pattern) | $110 - $160 |
| Seat & Mounting | Polyethylene High-Back Bucket Seat & Aluminum Brackets | $60 - $90 |
| Consumables | MIG Welding Wire, C25 Gas, Cutting Discs, Paint | $80 - $120 |
Total Estimated Base Cost: $790 - $1,145
Engine Selection: The Biggest Cost Variable
The engine dictates not only your top speed but also your drivetrain compatibility. The 6.5HP (196cc-212cc) horizontal shaft engine is the undisputed king of DIY go karts due to its massive aftermarket support and low price point.
- The Budget Clone (Harbor Freight Predator 212): Retailing around $150, the Predator 212 (both Hemi and Non-Hemi variants) offers incredible out-of-the-box reliability. It uses a standard 3/4-inch crankshaft, making it a direct bolt-on for almost all aftermarket clutches and torque converters.
- The OEM Standard (Honda GX200): Priced between $350 and $400, the genuine Honda GX200 is the engine that the clones are based on. It offers superior longevity, tighter machining tolerances, and easier starting, but the 150% price premium is rarely justified for casual backyard driving.
- The Track Racer (Tillotson 225RS): Costing upwards of $600, this is a purpose-built, methanol-capable race engine with a reinforced block, billet flywheel, and specialized carburetor. Only necessary if you are actively competing in sanctioned karting leagues.
Drivetrain: Clutch vs. Torque Converter
When budgeting your drivetrain, you must choose between a centrifugal clutch and a torque converter. This decision fundamentally changes the kart's performance and your final bill.
Centrifugal Clutch ($35 - $50)
A standard 12-tooth #35 centrifugal clutch engages at a fixed RPM (usually around 2,300 RPM). It provides a direct 1:1 gear ratio from the engine to the axle. Best for: Flat terrain, lightweight drivers, and high-top-speed runs. Drawback: Terrible hill-climbing ability and high risk of burning out the clutch shoes in stop-and-go traffic.
Torque Converter ($110 - $160)
A 40-series or Comet TAV2 torque converter acts as a continuously variable transmission (CVT). It dynamically changes the gear ratio based on engine RPM, providing massive low-end torque for climbing hills and accelerating out of corners. According to drivetrain specialists at BMI Karts, a torque converter is mandatory for karts equipped with heavy off-road tires or driven on hilly terrain. Always pair a torque converter with #40 or #41 chain, as the increased torque will snap a standard #35 chain.
Chassis Fabrication and Steel Sourcing
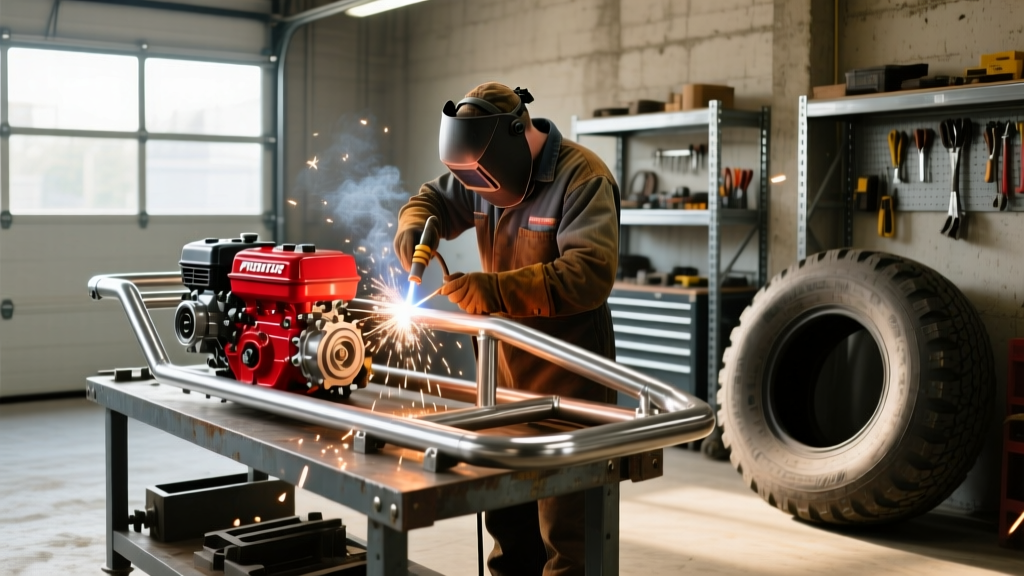
The skeleton of your kart requires specific steel dimensions to balance rigidity with weight. Do not use thick-walled square tubing; it adds unnecessary weight and makes welding complex angles difficult.
The industry standard for DIY kart frames is 1-inch Outside Diameter (OD) round tubing with a 0.065-inch wall thickness. You can source this from local steel yards or online suppliers like Metals Depot. Expect to pay roughly $45 to $60 per 20-foot stick of 1018 mild steel ERW tubing. A standard single-seater kart requires roughly 35 to 45 feet of main tubing, plus additional 3/4-inch or 5/8-inch tubing for steering links and brake pedals.
Steering Geometry: Ackermann Principle
A common mistake that ruins an otherwise expensive build is ignoring steering geometry. If you simply connect the steering knuckles with a single straight tie rod, the inside and outside wheels will turn at the same angle. This causes severe tire scrub, heavy steering feel, and unpredictable cornering.
You must implement Ackermann steering geometry. By angling the steering arms on the spindles so that the imaginary lines drawn through the kingpins intersect at the center of the rear axle, the inside wheel turns at a sharper angle than the outside wheel. Fabricating Ackermann into your front hoop costs nothing in extra materials but requires precise angle measurement during the tack-welding phase.
Hidden Costs: Tools and Fabrication Consumables
When calculating how much it costs to build a go kart, first-time builders often forget the consumables required to actually assemble the machine. If you do not already own a fully equipped garage, factor in the following:
- Welding Gas: A 75/25 Argon/CO2 mix (C25) is required for clean MIG welds on thin-wall tubing. A 20cf tank refill costs roughly $40 to $60.
- MIG Wire: Use 0.030-inch ER70S-6 solid wire for 0.065-wall tubing. A 10lb spool costs about $35.
- Abrasive Consumables: You will burn through dozens of Type 1 cut-off wheels and flap discs for gusseting and beveling. Budget $40 for high-quality zirconia alumina discs.
- Drilling: Drilling 1/2-inch and 5/8-inch holes through steel for heim joints requires cobalt or titanium-coated drill bits and cutting fluid. Budget $25.
Safety Upgrades and Regulatory Compliance
If you plan to take your kart to a commercial track or participate in organized events, your build must meet specific safety standards. The International Kart Federation (IKF) mandates specific safety gear and kart specifications for sanctioned racing.
Even for backyard driving, do not skimp on the braking system. While a mechanical disc brake is sufficient for flat grass, upgrading to a dual-piston hydraulic brake system ($120 - $180) provides the stopping power necessary to prevent rear-end collisions when driving on paved driveways or trails. Additionally, invest in a rib-protector seat insert ($45) and a DOT-approved full-face helmet ($100+). The cost of a hospital visit far outweighs the price of proper safety equipment.
Final Verdict: Is it Worth the Cost?
When you price out a pre-assembled, off-the-shelf go kart from a big-box store, you will find they retail between $1,200 and $2,000. These mass-produced karts often feature weak, stamped-steel frames, inadequate brakes, and engines that are difficult to service.
By spending roughly $900 to $1,200 to build a go kart yourself, you acquire a machine that is structurally superior, fully repairable, and customized to your exact physical dimensions. More importantly, you gain the fabrication skills and mechanical knowledge required to maintain, modify, and upgrade the kart for years to come.
Written by
James ThorntonJames Thornton is a construction industry veteran with 25 years of hands-on experience in wood framing, lumber grading, and residential building codes. He started as a framing carpenter in rural Oregon, earned his ICC Residential Building Inspector certification, and eventually became a senior plan reviewer for the City of Portland Bureau of Development Services. James holds a B.S. in Wood Science & Technology from Oregon State University and is a certified lumber grader through the West Coast Lumber Inspection Bureau (WCLIB). He has inspected over 3,000 residential construction sites and authored the city's internal guide on advanced framing techniques (2x6 at 24" O.C.). James lives in Bend, OR, where he builds custom timber-frame cabins and competes in lumberjack sports.
More from James Thornton
View all
Insulation
Best Home Insulation Materials: Complete 2026 Guide
Compare top home insulation materials for 2026. Find R-values, installed costs per square foot, and best uses for fiberglass, spray foam, and mineral wool.
Aug 4, 2026

Sustainable Building
Certify Your Green Building Material for LEED and WELL
Step-by-step guide to certifying a green building material for LEED v5 and WELL v2. Master EPDs, HPDs, and VOC limits for 2026 project specifications.
Aug 4, 2026

Stone & Masonry
Veneer Stacked Stone Panels: Interior Design & Style Showcase
Discover how veneer stacked stone panels transform interiors. Explore modern design profiles, material pairings, and technical installation specs.
Aug 4, 2026