How Much Would It Cost to Build a Bridge? Cost & Savings Guide
Discover how much it would cost to build a bridge for your property. Explore material choices, foundation hacks, and money-saving strategies for crossings.
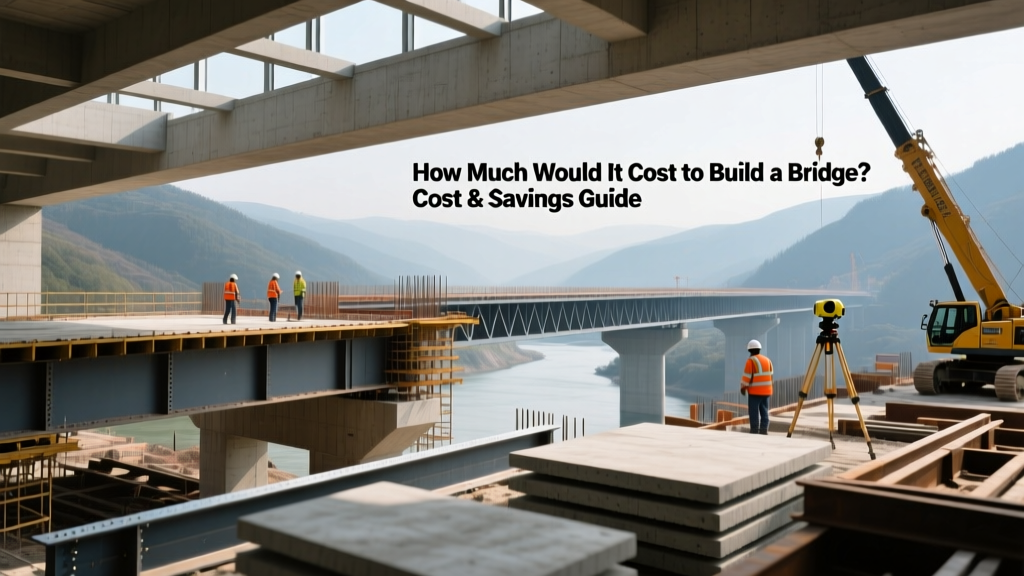
How Much Would It Cost to Build a Bridge? Defining the Scope
When property owners and rural developers ask how much would it cost to build a bridge, the answer hinges entirely on load requirements, clear span length, and site hydrology. While municipal highway overpasses cost millions per lane, residential, agricultural, and light-commercial bridges (spans of 10 to 60 feet) operate on a completely different pricing scale. For a private property crossing, costs typically range from $150 to $800 per square foot of deck space, depending on whether the structure supports foot traffic or heavy vehicular loads.
The most effective way to control your budget is to align your structural choices with the actual load-bearing necessity of the crossing. Over-engineering a pedestrian creek crossing to handle 10,000-pound fire trucks is the fastest way to destroy your budget.

Baseline Cost Matrix by Bridge Type
The following table outlines current market rates for small-scale bridge construction. These figures include materials, basic site prep, and installation, but exclude complex geotechnical engineering or extensive permitting fees.
| Bridge Type | Typical Span | Cost per Sq. Ft. | Load Capacity | Best Application |
|---|---|---|---|---|
| Timber Pedestrian | 10 - 25 ft | $150 - $280 | 85 PSF (Live Load) | Backyard creeks, garden paths |
| Prefab Steel Truss | 20 - 60 ft | $350 - $600 | 10,000 - 20,000 lbs | Driveways, farm equipment |
| Precast Concrete Arch | 10 - 30 ft | $400 - $750 | HS-20 (32,000 lbs) | Permanent driveway crossings |
| Glulam Timber Beam | 20 - 40 ft | $250 - $450 | Light Vehicular | Equestrian trails, light trucks |
5 Proven Money-Saving Strategies for Bridge Construction
Reducing the cost to build a bridge requires strategic decisions during the design phase. Once earthmoving begins, your budget is largely locked in. Implement these five strategies to maximize capital efficiency.
1. Optimize the Clear Span to Avoid Intermediate Piers
Every additional foot of clear span increases material costs, but introducing an intermediate pier in a waterway exponentially increases engineering and construction costs. Piers require cofferdams, underwater concrete pouring, and complex scour analysis. The Strategy: Design your bridge to span the entire width of the flood channel in a single clear span. If the gap is 35 feet, do not build two 17.5-foot spans with a center pier; build a single 40-foot prefabricated steel truss. The premium for the longer truss is almost always lower than the cost of in-water pier construction.
2. Substitute Poured Abutments with Helical Piers
Traditional bridge abutments require extensive excavation, forming, rebar tying, and pouring massive concrete footings below the frost line. In wet or unstable soils, this requires continuous dewatering. The Strategy: Use galvanized helical piers. For a light pedestrian bridge, 2.875-inch OD (outside diameter) helical piles driven to refusal can support the abutment loads at a fraction of the cost. For driveway bridges, 7-inch OD helical piles with reinforced concrete pile caps eliminate the need for deep excavation and curing time. According to foundation engineering data, helical piles can reduce substructure costs by 30% to 40% in riparian zones while providing immediate load-bearing capacity.
3. Specify A588 Weathering Steel for Trusses
Painting a steel bridge in a high-humidity environment over a waterway is a recurring maintenance nightmare. The Strategy: Specify ASTM A588 weathering steel (often known by the brand name Corten). This alloy forms a dense, protective rust patina that halts further corrosion. While the initial material cost is roughly 10% to 15% higher than standard A36 carbon steel, it entirely eliminates the need for industrial sandblasting and epoxy coating systems, saving thousands in initial labor and decades of maintenance.
4. Buy Modular, Pre-Engineered Kits
Custom fabrication by local welders incurs massive hourly labor rates and requires on-site X-ray testing of welds for structural compliance. The Strategy: Purchase pre-engineered, modular bridge kits from established manufacturers. These kits arrive with all components galvanized, pre-drilled, and bolted together on-site using high-strength A325 structural bolts. This shifts the labor from expensive skilled ironworkers to general carpenters or equipment operators.
5. Utilize Composite or Fiber-Reinforced Polymer (FRP) Decking
Pressure-treated Southern Yellow Pine (SYP) is cheap upfront but requires sealing, board replacement, and eventual disposal of chemically treated wood. The Strategy: For pedestrian spans, use structural FRP grating or heavy-duty composite decking. While FRP grating costs $40 to $60 per square foot compared to $8 for SYP, it weighs 75% less. This weight reduction allows you to downsize the primary support beams and substructure, effectively neutralizing the higher decking cost while delivering a 50-year maintenance-free surface.
Never guess the 100-year flood elevation. If your bridge deck or support beams sit below the Base Flood Elevation (BFE) established by FEMA, the structure will act as a dam during a flood event. This causes upstream flooding, which can result in severe liability if neighboring properties are damaged. Always invest $1,500 to $3,000 in a professional hydrology and hydraulics (H&H) study before finalizing your bridge elevation.
Navigating the Regulatory Minefield
The physical construction is often cheaper than the bureaucratic hurdles. If your bridge crosses a defined waterway, wetland, or navigable water, you will trigger federal and state regulations.
- Clean Water Act Section 404: Administered by the U.S. Army Corps of Engineers (USACE) and overseen by the Environmental Protection Agency, this regulates the discharge of dredged or fill material into waters of the United States. If your abutments require fill dirt in a wetland, you need a permit.
- State DOT Encroachment Permits: If your private driveway bridge connects to a state or county highway right-of-way, the local Department of Transportation will require structural stamped drawings and an encroachment permit.
- Fish Passage Requirements: In many states, the Department of Fish and Wildlife mandates that bridge crossings do not impede aquatic life. This often rules out corrugated metal pipe culverts and forces the use of clear-span bridges or embedded arch structures.
Decision Framework: Bridge vs. Culvert vs. Ford
Before committing to a bridge, verify that a bridge is actually the most cost-effective crossing method for your specific site. Use this decision matrix to evaluate alternatives.
Scenario A: Seasonal Creek with Low Banks (Depth < 4 feet)
Recommendation: Concrete Ford (Low-Water Crossing).
Cost Savings: 70% cheaper than a bridge. Pour a reinforced concrete slab directly on the stream bed with angled approaches. It will flood during heavy rains but is perfectly adequate for dry-season agricultural access.
Scenario B: Year-Round Stream with High Banks (Span < 20 feet)
Recommendation: Precast Concrete Arch Culvert.
Cost Savings: 40% cheaper than a clear-span bridge. A structural plate or precast arch buried under the driveway fill handles HS-20 highway loading without requiring complex abutment engineering. Consult the Federal Highway Administration guidelines on culvert load ratings for exact soil-cover requirements.
Scenario C: Wide Floodplain or Protected Wetland
Recommendation: Clear-Span Prefabricated Steel Truss Bridge.
Cost Savings: While the highest upfront cost, it is the only viable option that avoids USACE Section 404 fill permits and prevents floodplain obstruction. The money saved on environmental mitigation and legal fees offsets the structural premium.
Material Selection for Long-Term ROI
When evaluating how much it would cost to build a bridge, life-cycle costing is critical. The American Wood Council provides extensive data on the structural decay of timber in wet environments. If you choose timber, specify naturally decay-resistant species like Douglas Fir or use heavily treated marine-grade pilings for the substructure. However, for driveways subjected to heavy logging trucks or RVs, a galvanized steel truss with an open-grid steel deck remains the undisputed champion of long-term ROI, requiring zero maintenance while supporting dynamic vehicular impact loads.
Written by
Marcus ChenMarcus Chen is a licensed structural engineer (PE) and building materials analyst with over 12 years of experience across residential, commercial, and industrial construction. He holds a Master of Science in Civil Engineering from UC Berkeley and spent six years at Thornton Tomasetti before transitioning to independent consulting and technical writing. Marcus specializes in material selection for seismic-prone regions, concrete reinforcement strategies, and lifecycle cost analysis. His work has been cited by the American Concrete Institute (ACI) and the Structural Engineers Association of California (SEAOC). When he is not on a job site or at his desk, you will find him hiking the Sierra Nevada or restoring a 1920s craftsman bungalow in Oakland, CA.
More from Marcus Chen
View all
Construction Cost
How Much Did the Eiffel Tower Cost to Build?
How much did the Eiffel Tower cost to build in 1889? We adjust for inflation and compare its budget to modern skyscraper construction.
Aug 4, 2026

Fire Resistance
What Is a Fire Resistant Material? Testing & Certification Guide
Discover what is a fire resistant material through ASTM and UL testing. Learn how fire ratings, certifications, and assemblies work in construction.
Aug 4, 2026
Construction Cost
How Much Did the Burj Khalifa Cost to Build?
How much did the Burj Khalifa cost to build? We break down the $1.5B project and extract 5 money-saving strategies for your next build.
Jul 30, 2026