How to Install Fence Lights: Post Cap and Side-Mount Wiring Guide
Learn how to install fence lights on wood and vinyl posts. This guide covers low-voltage wiring, transformer sizing, and post cap mounting techniques.
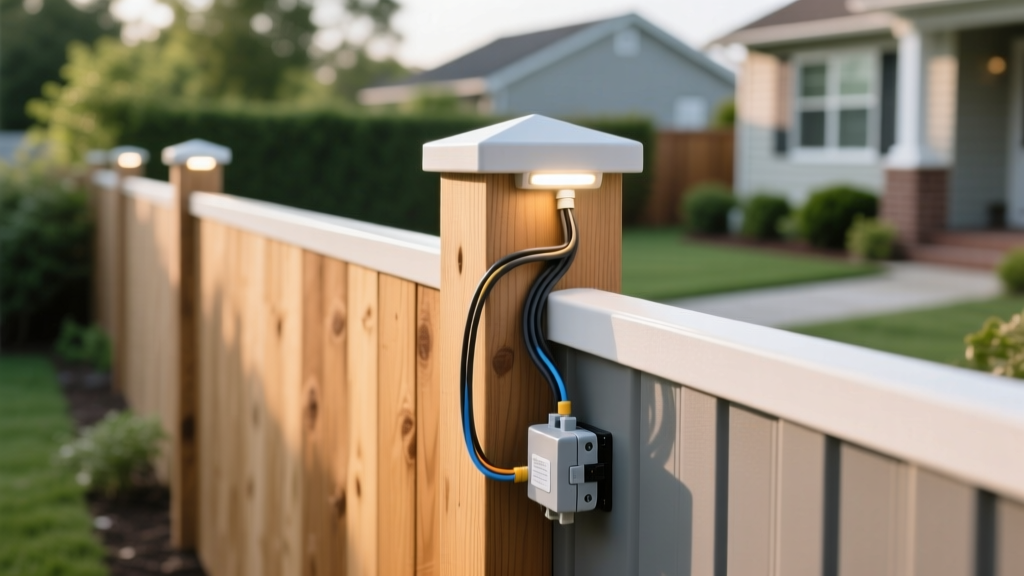
Solar vs. Low-Voltage Fence Lights: Application Matrix
When planning an outdoor illumination project, selecting between solar and hardwired low-voltage systems dictates your entire installation workflow. According to the U.S. Department of Energy, modern LED fixtures consume up to 90% less energy than incandescent alternatives, making both solar and low-voltage options highly efficient. However, their application profiles differ drastically based on fence layout, shading, and security requirements.
| Feature | Solar Post Caps | Low-Voltage LED (12V) |
|---|---|---|
| Wiring Required | None | 12 AWG Direct Burial |
| Brightness (Lumens) | 10 - 40 lm | 100 - 300 lm |
| Shade Tolerance | Poor (Needs 6+ hrs direct sun) | Excellent (Independent of sun) |
| Installation Time | 5 mins per post | 15-20 mins per post |
| Best Application | Isolated posts, decorative accents | Long runs, security, uniform lighting |
Calculating Transformer Capacity for Low-Voltage Runs
Undersizing your transformer is the most common cause of flickering and premature LED driver failure. To calculate the required wattage, sum the maximum wattage of all fixtures and add a 20% buffer for line loss and future expansion.
For runs exceeding 100 feet, upgrade to a multi-tap transformer. These units offer 12V, 13V, 14V, and 15V terminals, allowing you to compensate for voltage drop over long wire distances by starting the run at a higher voltage tap.
Side-Mount vs. Post-Cap Placement Strategies
While post cap lights are the default choice for fence illumination, they primarily cast light downward onto the post itself, offering minimal security or pathway illumination. Side-mount fixtures, installed directly on the fence rails or pickets, provide superior functional lighting.
- Post-Cap Placement: Best for defining property lines and adding architectural interest. Choose fixtures with integrated side-louvers if you need to cast light onto the adjacent walkway rather than just the top of the post.
- Side-Mount Placement: Install side-mount fixtures 18 to 24 inches below the top rail. This height prevents glare from shining directly into the eyes of pedestrians while providing a wide wash of light across the ground. For 6-foot privacy fences, mounting lights at the 4-foot mark creates an ideal ambient wash.
- Spacing Guidelines: For uniform illumination along a pathway, space side-mount fixtures every 6 to 8 feet. If you are only illuminating the fence structure for aesthetics, spacing them every other post (12 to 16 feet) is sufficient and cuts wiring costs in half.
Mounting Procedures by Fence Material
Wood Fencing (Cedar, Redwood, Pressure-Treated)
Wood posts offer the easiest mounting surface but require protection against moisture intrusion. When installing post cap lights on 4x4 or 6x6 wood posts, follow these steps:
- Pre-drill Pilot Holes: Use a 1/8-inch drill bit to create pilot holes through the post cap base. This prevents splitting, especially in older, dried-out cedar.
- Route the Wire: Drill a 3/8-inch hole straight down through the center of the post cap or at a 45-degree angle through the post shoulder to hide the 12-gauge wire.
- Seal the Penetration: Apply a bead of exterior-grade polyurethane sealant (like OSI Quad) around the wire entry point to prevent rot and carpenter ant infiltration.
- Secure the Fixture: Use 1.5-inch stainless steel trim-head screws to mount the base plate, ensuring the screws sit flush below the surface.
Vinyl and Composite Fencing
Vinyl (PVC) fencing presents unique challenges. The material expands and contracts significantly with temperature fluctuations, and it becomes brittle in freezing weather. Never use standard wood screws or overtighten fasteners on vinyl posts.
- Adhesive Mounting: For lightweight LED post caps, use a PVC-specific structural adhesive (such as PVC TrimWeld) rather than screws. This allows for thermal expansion without cracking the vinyl extrusion.
- Drilling Vinyl: If side-mounting heavier fixtures, drill slowly using a sharp brad-point bit to prevent the bit from grabbing and shattering the PVC wall. Back the hole with a wooden block inside the hollow post if possible.
- Sleeve Adapters: Many vinyl posts have outer sleeves. Purchase lights specifically rated for the exact outer dimension of your vinyl post (e.g., 5x5 actual vs. 4.5x4.5 actual) to ensure a friction-fit base.
Routing and Hiding 12-Gauge Landscape Wire
A professional fence lights installation hides the wiring completely. Exposed wires degrade under UV light and look unprofessional.
- Hollow Vinyl Posts: Drop the wire down the hollow center of the vinyl post and route it underground at the base. Use a fish tape if the post has internal stiffening ribs.
- Wood Privacy Fences: Run the main trunk line along the bottom horizontal rail (the kicker board). Use UV-resistant black cable staples every 18 inches. For a cleaner look, route the wire behind the vertical pickets by removing one screw per picket, tucking the wire behind, and replacing the screw.
- Trenching to the Transformer: Bury the main trunk line in a 6-inch deep trench. According to the National Electrical Code (NFPA 70), Class 2 low-voltage landscape wiring does not require conduit underground, but maintaining a 6-inch depth protects it from aeration and shallow digging.
Troubleshooting Voltage Drop at the End of the Run
If the last three or four fence lights on your run appear noticeably dimmer than the first few, you are experiencing voltage drop. This occurs when the wire resistance consumes the available voltage over long distances.
Solutions for Voltage Drop:
- Upgrade Wire Gauge: If you used 14 AWG wire for a run exceeding 100 feet, replace the main trunk line with 12 AWG or even 10 AWG copper wire to reduce electrical resistance.
- Use a Multi-Tap Transformer: Professional-grade transformers feature multiple voltage taps. Connecting your wire to the 14V or 15V tap compensates for the voltage lost over the length of the wire, ensuring the final fixture still receives a usable 11V.
- Implement a Hub or Loop Wiring Method: Instead of a single long daisy-chain (T-wiring), run two separate lines from the transformer to the middle and ends of the fence, or loop the wire back to the transformer to halve the electrical distance.