How to Install a Solar Electric Fence for Livestock & Predators
Learn how to install a solar electric fence with precise wire spacing, grounding techniques, and energizer sizing for reliable livestock and predator control.
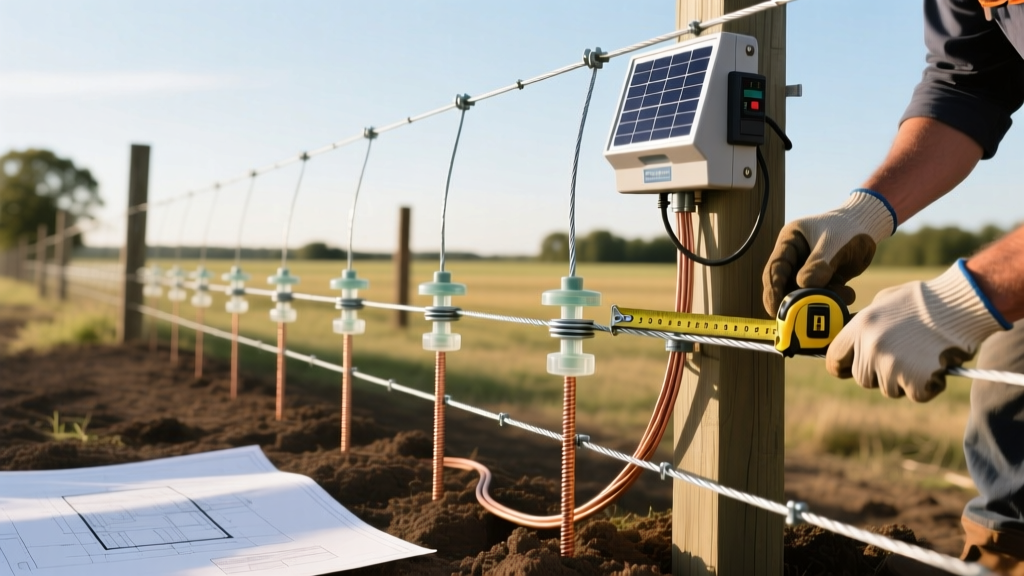
Sizing the Solar Energizer: Joules vs. Mile Ratings
The most common mistake in solar electric fence installation is relying on the 'mile rating' printed on the energizer box. Marketing mile ratings assume perfect conditions with zero vegetation contact. Instead, size your energizer based on output joules. A general rule of thumb for high-tensile wire is 1 output joule for every 3 to 5 miles of multi-wire fence. For a 2-mile perimeter fence with 5 wires, you need an energizer rated for at least 2.5 to 3 output joules to maintain a minimum of 4,000 volts under moderate weed load.
When selecting a unit, look for models with integrated solar panels and sealed lead-acid or lithium-iron-phosphate (LiFePO4) batteries. The Gallagher MBS2800 (2.8 stored joules) and the Parmak DF-SP-LI (1.0 output joules) are industry benchmarks for reliability. According to Gallagher North America, ensuring your energizer has a low-impedance output is critical for pushing current through dry soil and vegetation without shorting out.
| Fence Length (Perimeter) | Number of Wires | Minimum Output Joules | Target Voltage |
|---|---|---|---|
| Up to 1 Mile | 3 - 5 | 0.5 - 1.0 Joules | 4,000V+ |
| 1 - 3 Miles | 4 - 6 | 1.5 - 2.5 Joules | 4,500V+ |
| 3 - 10 Miles | 5 - 7 | 3.0 - 5.0 Joules | 5,000V+ |
Step 1: Constructing H-Brace Corner Assemblies
High-tensile wire exerts up to 1,500 pounds of cumulative pull on corner posts. Standard driven T-posts will lean and fail within months. You must construct wooden H-brace assemblies at every corner, gate, and directional change.
- Corner Post: Use an 8-inch diameter treated wood post, driven or set 3.5 feet into the ground. The post should extend at least 4 feet above grade.
- Brace Post: Use a 4-inch diameter post, driven 2 feet into the ground, placed exactly 8 feet away from the corner post.
- Horizontal Brace: A 4-inch wooden rail notched into both posts, secured with 6-inch galvanized lag screws.
- Brace Wire: Wrap 9-gauge high-tensile galvanized wire in a double loop around the corner post (near the top) and the brace post (near the ground). Tighten using a Gripple Plus tensioner or a traditional hay wire tightener until the assembly is rigid.
Step 2: Line Post Spacing and Insulator Selection
For straight runs, 6.5-foot or 7-foot galvanized steel T-posts are the most cost-effective and durable option. Space line posts 50 to 80 feet apart depending on terrain. In rolling or uneven terrain, reduce spacing to 30 feet to prevent the wire from lifting off the insulators or sagging into the ground.
Never allow high-tensile wire to touch the metal T-post. Use heavy-duty polyethylene T-post insulators with a UV-stabilized rating. For corner posts and gate ends, use heavy-duty porcelain or high-density polyethylene corner insulators bolted directly to the wood to handle the extreme tension without degrading.
Step 3: Wire Configuration and Tensioning
Use 12.5-gauge, Class 3 galvanized high-tensile wire. This wire has a breaking strength of roughly 1,500 lbs and will not stretch permanently under normal temperature fluctuations. Unroll the wire using a spinning jenny to prevent kinking, which creates weak points and voltage resistance.
Optimal Wire Heights by Target Animal
According to guidelines published by the USDA Natural Resources Conservation Service, wire spacing must target the nose and shoulders of the animal you are controlling or excluding.
- Cattle (Containment): 3 to 4 wires. Heights: 12", 22", 32", and optionally 42" from the ground.
- Sheep/Goats (Containment): 5 wires. Heights: 6", 12", 18", 24", 32". (Note: Sheep wool insulates against shock; lower wires must be closer together).
- Predators (Coyote/Fox Exclusion): 6 wires. Heights: 4", 8", 14", 20", 28", 36". The 4-inch wire prevents digging, while the alternating hot/ground wires ensure a shock if the predator touches two wires simultaneously.
Tension 12.5-gauge high-tensile wire to exactly 150 to 250 pounds using an inline ratchet strainer or a spring-loaded tension gauge. Do not over-tension. In sub-zero winter temperatures, metal contracts; wire tensioned to 400+ lbs in the summer will snap when the temperature drops below freezing.
Step 4: The Grounding System (The Critical Failure Point)
Up to 80% of solar electric fence failures are caused by inadequate grounding. The energizer pushes electrons into the hot wire; when an animal touches it, the current travels through the animal into the soil and back to the ground rods. If the soil is dry or rocky, or if the ground rods are insufficient, the circuit fails to complete, and the animal feels no shock.
The 3-Rod Grounding Standard:
- Drive three 6-foot long, 1/2-inch galvanized steel ground rods into the soil.
- Space the rods at least 10 feet apart in a straight line.
- Connect them using insulated ground wire (not bare fence wire) and heavy-duty galvanized ground rod clamps.
- Locate the ground system at least 50 feet away from utility grounds, metal water pipes, or building foundations to prevent interference.
Expert Insight: Never use copper ground rods or copper wire with a steel fence system. The dissimilar metals will cause galvanic corrosion (electrolysis) when exposed to soil moisture, destroying your grounding infrastructure within two seasons.
Step 5: Solar Panel Placement and Battery Care
Mount the solar panel facing true south (in the Northern Hemisphere). Tilt the panel at an angle roughly equal to your local latitude (typically 30 to 40 degrees in the continental US) to maximize winter sun exposure when days are shortest. Ensure the panel is mounted high enough on the post or a dedicated stand to prevent shading from tall summer grass or snow accumulation. Trim vegetation in a 3-foot radius around the energizer monthly.
Testing and Troubleshooting Voltage Drops
Never guess your fence voltage. Use a digital low-impedance fence voltmeter to test the furthest point from the energizer. As noted by Penn State Extension agricultural programs, routine testing isolates faults before livestock learn the fence is dead and break out.
| Symptom | Probable Cause | Corrective Action |
|---|---|---|
| Voltage drops below 3,000V at the end of the line | Heavy vegetation touching lower wires | Mow under the fence line; use a weed-eater with a non-conductive nylon line. |
| Energizer clicking rapidly but low voltage on wire | Dead short (wire touching metal post or gate) | Walk the line to find arcing; replace cracked insulators. |
| Good voltage at energizer, zero voltage 100ft away | Broken wire or faulty inline strainer connection | Inspect crimp sleeves; re-crimp using a specialized high-tensile crimping tool. |
| Animals receiving weak shock despite 5,000V reading | Inadequate grounding in dry/sandy soil | Add three more ground rods; pour water around existing rods during droughts. |
By adhering to these precise material specifications and installation procedures, your solar electric fence will provide a robust, low-maintenance psychological barrier capable of containing livestock and deterring predators for decades.